
How to Squeeze A Twisted Pair in RJ-45? DIY NETWORK CABLE
I will admit that I am not an expert in crimping twisted pair, and I do not have a lot of experience in this business, but I still know and know how to do something. I’ve had to make a network cable myself more than once, and I even bought special pliers. In fact, there is nothing complicated about it. Everyone can properly crimp a twisted pair. True, for this it is desirable to have a special tool – a crimper. And here there are already some small problems. Most likely you need to once make a network cable of the required length, and buy for this crimper is not very correct. You will use it once, and most likely it will not be useful to you anymore. And it does not cost a penny. There is an option to crimp the network cable without a special tool. For example, with a screwdriver. This is not very correct, but it is quite realistic. As a variant of making a cable at home may well be. I wrote about this in the article: how to crimp a network cable without a tool (screwdriver). And in this instruction I will show how to do everything with the use of this very special tool.
As for the twisted pair cable itself, I talked about it in more detail in the article: twisted pair: what is it? Schemes and methods of crimping twisted pair. As you probably already realized from the title of the article, there I also wrote about the schemes by which you can make a network cable. It all depends on what purposes you need the cable. We will return to this question when we go directly to the manufacture of the cable.
What will be needed to make a network cable?
Let’s consider what materials and tools we will need.
- Of course, the cable itself “twisted pair” the length we need. The cable needs a 5-th category (cat.5). It has 8 cores.
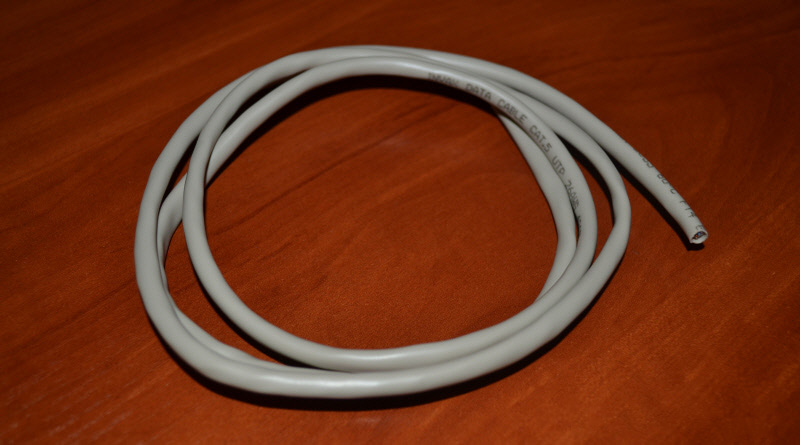 You can immediately measure and buy a cable of a certain length. It is better to take a small reserve.
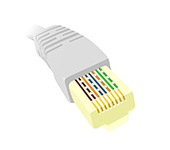
 - At least 2 RJ-45 connectors, in which we will crimp twisted pair.
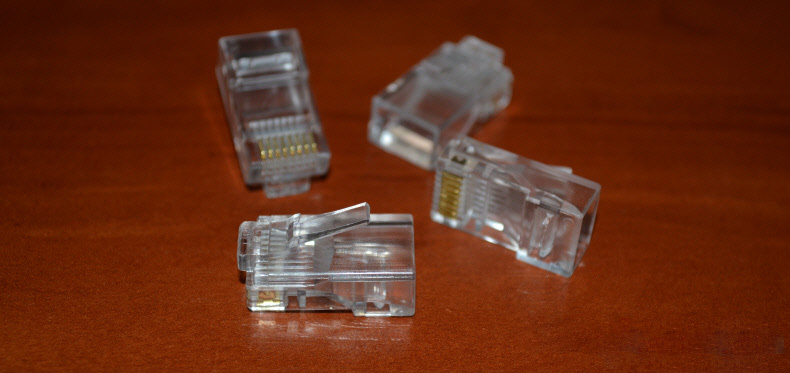 Connectors also take a reserve. If you do the first time, the first time may not work. And the connector is disposable.
 - Tool for crimping twisted pair. It is called a crimper, or simply crimping pliers.
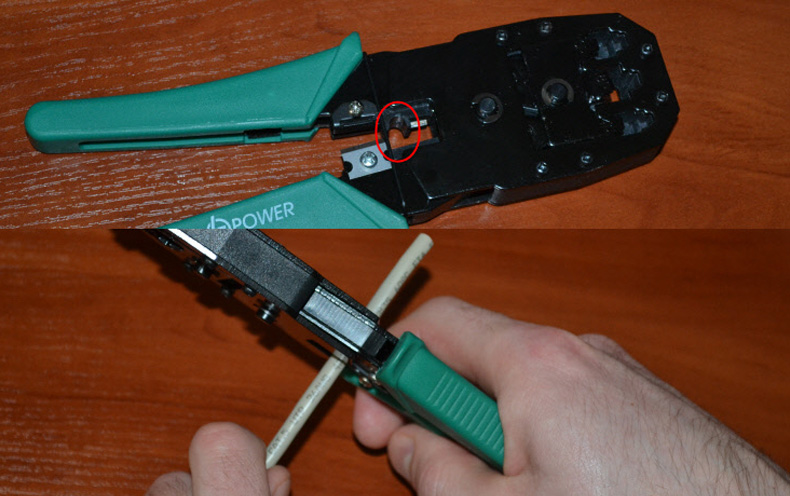
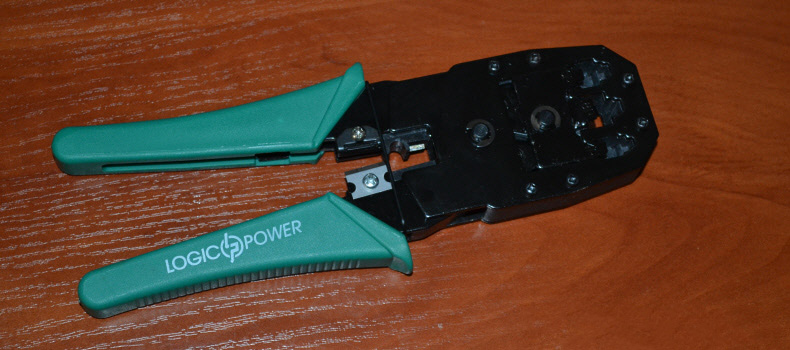 The appearance of the crimper itself may differ. As a rule, such a tool can crimp not only network connector RJ-45, but also RJ-11 (under the telephone cable). Also, the crimper usually has wire cutters and a special hole with a blade to remove insulation from the twisted pair. And so we will not need a stripper tool, which is designed specifically for stripping insulation.
With a set of materials and tools we have sorted out. Let us now choose the scheme by which we will crimp the network cable. This is a very important moment.
Choosing a scheme for crimping twisted pair
There are two schemes by which you can make a network cable. Let’s find out which method will suit your needs.
- In most cases, it is the direct order of crimping that is used. Such a cable can be used to connect computers, laptops and other devices with routers, and other network equipment. Most likely you need to crimp twisted pair in this way. To create a straight cable can be one of two standards: T568A and T568B. For clarity, see the diagram, which shows everything in detail (by color).
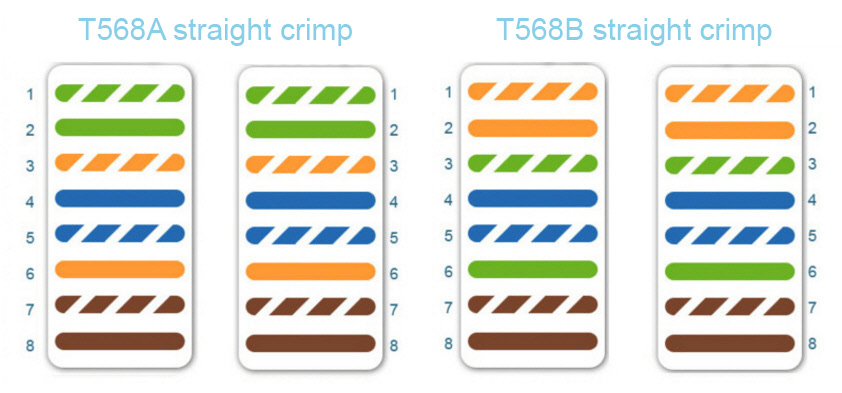 I will crimp the straight cable to the T568B standard.
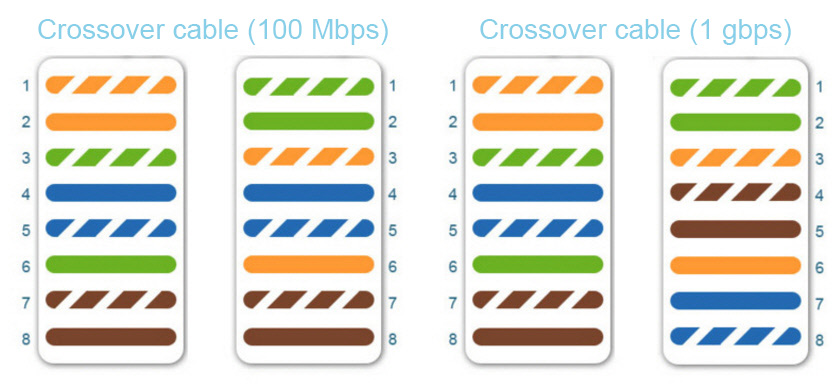
 - Cross cable (crossover), aka crossover cable. This cable is used to connect two computers directly PC to PC. Without routers and other networking equipment. Also, rumor has it that this is the cable you need to connect to older networking equipment. Here’s the schematic:
I’m pretty sure you need a regular straight cable. Which you can use to connect your computer, TV, game console to your router. Or, for example, connect two routers to each other.
Crimping a network cable (twisted pair) with a crimper
With all the nuances we have sorted out, it’s time to move on to the most interesting. I will describe everything step by step, and of course show on the photo.
1
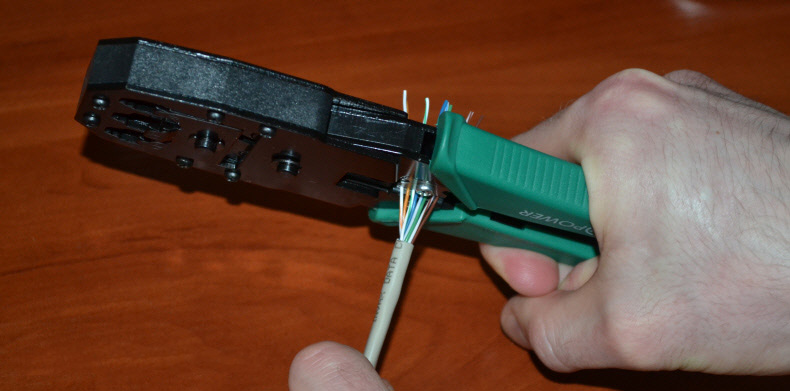
We need to remove the upper insulation from the cable. To do this, we insert the cable into a special hole on the crimper, and in a circular motion cut the insulation.
It will turn out like this:

2
Next we need to unravel the twisted pair, and align the wires according to the crimp pattern. I use “Direct crimping according to the scheme T568B”. You can find a photo of the circuit itself above. Trim the wiring so that there is about a centimeter left, or a little more.
3
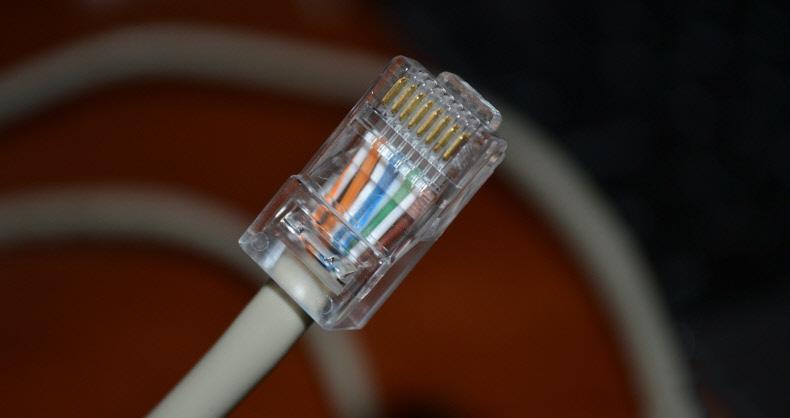
Align the wires, check if they are correctly aligned (according to the diagram), and insert them into the RJ-45 connector. The connector should be held with the latch towards the bottom. Like in the photo below. You will see how each of the wires will take its place in the connector. Push the cable all the way in. In my photo below, the cable is not fully inserted (I just started inserting it). The wires themselves should go under the shiny contacts and rest against the wall.
4
Check to see if the wires are properly positioned in the connector. And whether they are inserted all the way into the connector.
5
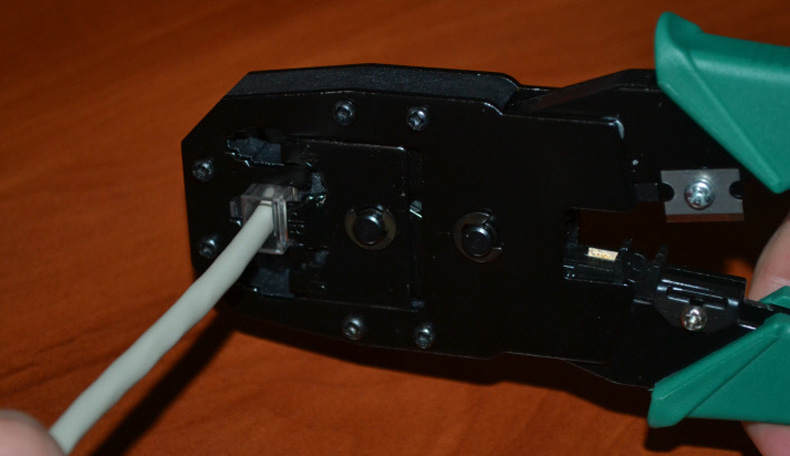
Insert the connector into the crimper and slowly crimp the cable by squeezing the handles. Squeeze the crimper handles firmly.
After crimping:
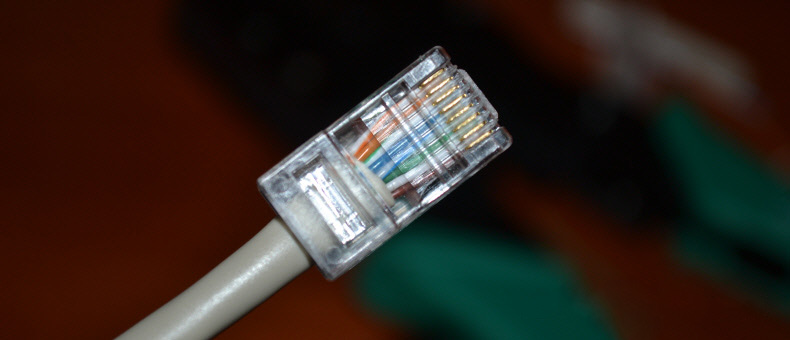
Do the same crimp on the other end of the cable. Our cable is ready, you can check.
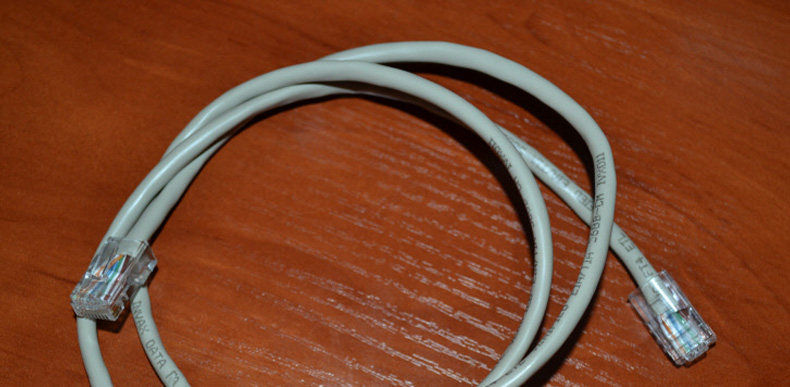
I connected my laptop to the router with this cable, and everything worked. Maybe I crimped the twisted pair is not quite perfect, for this of course you need to practice, but I got it all right. And that means that you can do it too.
Without a special tool, crimper, crimp network cable is certainly more difficult. The only difference is that after stripping, aligning, and installing the cable in the connector, you need something sharp (for example, a screwdriver) in turn to push each contact on the connector.
If you still have any questions about any of the points, please ask them in the comments.
 We Transmit a Large File Over the Internet. Simple Ways
  Smart Outlet with Wi-Fi. What it is?
  Standard HomePlug AV and PowerLine Adaplers: What is it and How It Works?
  A router that sides not the Speed by Wi-Fi and Gives 100 Mbps and More