
TP-Link Archer C3200: Connection and Settings

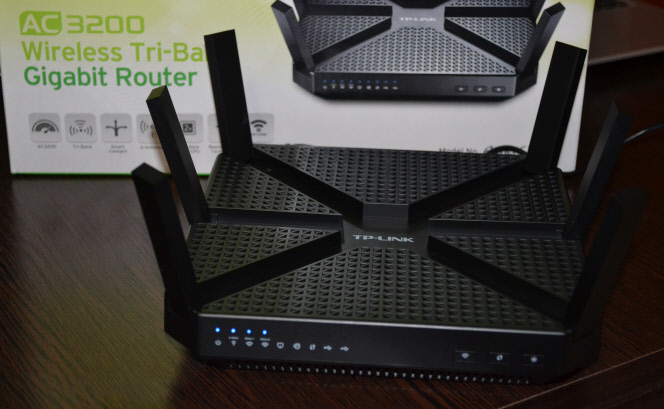
TP-Link Archer C3200 is a powerful and stylish router, which we will connect and configure in this tutorial. Later, I’ll do a review and tell you more about this router. You have most likely already purchased this “wi-fi monster” and you have some questions about its configuration. I already have experience in setting up Archer C3200, everything is very simple there.
Now we’ll go through the whole process in detail. With pictures and screenshots, just the way you like it!
TP-Link routers have never been difficult to configure. Clear web-interface, even in English. The Archer C3200 model already has a new control panel, which is in blue colors. On the top, expensive router models of this company you won’t see the old and familiar control panel in green colors. In addition, this router supports the TP-LINK Tether application, through which you can configure and control the router from your mobile device.
Connecting TP-Link Archer C3200 router
Connect the power adapter to the router and plug it in. You have already probably appreciated the size of the power adapter itself, it is bigger than some laptops:) If the indicators on the router do not light up, then turn on the power with the button on the router.
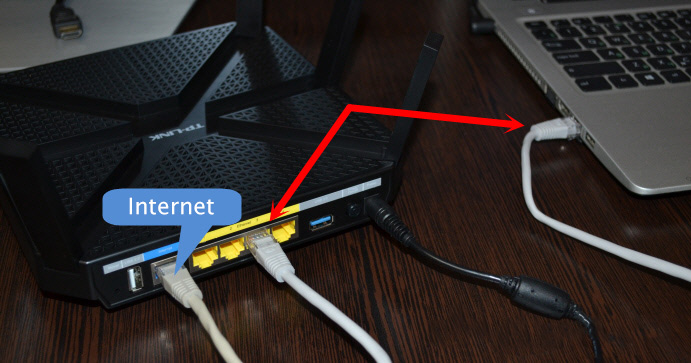
Next, in the WAN port (it is blue) of the router connect the cable from your Internet provider. You can connect the router to your computer or laptop using the network cable that comes with it. But, this is not necessary. You can also configure the router when connected via Wi-Fi network.
If you decide to configure the router via Wi-Fi (or you don’t have a computer with a network card), it is enough to connect your device (laptop, smartphone, tablet) to the Wi-Fi network, which will be broadcast by Archer C3200 right after turning it on. It will broadcast 3 Wi-Fi networks. You can connect to any of them. The standard names of the wireless networks and the factory password are indicated at the bottom of the router on the sticker.
Immediately after connection, the Internet through the router may or may not work (without Internet access). This is normal. You just need to configure the router, specify the type of Internet connection and other parameters.
Configuring Archer C3200
You can enter the control panel of the router through the browser of almost any device. The main thing is that this device should be connected to the router via cable or wi-fi. The address for entering the Archer C3200 settings is given at the bottom of the router. It is tplinkwi-fi.net (you can also use 192.168.0.1).
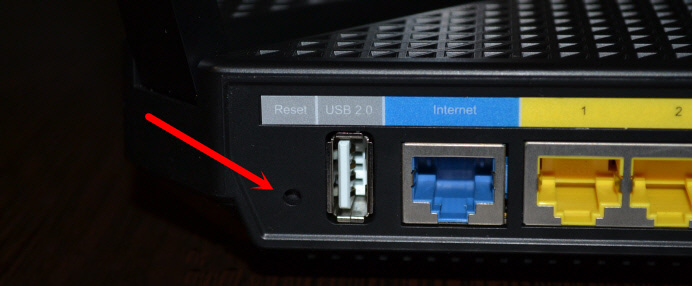
If you or someone else has already tried to configure the router, or it worked with another provider before, I strongly advise you to do a factory reset. Press the RESET button recessed in the case for 10 seconds with something sharp. Look at the indicators, you will realize when the reset occurs.
The router will reboot and will be as good as new. Now you can customize it, the old settings will be fine.
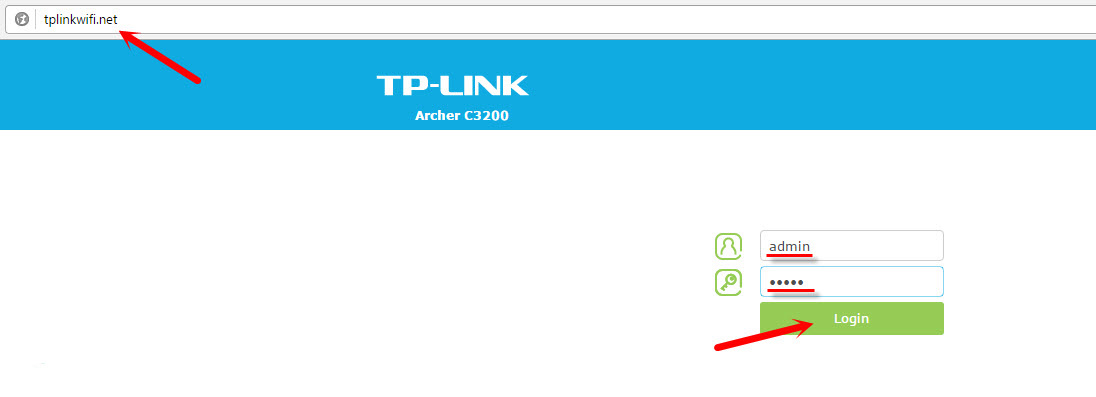
Open a browser and go to the address tplinkwi-fi.net. The authorization window will appear. The factory login and password are admin and admin. Specify them and get into the control panel.
The router will immediately ask you to change your username and password, which will protect the control panel. You can keep the username admin, but change the password. And try not to forget the password you set, or you will have to do a factory reset.
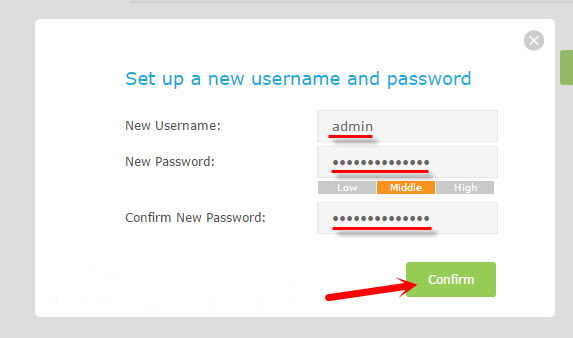
The authorization page will appear again, where you need to specify the username and password that you have set. The control panel will open and the Quick Setup Wizard will appear, which I advise you to use to configure the router. If it doesn’t open, click on “Quick Setup”.
1
The first step is to specify your region, and click on “Next”.

2
Next is a very important point. Internet configuration. You need to specify the correct parameters so that the router can connect to your Internet provider. First of all, you need to choose the type of connection (Dynamic IP, Static IP, PPPoE, L2TP, PPTP). If you don’t know it, check with your ISP. This information is most likely specified in the documents you were given when you connected to the Internet.
Dynamic IP
I, for example, have Dynamic IP (Dynamic IP). This is the easiest way to connect. Select it and click “Next”.
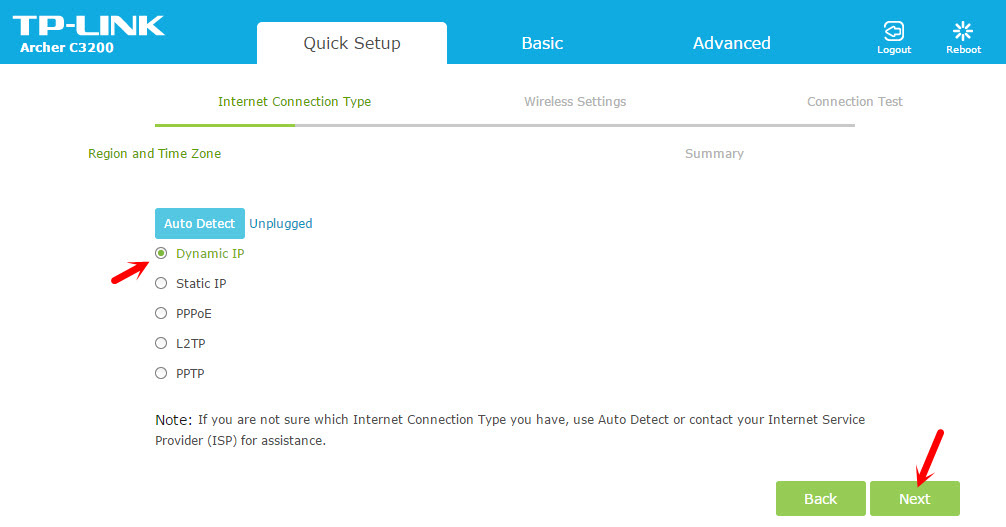
The router will ask if your ISP does MAC address binding. If they do (which is rare), then you need to clone the MAC from the computer to which the Internet was previously connected. Or call your ISP’s support and ask for a new MAC address for the router. It is indicated at the bottom of the device.
PPPoE, L2TP, PPTP
Select the appropriate connection type, click “Next”, and in the next window specify the user name and password. Also, if necessary, specify “Server IP/Domain Name” (they are given by the provider).
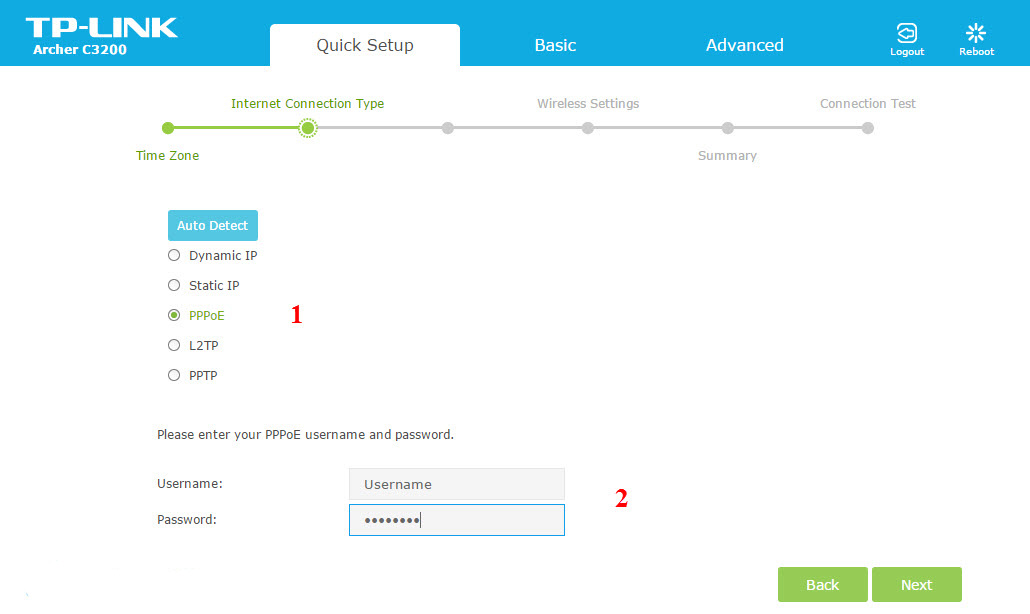
I think we have sorted out these settings.
Wi-Fi network configuration
3
Everything is very simple here. Since the router broadcasts three wi-fi networks (one at 2.4GHz and two at 5GHz), we need to change the parameters of each network. If you want, you can disable the networks you don’t need by simply unchecking the “Enable” checkboxes of a particular network. From the settings, you only need to change the network name (SSID), and the password.
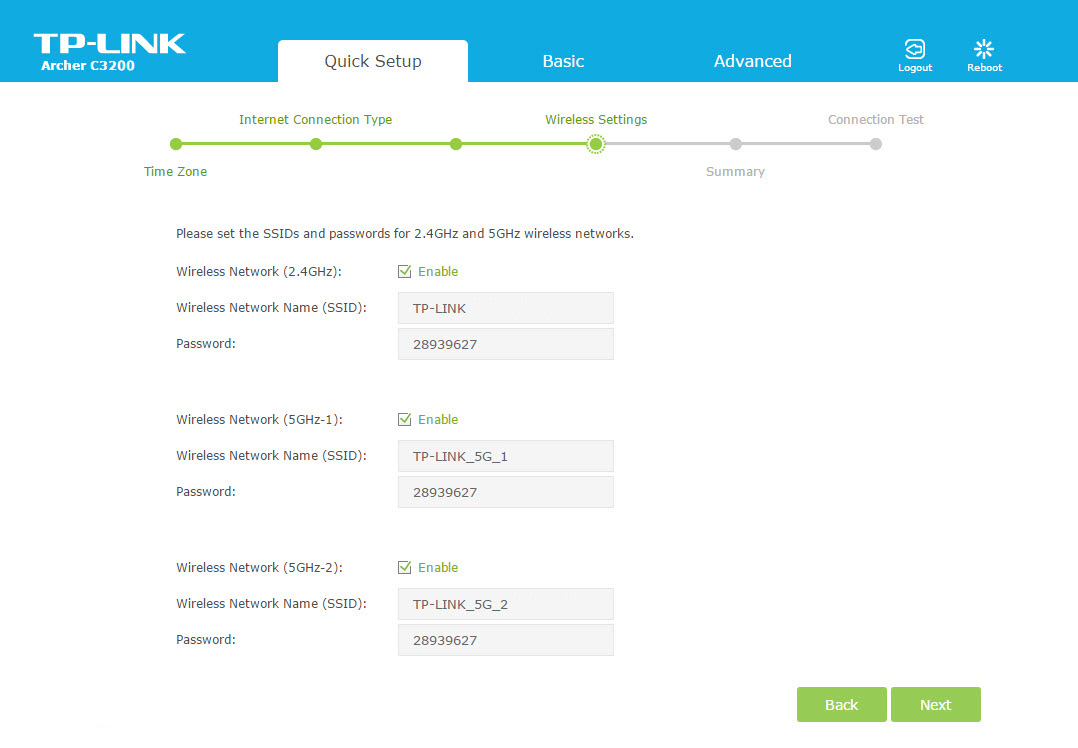
Click “Next”. You can change these settings at any time. If you need to set up a guest Wi-Fi network, see these instructions.
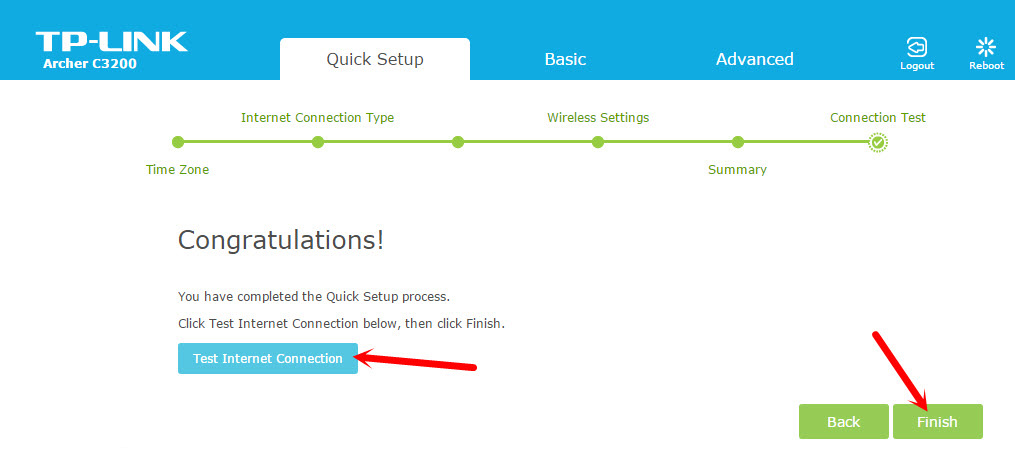
4
Check all the parameters that we have set and click on “Save”.

Wait for the router to save the settings. Then, it will offer to test the Internet connection. Click on the corresponding button.
If the router informs you that there is no Internet connection, then check your ISP connection settings on the “Basic” – “Internet” tab.
Since you most likely changed the names of Wi-Fi networks and passwords to them, then after setting up and restarting the router, you will need to reconnect the devices using the password you set.
All functions of the router can be configured on the “Basic” and “Advanced” tabs, where the advanced settings are located.
 Indicators (Light Bulbs) On the TP-Link Router. What Shoup Burn, Blink and What Do they Mean?
  TP-Link TL-WR844N-ConNENENECTION, SETTING WI-FI, FIRMware, IPTV, Operating Mode
  Setting Wi-Fi Router TP-Link TL-WR940N and TL-WR941ND. Instructions for Connecting and Configuring Wi-Fi
  TP-Link Archer T2uh Ac600-Review, Driver Installation, Setting