
TP-Link Archer A7: Internet, Wi-Fi Network, Firmware, USB Router

I don’t even know what could be simpler than setting up a modern router. TP-Link Archer A7 is no exception. TP-Link developers tried to make a multilingual, beautiful and understandable web-interface, an application for mobile devices, and even a manual with pictures on quick setup was printed out and put in the box with the router. But despite this, not seldom users still have certain difficulties in the process of configuration. And most often these difficulties are related to the device from which the configuration is performed, or to the Internet provider. But this is a topic for another article. And today we are going to consider the process of TP-Link Archer A7 configuration. Let’s connect everything and quickly configure it. And if you don’t have an Archer A7 yet, then read my review of this model.
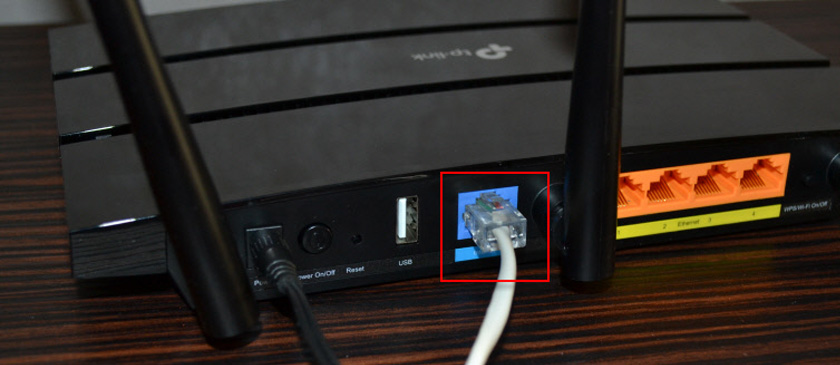
And let’s get right down to business. First of all, we need to connect everything correctly, connect everything and don’t mix up anything. Connect the power adapter to the router itself and plug it into the socket (make sure that the router is powered on with the Power On/Off button). Plug the Internet port (it is blue) into the Internet port (cable from an Internet provider, DSL/GPoN modem, other router).
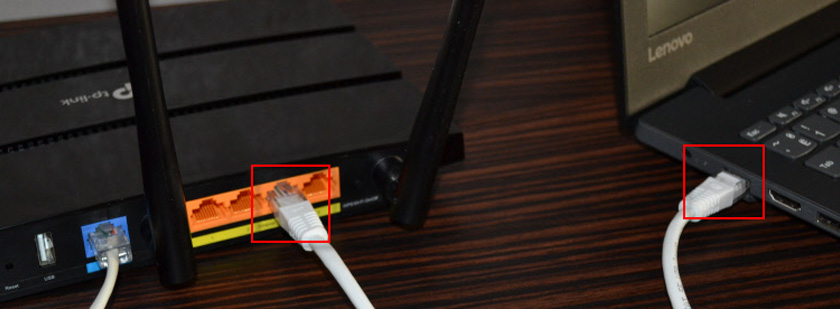
The next step is to connect to TP-Link Archer A7 the device from which we are going to configure it. It can be a PC, laptop, smartphone, tablet. If you have an opportunity to connect from a PC or laptop, it is best to do it with a network cable.
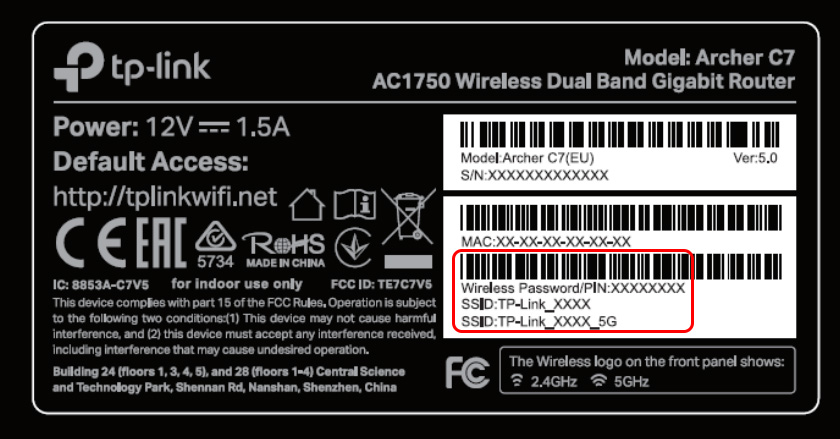
If you need to connect via wi-fi, then in the list of available Wi-Fi networks on your device, find the router network and select it. Specify the factory password. The factory network name (SSID) and password are indicated on the sticker at the bottom of the router and on a separate card that comes with the router (on which you can write down the new password after the configuration).
Let me remind you that you can configure the router from your smartphone or tablet via the Tether app. Install the application, connect to the router’s Wi-Fi network and configure the router via the application.
If you want to configure through the web-interface (through a browser), then further I will show you how to enter the settings and specify the necessary parameters.
Configuring TP-Link Archer A7
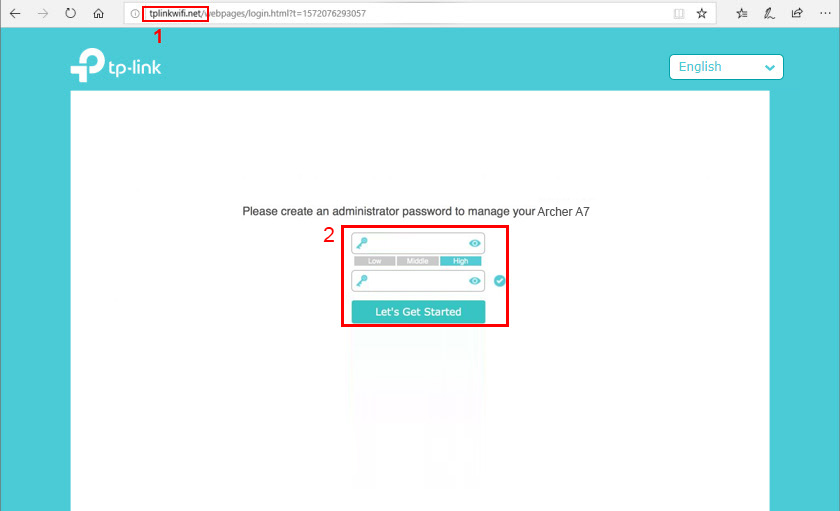
Open any browser and go to http://tplinkwi-fi.net/ (more details in this article). Or see the instruction: how to enter the settings of the TP-Link router. By the way, by IP-address 192.168.0.1 you can also get to the web-interface.
The router will immediately ask us to set the administrator password. Think up a password, specify it twice and write it down somewhere. It will be needed later to enter the router settings.
After clicking on the “Let’s get started” button, the quick setup wizard will open. Usually, I show how to configure the router with its help, but today we will make the necessary settings separately, in different sections of the web-interface. So let’s go straight to the “Advanced Settings” section.
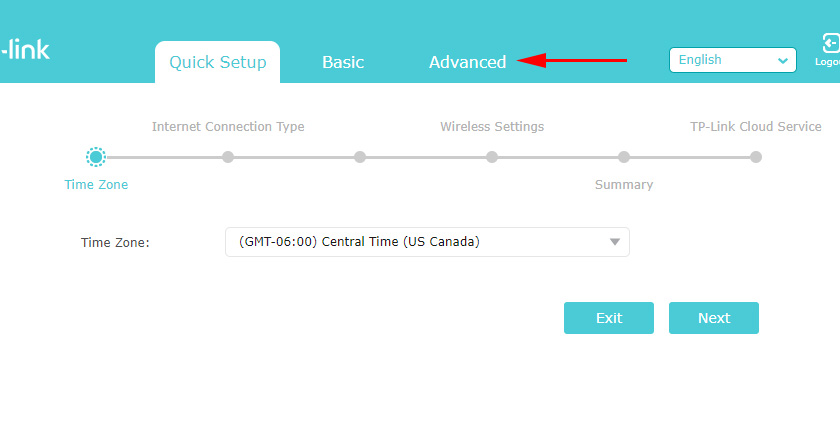
If you want, you can try to configure Archer A7 through the Quick Setup Wizard. Everything is very simple there, step by step.
Connecting to the Internet
Important: if the Internet through your TP-Link Archer A7 is already working, if the connected devices have access to the Internet, you can skip this stage of configuration (go straight to wi-fi configuration).
On the “Advanced settings” tab you should open the “Network” – “Internet” section. It is very important to correctly select the type of connection and set all the necessary parameters. The information you need to specify on this page is given by your Internet provider. Therefore, if you don’t know what type of connection your ISP uses, call support or look at the Internet connection agreement.
If you have Dynamic IP (DHCP), just select this type of connection and save the settings.
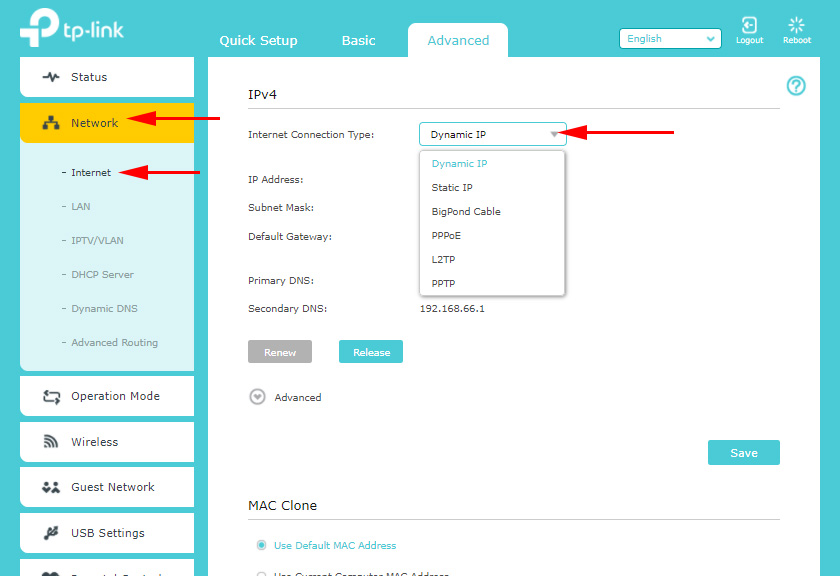
If PPPoE, PPTP, L2TP, you need to specify the user name and password. As well as the server address (only for PPTP and L2TP).

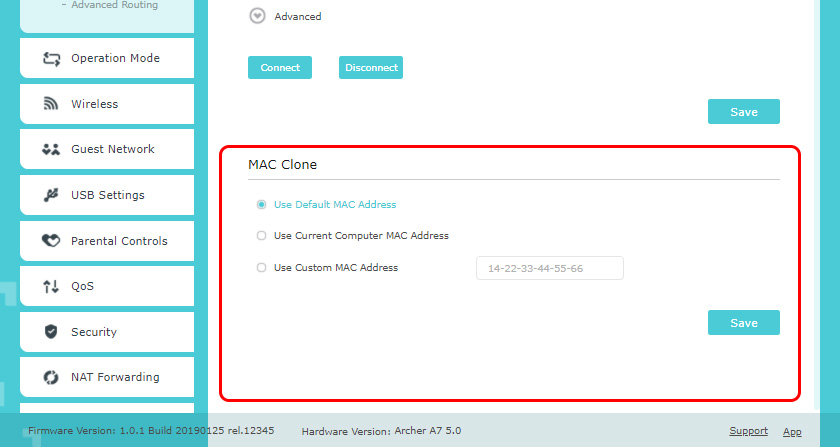
If your ISP binds your TP-Link Archer A7 by MAC address, you can either clone the MAC address from the computer to which the Internet is bound, or you can write the required MAC address manually, or you can write the MAC address of your TP-Link Archer A7 (indicated on the sticker at the bottom) from your ISP .
Once again: you can get all the information on setting up your Internet connection from your Internet provider’s support.
Article on the topic: When setting up the router writes No Internet access, or Restricted and no connection to the Internet
Setting up a Wi-Fi network
Many people leave the Wi-Fi network name and password, which is set by default. But I still recommend changing them. At least the password. To do this, go to “Wireless Mode” – “Wireless Mode Setup”.
 TP-Link M5250 and TP-Link M5350 Roter Firmware
  How to Change the Password for a Wi-Fi Router TP-Link TL-WR841N?
  Detailed Instructions for setting up the tp-Link Archer C6 Router
  Comparison of Wi-Fi Routers: TP-Link Archer C20 and Xiaomi Mi Wi-Fi Router 3