
TP-Link Archer A6 Wi-Fi Settings Instructions
Buying a router is not difficult. Choosing one, yes, is a bit tricky. But let’s assume that you read my article with tips on choosing a Wi-Fi router for your home or apartment, then read the review on TP-Link Archer A6 and chose this router. Great choice! But it still needs to be connected and configured somehow. Now I’ll show you how to do it correctly using my TP-Link Archer A6 as an example. There is a small configuration guide in the package, but it covers only the main points and answers the most popular questions. I’ll try to show you the whole process of configuration with photos and screenshots.
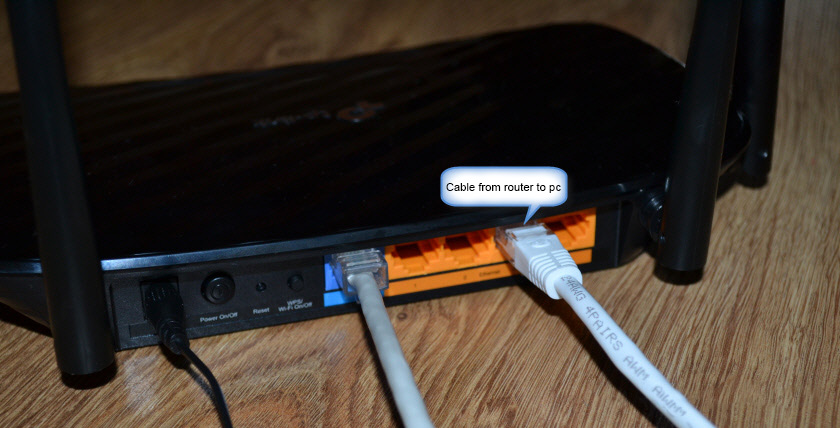
Like any other router, our TP-Link Archer A6 needs to be first connected and prepared for configuration. To do this, you need to connect the power adapter and plug it into a socket. Turn on the power with the Power On/Off button (if it is disabled) and connect the Internet (cable from the provider, modem) to the Internet port ( aka WAN ). It should work like this:

If the WAN indicator light is orange – no big deal. Just the Internet on the router is not set up yet. Ignore it. We need to connect to the router from some device to enter the router’s web-interface and set the necessary parameters. It is best to use a PC, or a laptop. Connecting it to the router via a network cable (the cable is included in the kit).
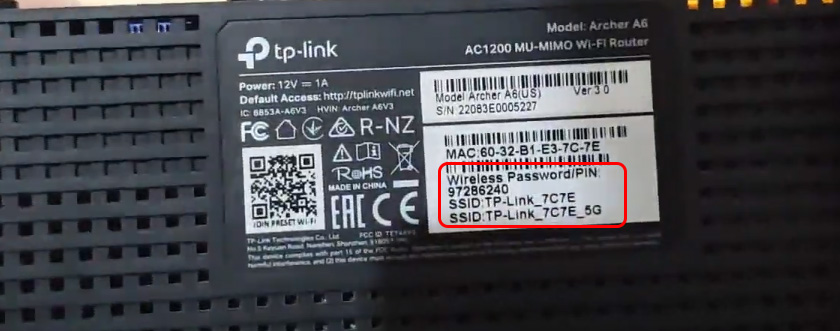
If you want to configure the router from a phone, tablet, or laptop can be connected only via wi-fi, you need to connect to the Archer A6 Wi-Fi network. The factory network name (SSID) and password (wi-fi password) can be found on the bottom of the router.
Choose the network, the name of which is indicated on the router, enter the password and connect.
It happens that the router has already been configured. As a result, the network name or password may have been changed. Also the router login and password and other parameters may have been changed. In this case you need to do a reset. To do this, press the Reset button with something sharp and keep it pressed for about 5 seconds (until the power indicator starts blinking). After that, wait for the router to boot up. Connect to it via cable or wireless network and try to enter the web-interface.
Configuring TP-Link Archer A6
If you are going to configure the router from a mobile device, it might be more convenient to do it using the TP-LINK Tether application.
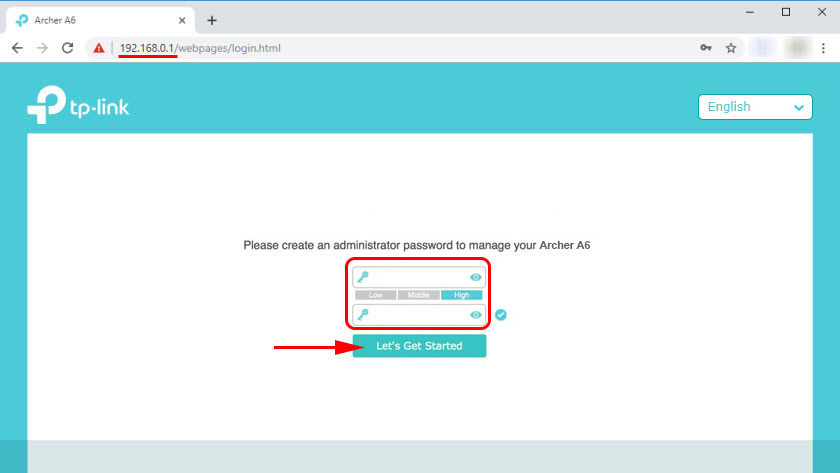
On the device that we have connected to Archer A6 you should launch the browser and go to the following addresses: http://192.168.0.1 or http://tplinkwi-fi.net. If the router settings don’t open, see this article and this one. In the first one I showed you in more detail how to enter TP-Link router settings, and in the second one I wrote about solving the problem when these very settings are not opened.
TP-Link Archer A6 greets us with a suggestion to change the administrator password. Do it. Make up a strong password and specify it twice. Write it down so that you don’t forget it. This password will protect the router settings (the next time you try to open the router settings, you will see the authorization page where you need to enter this password). Do not confuse this password with the Wi-Fi network password.
If necessary, you can change the language of the web-interface.
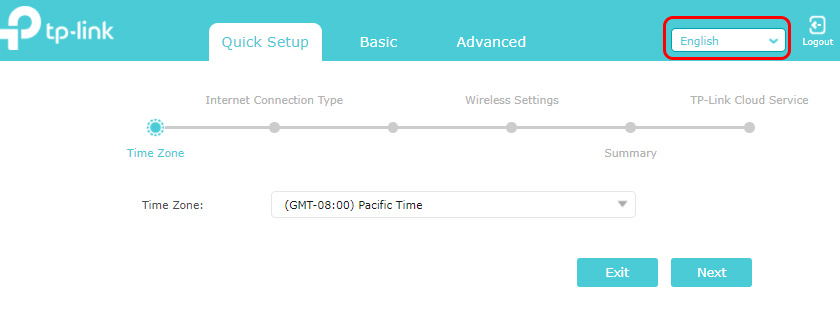
When you enter the web interface for the first time, the “Quick Setup” will be launched automatically. If necessary, you can go to the basic or advanced settings and set the necessary parameters in separate sections. But it is very easy to configure the router using the Quick Setup wizard. Let’s try it.
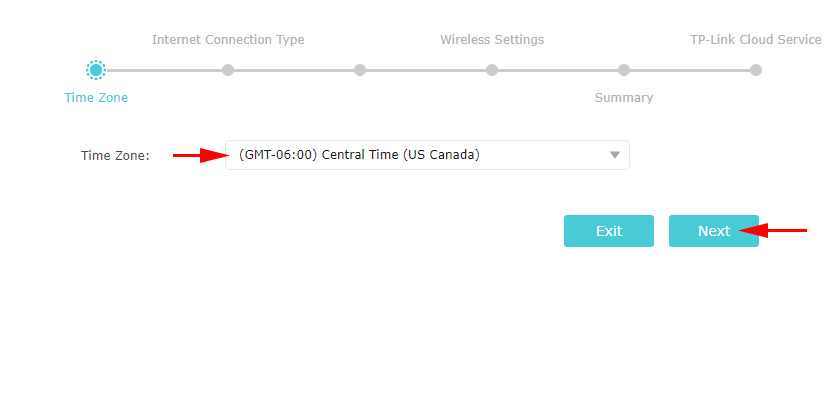
Specify your time zone.
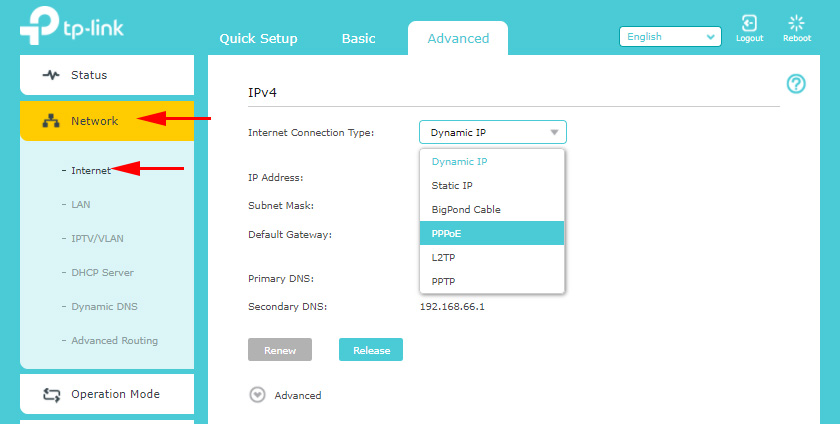
In order not to enter all the Internet connection settings manually, you can try to find your Internet provider in the preset settings and click “Next”. Depending on the type of connection, you may need to enter the necessary parameters. Usually these are username, password and server address (for PPTP and L2TP). They are provided by your ISP.
If there is no provider for your country and city, check the box “I have not found suitable settings”.
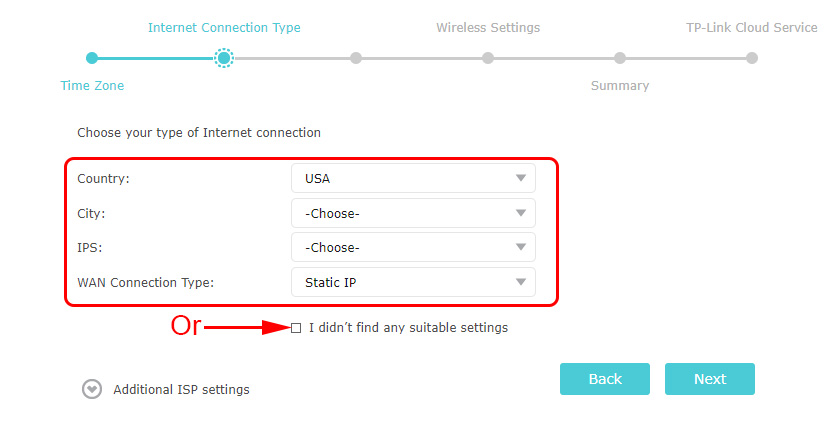
In this case you need to manually select the type of connection. If you don’t know what connection your provider uses, check with support.
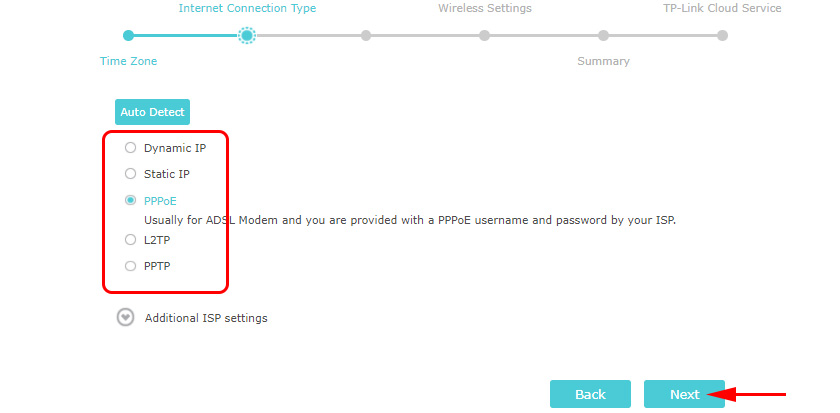
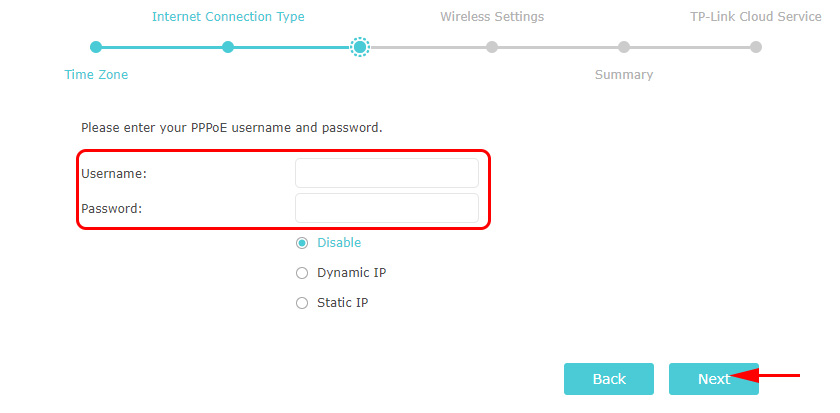
If it is “Dynamic IP-address” – you will not need to enter any additional settings. If PPoE – you will need to specify the user name and password. And for PPTP and L2TP you will also need to specify the server address. Let me remind you that all this information is given to you by your Internet provider.
For example: PPPoE configuration.
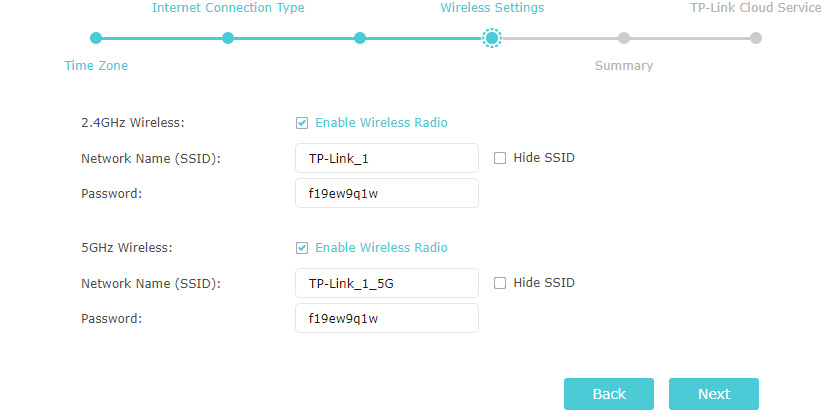
Wireless mode settings
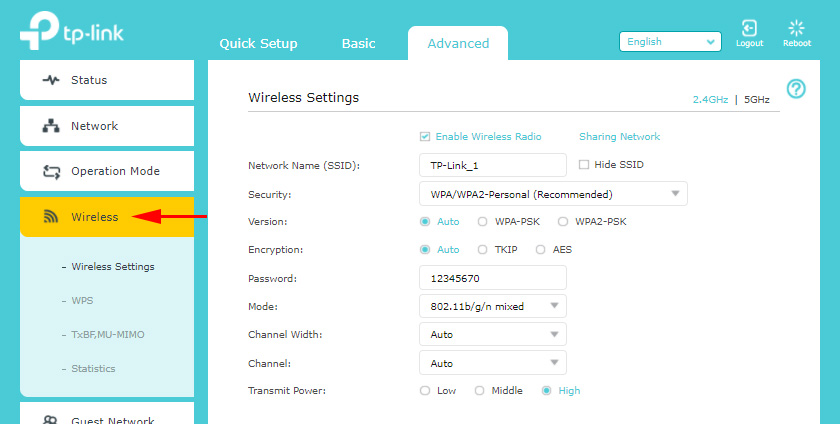
Here you need to set the wi-fi settings. Change the network name and password (set a strong password, at least 8 characters). Separately for the network in the range of 2.4 GHz and 5 GHz. If, for example, there is no need for the router to distribute the network in the 5 GHz range, you can disable it. Simply uncheck the box next to “Enable wireless broadcasting”.
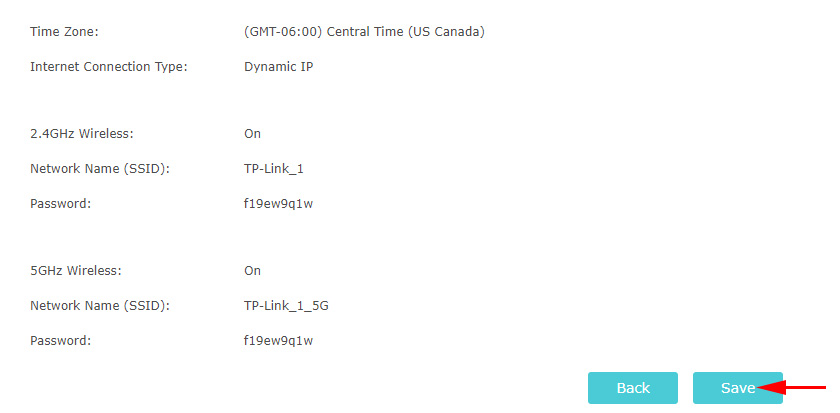
Check all the settings and save them.
After saving the settings, the following message will appear:
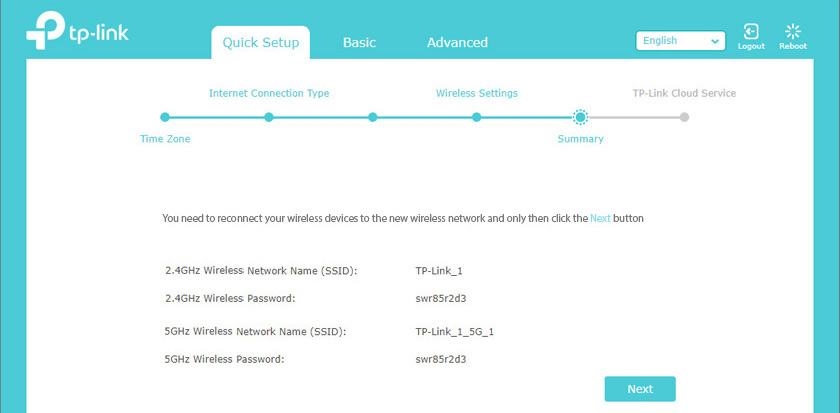
If you connected and did the setup over wi-fi, then connect to a new Wi-Fi network as we have changed its name and password. Once connected, click “Next”.
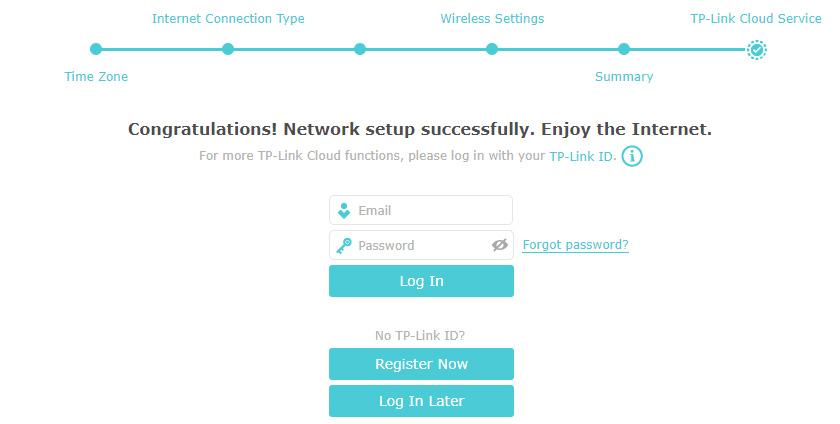
The router will save the settings again and prompt you to link the router to your TP-Link ID, as TP-Link Archer A6 supports cloud functions.
You can, for example, control the router via the internet. Via the Tether app.
If you want to skip this setup – click on the “Sign in later” button.
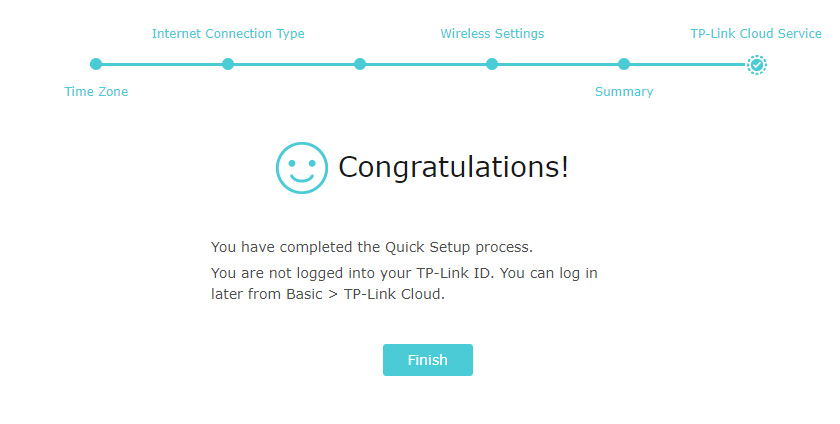
The router configuration is complete.
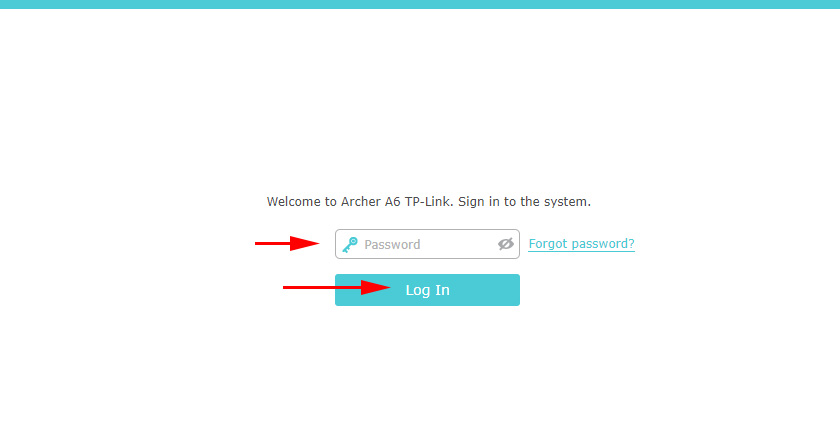
The authorization page will appear. You need to enter the password that we set at the beginning of the configuration.
The “Network Scheme” page will open.
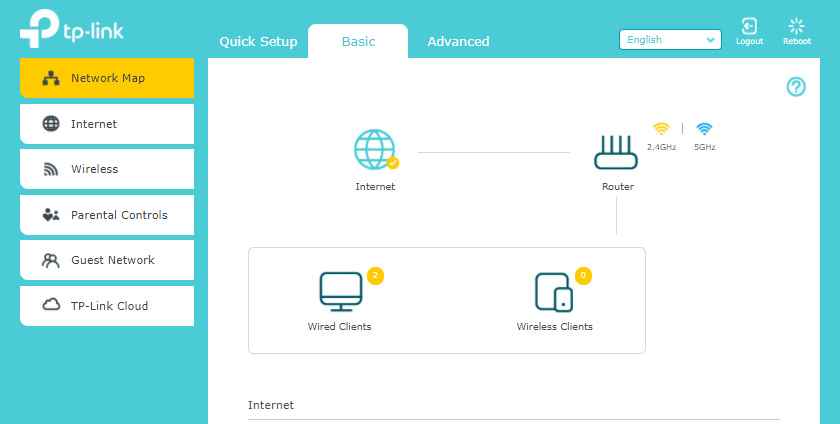
You can see information about the Internet connection, information about the router (wi-fi network), wired and wireless clients. Just click on the desired item and see the information below.
Additional information
If you need to change some settings, you can do it on the “Basic Setup” tab, or “Advanced Settings”. By selecting the desired section on the left.
For example, you can change the Internet connection settings in the “Network” – “Internet” section.
And Wi-Fi settings can be changed in the “Wireless” section.
If you need to configure some additional functions, you can look for instructions in the “TP-Link” section. For example, there are instructions on how to set up IPTV.
If after the configuration the Internet through the router doesn’t work and the WAN (Internet) indicator is lit orange, then you need to check with your provider all the parameters of Internet connection and change them in the router settings.

About this problem I told you in detail in the article Why the Internet (WAN) indicator on TP-Link router is lit orange.
If you have information about any problems with TP-Link Archer A6, solutions, or useful information that is not in the article – write in the comments. There you can also ask questions about this router and leave feedback.
 Indicators (Light Bulbs) On the TP-Link Router. What Shoup Burn, Blink and What Do they Mean?
  TP-Link Archer C5400-Three-Band and Very PowerFul Wi-Fi Router
  tplinkrepeater.net and tplinkextender.net - Admin Password, Entrance to the Repiter Settings
  How to Change the Password for a Wi-Fi Router TP-Link TL-WR841N?