
Setting Up Extendal Access Points TP-Link. Wi-Fi Network Over Long Distances Using TP-Link CPE510
If in the previous article we looked more at the appearance, features and capabilities of TP-Link CPE510 outdoor access points, in this article we will talk about their settings. These are professional devices, and it is desirable that they are configured by professionals. It is necessary to follow the order of installation and connection to maintain the warranty, as well as it is necessary to comply with local regulations regarding the use of radio frequencies, channels, signal strength. Depending on the region, there may be different restrictions. It is written immediately when you enter TP-Link CPE510 settings.
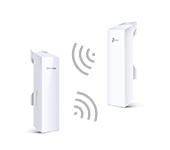
Therefore, if you want to build a network of several outdoor access points, for a long distance, it is better to turn to the experts. In this article, I will just familiarize you with some of the features of these outdoor access points. I will show you how to log into the TP-Link CPE510 control panel and configure these devices in two modes “Access Point” and “Client”. These are the modes in which these devices are most often configured. Including for establishing Wi-Fi connection at a long distance (up to 15 kilometers).
Since these are outdoor access points, and they will be installed on the outside of the building, it is desirable to think about the connection scheme in advance and lay all the necessary cables. Also make a bracket for mounting the device itself. Make grounding.
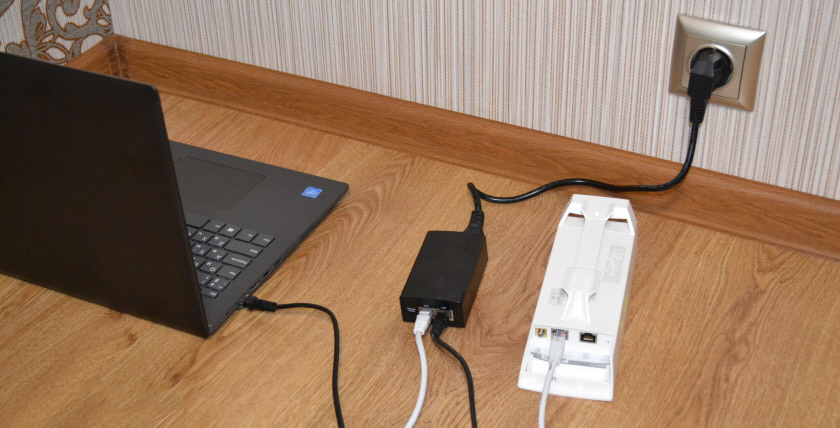
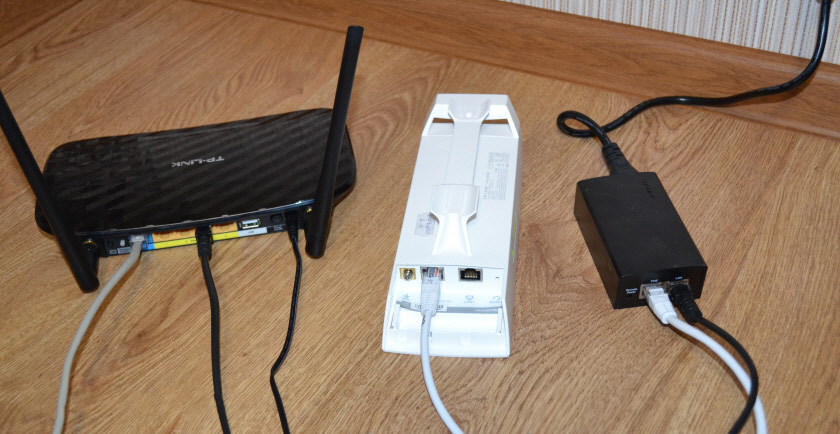
In most cases, to TP-Link CPE510 will go one network cable. From the router (provider), or to the router, computer, or other device. It is powered by PoE (over the network cable). This greatly simplifies the installation process.
How to set up a long distance Wi-Fi connection?
You will need two access points. For example, TP-Link CPE510. They need to be fixed on two buildings so that they are in line of sight. And direct them approximately at each other. When everything is already set up, you can configure them more accurately by looking at the indicators in the control panel. One TD will be configured as an “Access Point” (transmit signal) and the second one as a “Client” (receive signal).

If we consider specifically the CPE510 model, they can be connected at a distance of up to 15 kilometers.
How to enter the settings of the outdoor access point TP-Link?
To enter the settings of TP-Link CPE510, you must first configure the parameters of the network card of the computer. But before that, you can connect the device to the computer. You need two network cables. The first one is connected to the POE port on the adapter and to the LAN0 (POE IN) port on the access point. And the second cable is connected to the LAN port on the adapter and to the computer or laptop.
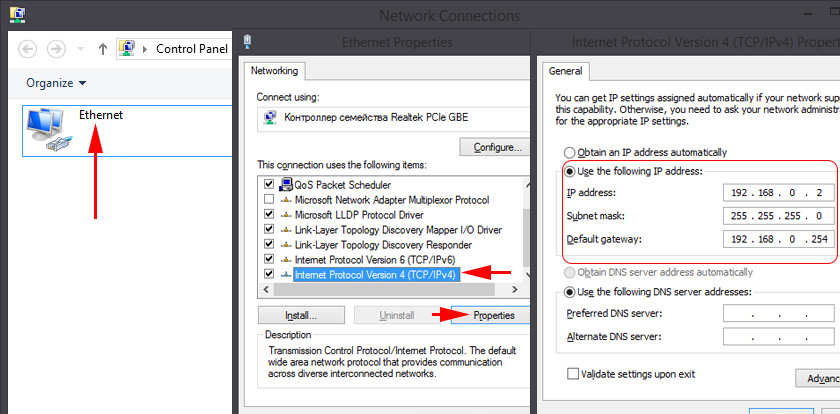
In the properties of the network adapter (Ethernet), for the protocol IPv4 you need to write static addresses. The IP-address is 192.168.0.2 for example, the subnet mask will be set automatically, and in the main gateway field we specify 192.168.0.254.
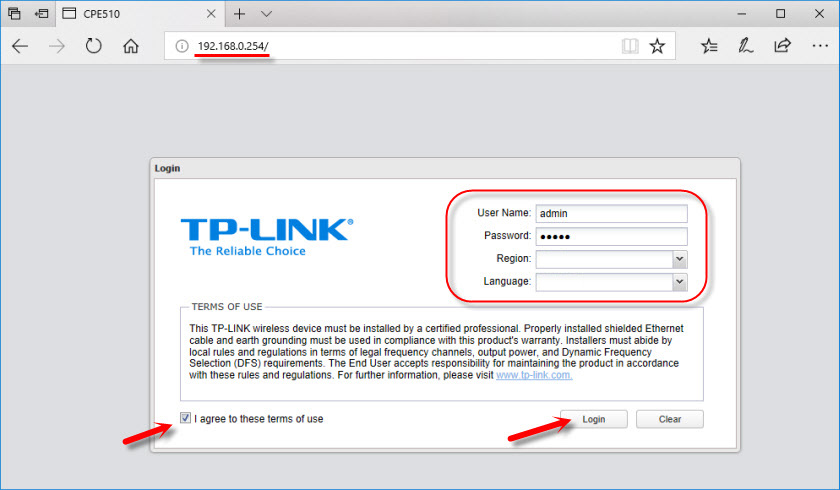
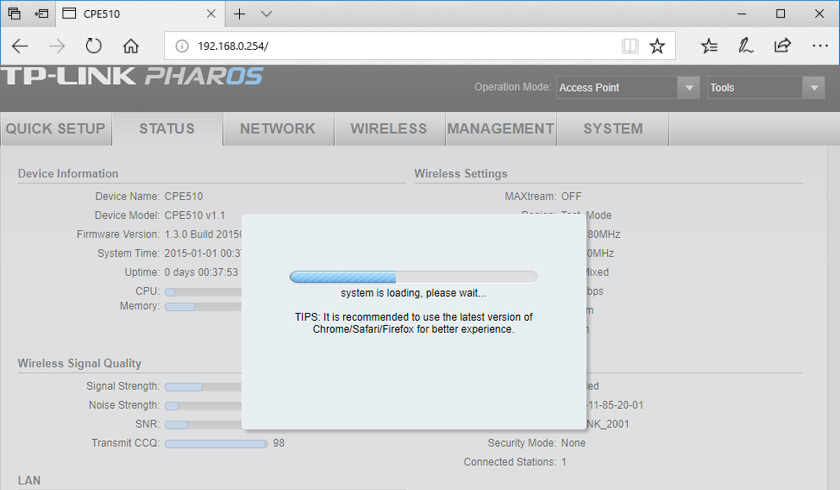
The factory IP address of TP-Link CPE510 is 192.168.0.254. Login and password – admin/admin. Open the browser and go to http://192.168.0.254. On the first page, specify login and password (admin/admin), select the region and language of the control panel. Read the rules of use, check the box accepting them and continue by clicking on the “Login” button.
Next, the device will offer to change the factory admin password to a more complex one. Specify the new password twice and press the “Finish” button.

The PHAR OS control panel will open.
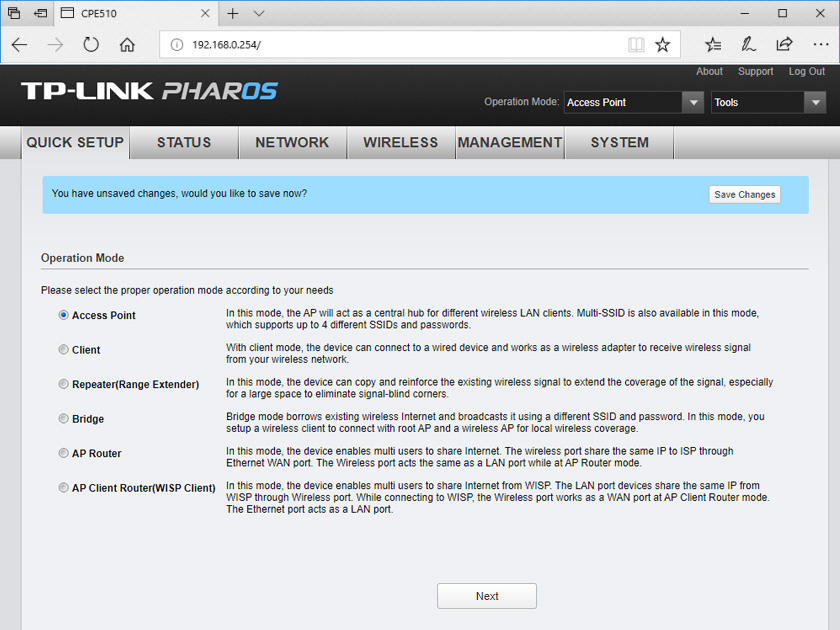
Next, simply change the access point’s operating mode and configure it.
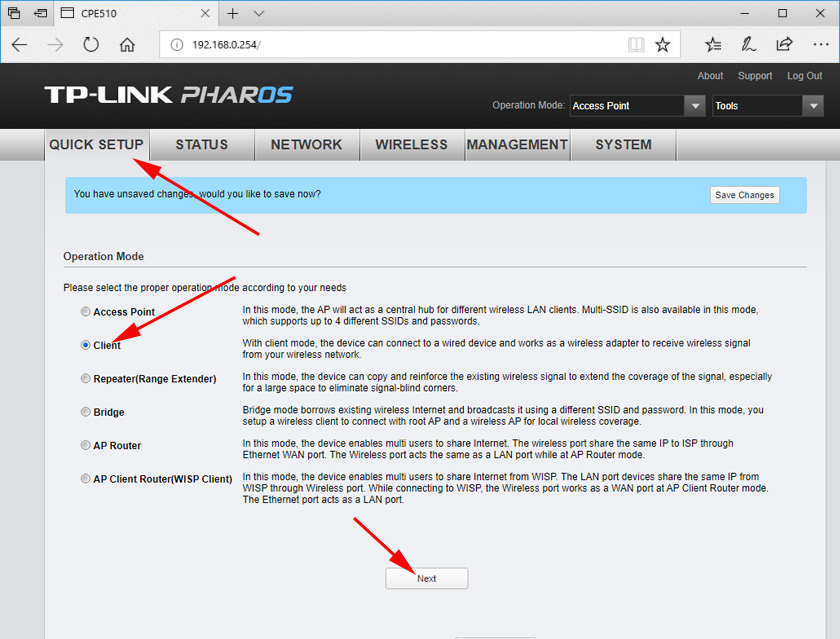
Configuring TP-Link CPE510 in “Access Point” mode
In the control panel, in the “Wizard” section, select the “Access Point” mode and click on the “Next” button.
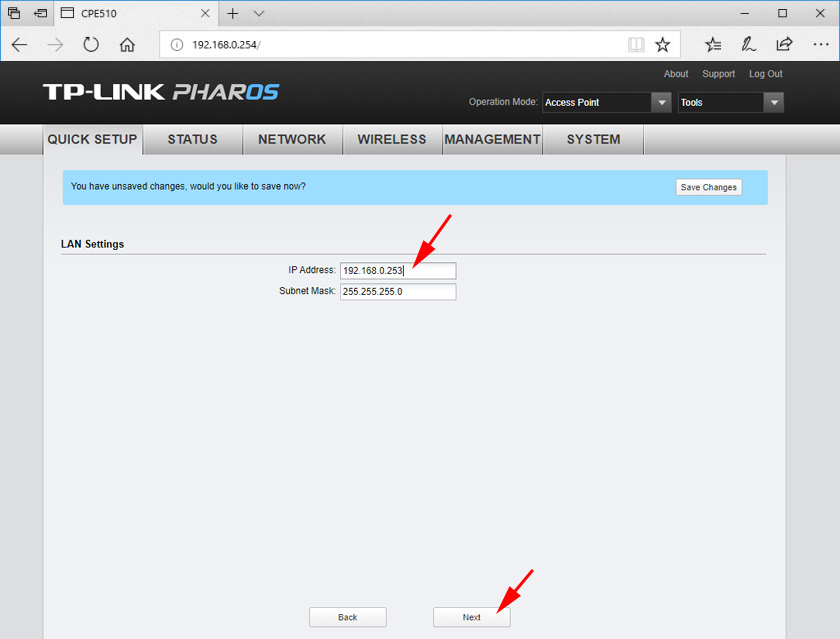
Do not change anything in the LAN settings, just click on “Next”.
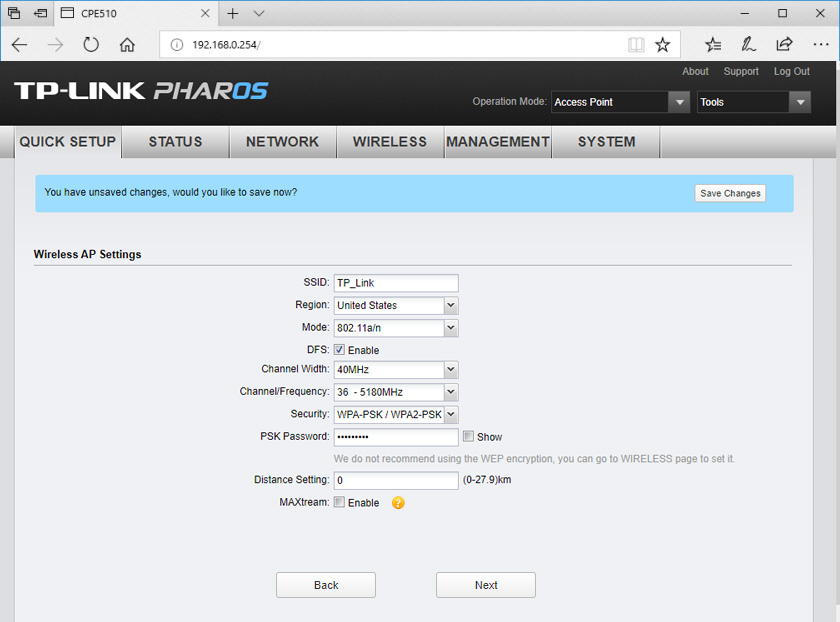
The next step is to configure the wireless access point. Change the network name and other parameters. Set a password, if necessary.
Check all the settings and click on the “Finish” button.
After saving the settings, this access point can be disconnected from the computer. Install it on the bracket (if it is not already installed). Since this is an access point, it will be transmitting internet. So it needs to be connected. We connect the Internet from the router (or other device) to the LAN port on the adapter.
You will get approximately this scheme:
In the settings, in the “wi-fi” section, you can change various parameters of the wireless network. Including channel, transmitter power, etc. There are a lot of settings there. I also advise you to check the box next to “Automatic (Apply in 0-27.9km)”.
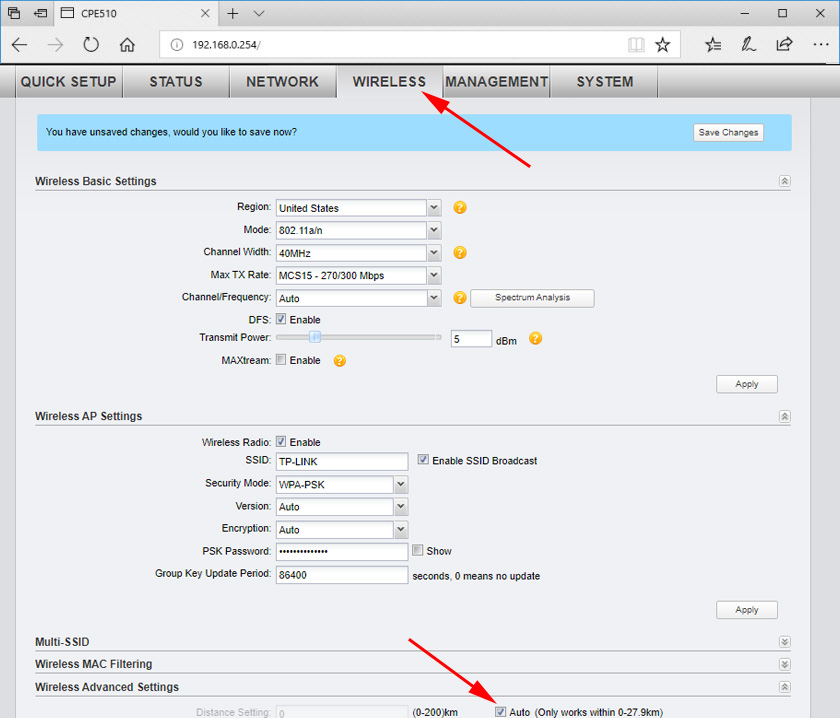
Don’t forget to save the settings.
Operation mode “Client” (signal reception)
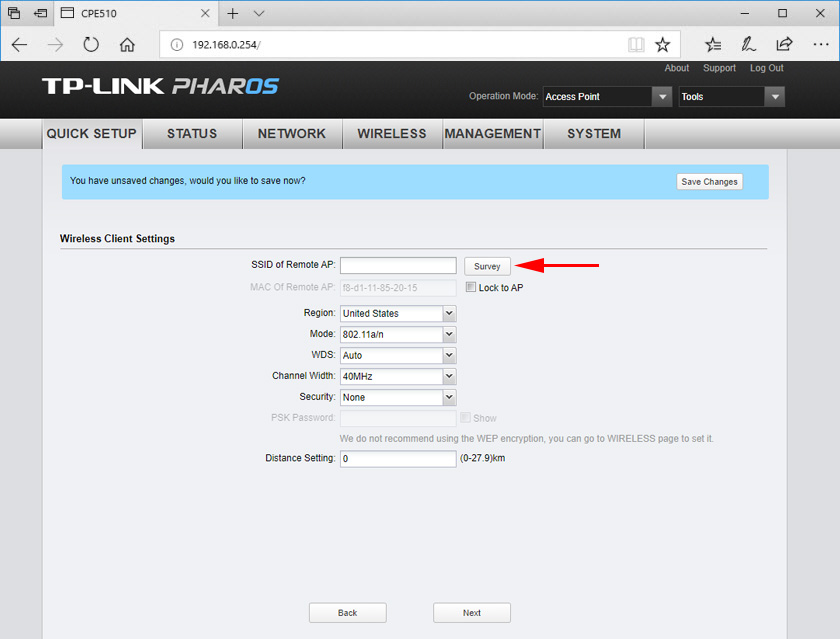
The second AP (on the second end) needs to be configured in client mode. Before configuring it , it must be directed to the source of the signal (in our case, it is the first AP). Connect to it, go into the settings and switch to the “Client” mode.
Change the last digit of the IP-address. So that it differs from the IP-address of the access point.
In the next window click on the “Search” button. Choose our access point from the list.
If it is protected by a password, enter it and save the settings. Our access point in client mode will connect to the main Wi-Fi network. From the client you can connect the Internet to the router by cable, or directly to the computer.
 Indicators (Light Bulbs) On the TP-Link Router. What Shoup Burn, Blink and What Do they Mean?
  Fast Setting Wi-Fi Router TP-Link Archer C7 (AC1750)
  TP-Link Archer C20 and Archer C20i Roter Firmware
  TP-Link TL-WR842N: Review and Reviews. Is the Any Support for 3G/4G Modems