
Setting up a ftp server on the tp-link router

If your TP-LINK router has a USB connector, you can probably run an FTP server on it to access files from the local network or the Internet. This means access to those files that are on the drive that is connected to the router.
Very convenient. Connect a flash drive or an external hard disk to the router, run FTP-server, and get access to this drive from all devices that are connected to the router. And not only from computers, but also from mobile devices. To be honest, I don’t know how it is with iOS devices, but Android mobile devices have no problem connecting to the FTP server and accessing files.
Access to the files that are on the drive connected to the TP-LINK router can be obtained not only from the local network, but also remotely, via the Internet. All you need is to know your external IP-address (which is issued by your provider). That is, you can access the files on the flash drive, which is connected to your home router, from anywhere you have an internet connection. Unfortunately, I don’t have the ability to demonstrate access to an FTP server from the internet right now. As soon as the opportunity arises, I will be sure to supplement this instruction.
Connecting a flash drive to a TP-LINK router and setting up an FTP server
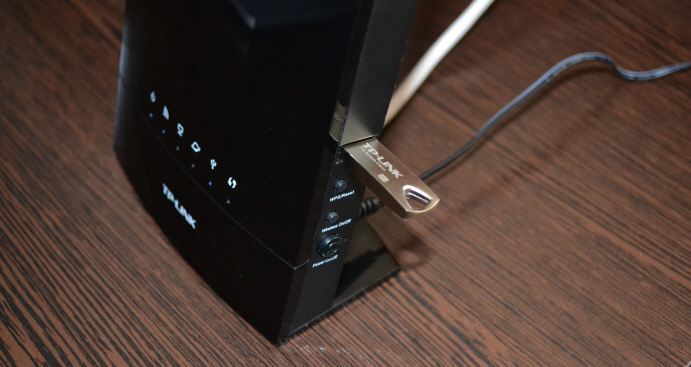
I’m going to show you the example of TP-LINK Archer C20i router. I connected an ordinary flash drive to it. You can also plug your flash drive into the router’s USB slot. I got it like this:
The router must be turned on. And the device, from which you will configure, must be connected to the router via wi-fi, or network cable.
Next, open any browser, and go to the address tplinklogin.net, 192.168.1.1, or 192.168.0.1. The exact address is indicated on the sticker at the bottom of the router. On the authorization page, specify your username and password. If you haven’t changed them, they are admin and admin. If it doesn’t work, see the detailed instructions.
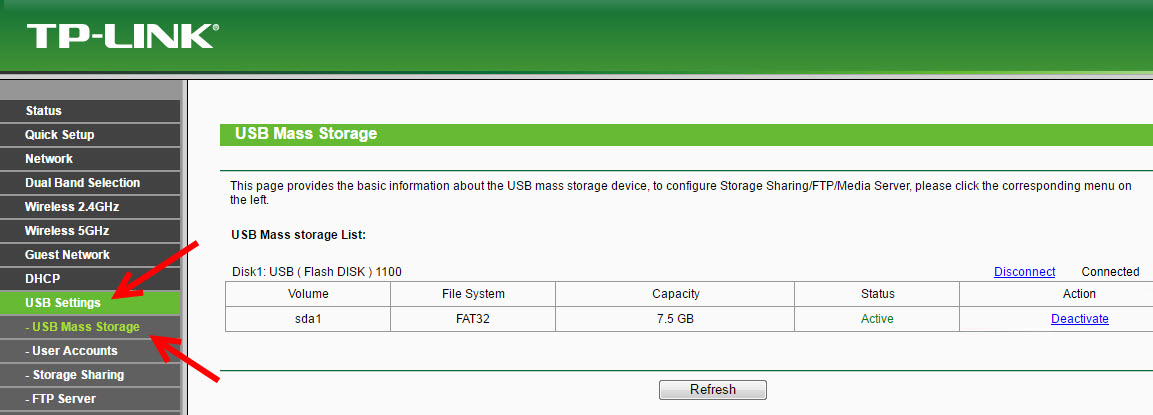
Go straight to the “USB Settings ” – “USB Mass Storage” tab. This page will display the USB drive that we have connected to the router.
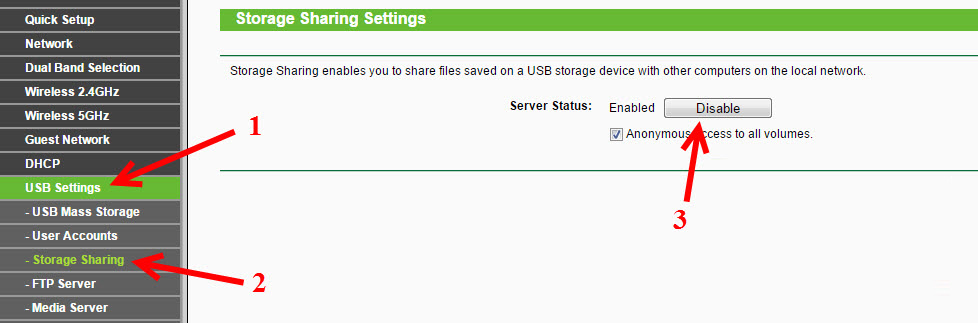
We have verified that the drive is there and it is working. Next, I would advise you to disable sharing of this drive, as it is enabled by default for some reason. So that it would not show up on devices on the local network. It would only be used for the FTP server. To do this, open the “Storage Sharing” tab and click on the ” Disable” button.
Go to the “FTP Server” tab. It should be enabled, in the “Enabled” status. I had it enabled by default.
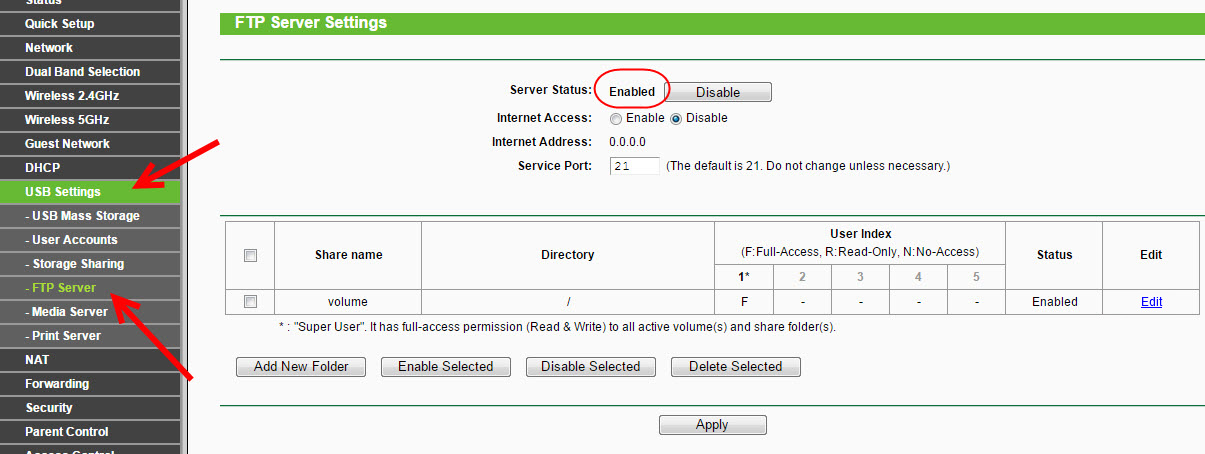
By default, a “volume” directory has already been created with access to the entire drive. And with administrator privileges. Let me explain. The server itself is already running and can be accessed. By default, access is configured to the entire drive. And with “Super User” administrative privileges. Administrator rights give you full access to the files on the drive. Including the ability to modify them.
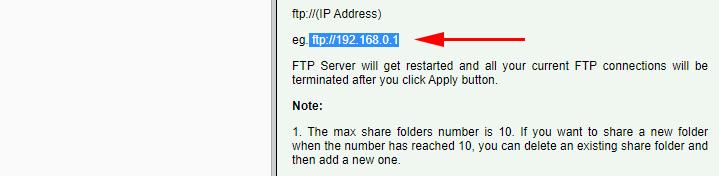
This means that we can already access the FTP server from any device that is connected to our router. To do this, on the “USB Settings”-“FTP Server” tab on the right (where the instructions are), copy the ftp address (or just memorize it, we will need it):
To gain access, we will need to provide a username and password. This is the same data that we specified when entering the router settings (factory – admin and admin).
And if you need to configure access only to a specific folder, and create other users (with different access rights), then I will tell you how to do it at the end of this article.
Connecting to a running FTP server on a computer
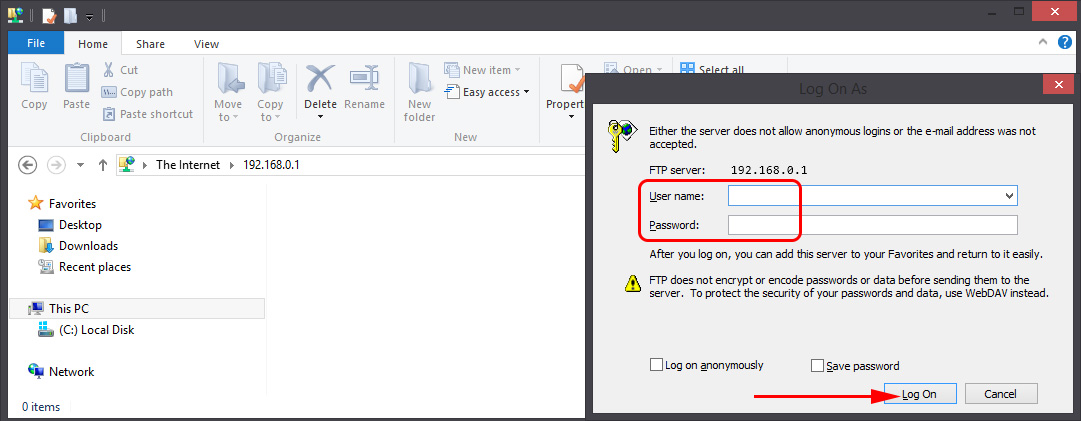
Simply open “My Computer”, or “This Computer” (Windows 10), and go to the address that is specified in the router settings. I have it as “ftp://192.168.0.1”. If you have a router IP address of 192.168.1.1, the address will be “ftp://192.168.1.1”.

Next you will be prompted for a username and password. I wrote about it above. Here you need to specify the same data that you use to enter TP-LINK router settings (standard admin and admin). You can check the box “Save password”, and click “Login”.
After that, you will see the files that are on the flash drive that is connected to the router. If you had any files on the drive, they will be in the “volume” folder.
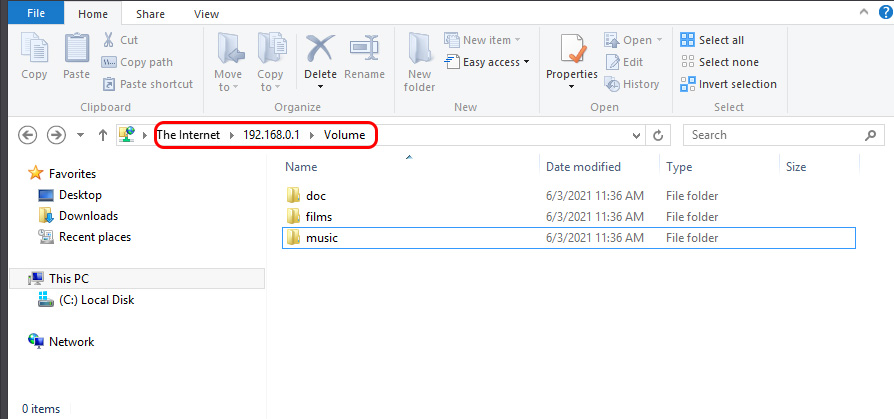
You can create new folders, copy files there, or view them. Everything works regardless of the version of Windows. I tested it on Windows 10, and Windows 7.
To connect to the created server you can also use third-party programs. Such as “FileZilla”. And you can do without the standard means of Windows.
Setting up an FTP connection to a network disk
I think you will agree that it is not very convenient to enter the address in Explorer every time. Therefore, I suggest that you create a connection, so that in the future just go to the folder, which will always be in Explorer.
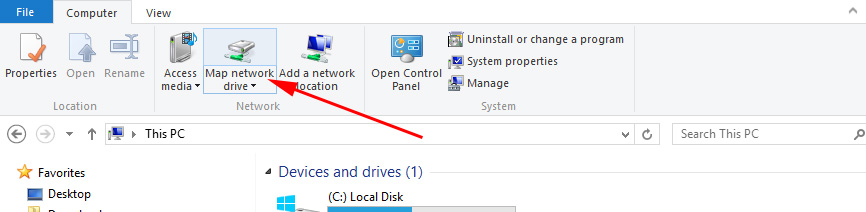
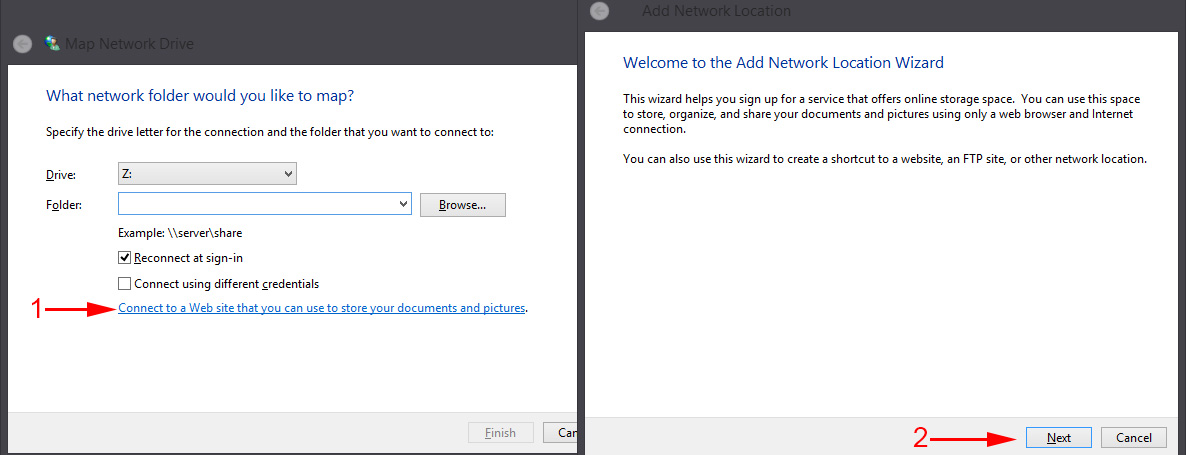
To do this, go to “My Computer” (remember that in Windows 10, this is “This Computer”), and click on “Connect Network Disk“. If you have Windows 10, then first click on “File” – “Connect Network Disk”.
A window will appear in which we click on “Connect to a site where you can store documents and images”. And in the next window, click on “Next”.
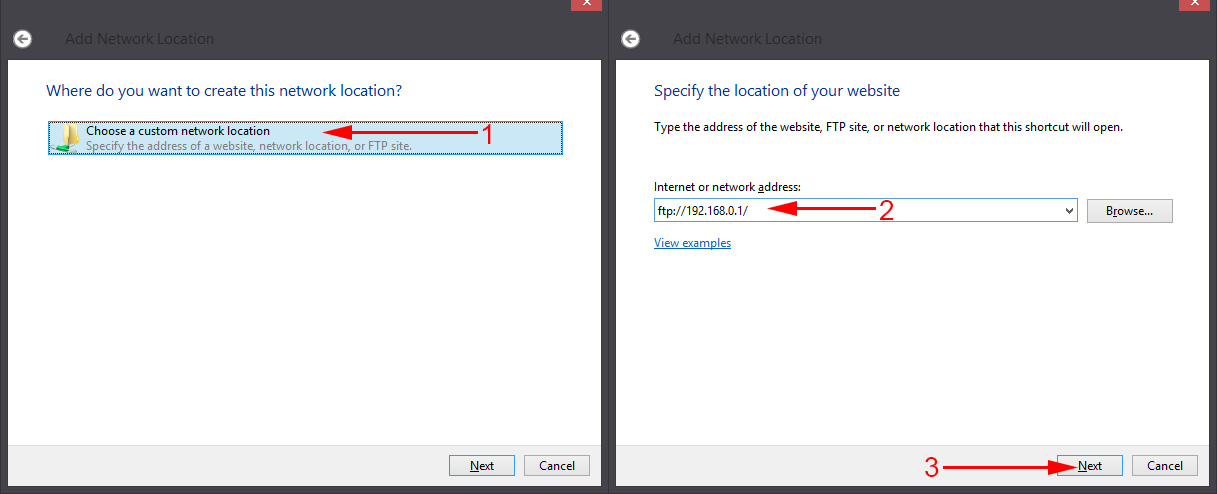
Click twice on “Select another network location”, specify the address of our server, and click “Next”.
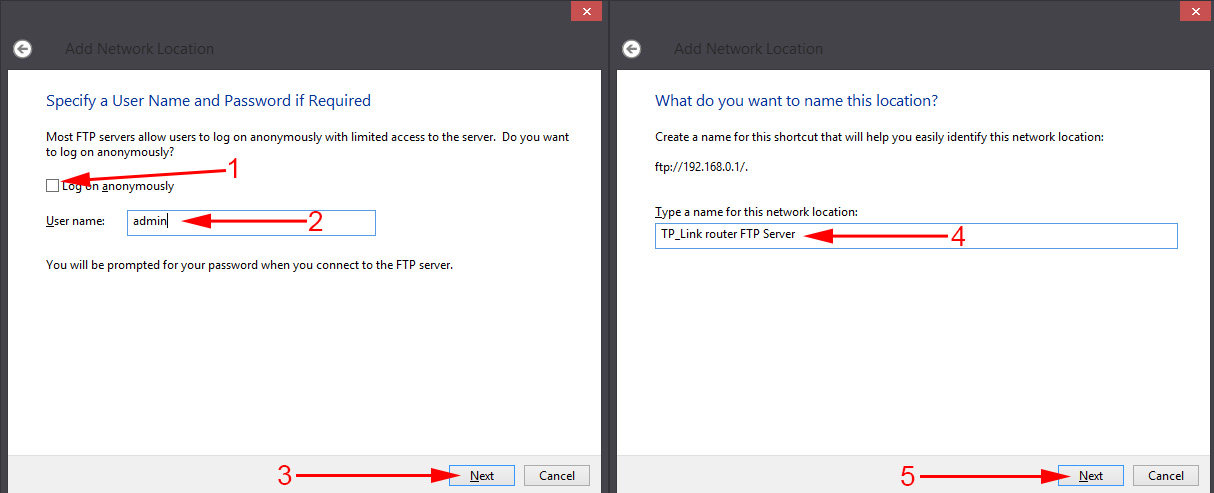
Uncheck “Anonymous login”, and in the “User” field specify the username (I remind you that the standard admin, if you have not changed it). The password request should appear when you log in to the server (the standard one is also admin).
And in the next window think up and write any name for our connection. Click “Next”.
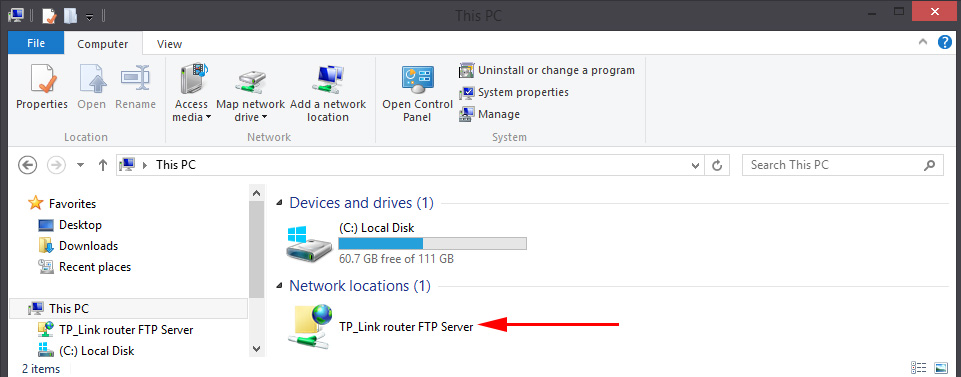
In the last window click “Finish”, and immediately open a folder with files. If you are prompted for a password, specify it.
This folder will always be displayed in Explorer, on the “Computer” tab.
When you open this folder, you immediately get access to the USB drive. We know the server address, username and password (which can be changed in the router settings), so we can connect to the server from any device on the local network. On Android devices I advise to connect via the file manager “ES Explorer”. I will write a separate article about it later.
Connecting to TP-Link FTP server via the Internet
The FTP server configured on the TP-Link router can be accessed via the Internet. This means that from any device that is connected to the Internet you can access the flash drive (which is connected to the router) and get access to files. To access the FTP server, an external IP address is used, which the router gets from your ISP. If your ISP gives you a white, static external IP address (WAN IP), then after setting up FTP (activating the “Internet Access” function) you can access your files from anywhere using this address. It is enough to find out your IP address (for example, on the site 2ip.ru) and go to it in your browser, adding ftp:// 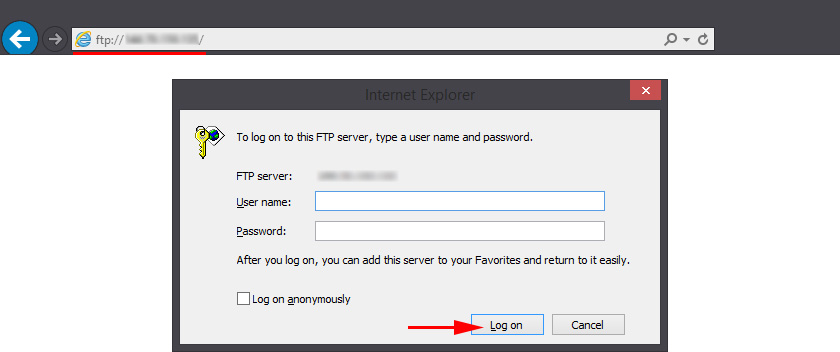 in the beginning. But usually providers issue dynamic IP addresses, which can change. In this case, there are two options: either order from the provider the service “static IP-address”, or configure DDNS (I will write more about this below and give a link to the instructions). But even worse is when your ISP gives you a gray IP address. Then even DDNS will not help. Read more in the article: DDNS (dynamic DNS) on a router: what it is, how it works and how to use it. You need to ask your provider for a white, public IP address and configure DDNS, or order a “static IP address” service. To access the FTP server remotely, you need to enable the “Internet Access” function in the FTP settings on your TP-Link router.
 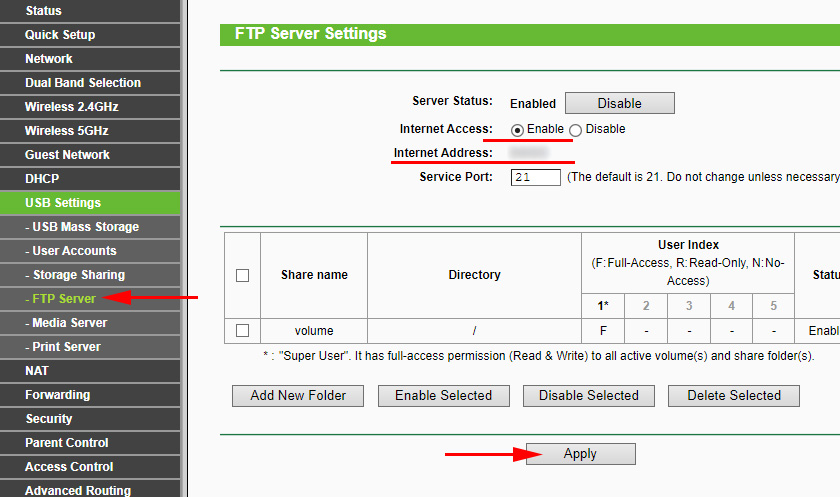 The “Internet address” line will contain the IP address, which can be used to access the FTP server (I wrote about it above and showed it on the screenshot). We have already figured out how to access the FTP server through an external, static IP address. If the router receives a dynamic IP address from your ISP, you will also have access to the server. But the provider will give the router a new IP-address and the access will be lost (and it is not very convenient to look at this address every time, and not always possible). In this case, the problem is solved by configuring DDNS on the TP-Link router. We configure DDNS, get a permanent address and use it for remote access to the FTP-server. By writing ftp:// at the beginning of the address.
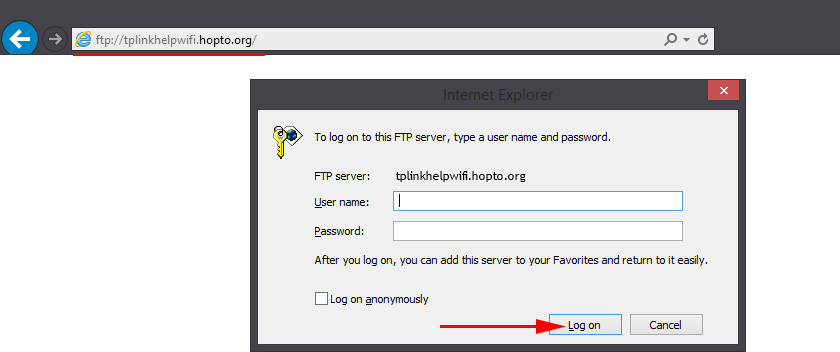
You can access the FTP server not only through a browser, but also through special FTP-clients. You can install them both on Windows and Mac OS computers and on mobile devices. In Windows I use FileZilla Client. You need to create a new connection and specify the host (server address), username and password. The thing is that through the browser you can only read files. You cannot copy files to the server, delete them or modify them through the browser. Even if you (in the account under which you log in) have the rights to do so. But you can perform any operations with files through the FTP client.
Account and folder settings for the FTP server on TP-LINK
These settings are not mandatory. And are needed only if you want to configure access for specific users, with different access rights.
To begin with, you can create several accounts. For example, a guest account, for which you can deny full access to the drive, but only to a specific folder, and only with certain permissions. Or, prohibit modifying files, but only read them.
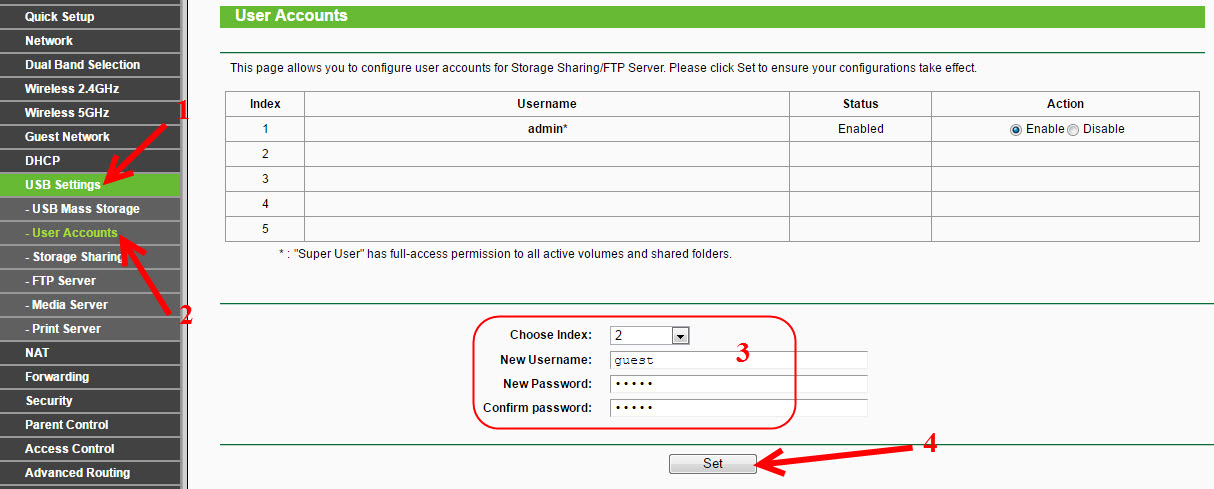
First we need to create a user. In the router settings, open the ” USB Settings” tab – “User Accounts“.
The default user will be admin*. To create a new user, fill in the fields below:
- Choose Index – select a number for the user.
- New Username – specify a name for the new user.
- And specify the password for this user twice.
Click on the “Set” button and the new user will appear in the table. You can also disable, delete or edit it there.
Next, go to the “FTP Server” tab again. This is the most confusing part. TP-LINK has made it all so complicated and not clear. You need to be some kind of a system administrator to figure it out.
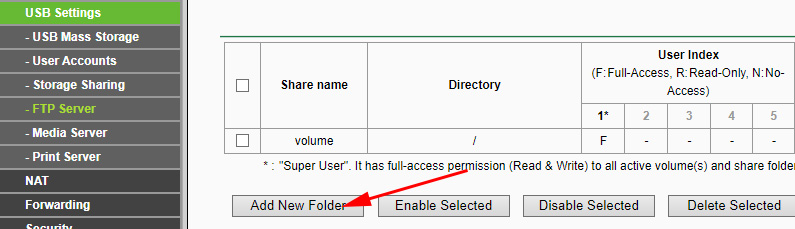
So, on the “FTP Server” tab we see a table where there is already one resource “volume” by default. This is access to the entire drive (the root folder of the drive). We can create another folder to which we want to allow access for example for a created user (user group), and with specific permissions. Or, we can change the access rights to the entire drive for the created account.
I’ll show you how to do this in a moment. Let’s first create another share. Click on the ” Add New Folder” button.
In the “Share Name ” field, enter the name of the folder. Click the Browse button.
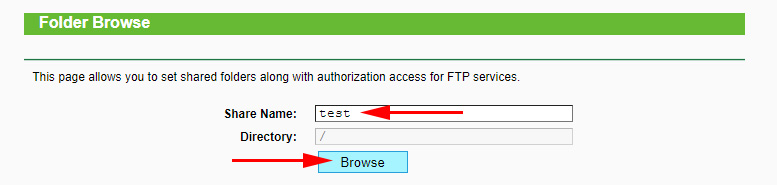
Select your drive and specify the directory you want to access. Note that the router will not let you select a folder that has a name that is NOT in English letters. You need to rename it first.
Once we have selected the directory, we can set access rights for the user we have created. Just in the table, opposite the user, set the desired access rights to this folder. There are three options: Full Access, Read Only, No-Access. I set read only. Click on the Apply button.

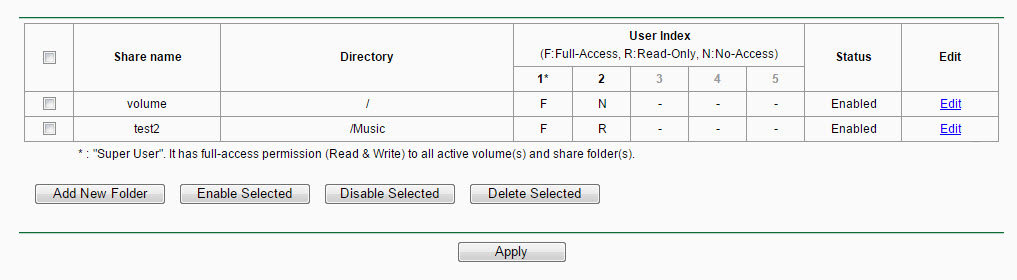
This folder will appear in a table where you can see the access rights for each account to a specific directory. You can change the permissions for each folder by clicking on the ” Edit” link next to it.
For example, in my screenshot below, the admin user (he is number 1) has access to both folders. To “volume” and “test2”. In the table are the letters F.
And the user “guest” (who is number 2) does not have access to the “volume” directory (to the root of the drive), but has access to the “test2” resource. And this is the “/Music” directory. So when we go to ftp://192.168.0.1 and specify the guest username and password for this account, we will only have access to the /Music directory (we will not be able to browse the entire drive). And this access will be read-only. That is, we won’t be able to delete files or create new ones.
It’s really hard to figure out. But if you understand how it all works, you can fine tune access to different directories and for different accounts.
Afterword
At first glance it’s very complicated and there are a lot of settings. But, if you don’t need all the permissions, directory access, etc. (which for home use is usually not necessary), then everything can be set up very quickly.
Everything works well and stable. Very convenient if you need to use common files on several devices on the network. And that these files would be not on one of the devices, but on a USB drive connected to the TP-LINK router.
Feel free to ask questions in the comments. Also, do not forget to share your experience and interesting tips on this topic. All the best!
 Two-Band Access Point TP-Link Eap320. Wi-Fi Business Solution
  Router TP-Link TL-WR940N (V3): Review and Reviews
  TP-Link TL-WR844N-ConNENENECTION, SETTING WI-FI, FIRMware, IPTV, Operating Mode
  Detailed Instructions for setting up the tp-Link Archer C6 Router