
Setting TP-Link Archer C24 and TP-Link Archer C54: Internet, Wi-Fi, Firmware, Repiter Mode
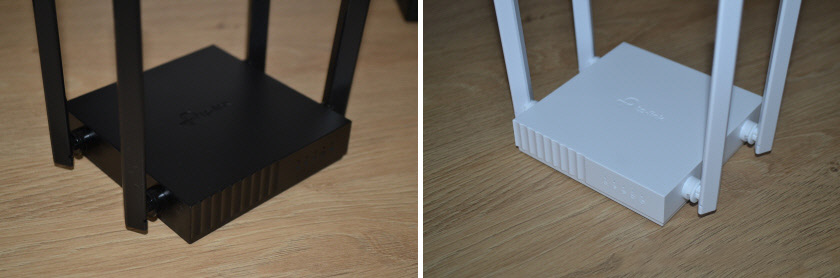
On this page you can read my detailed instructions on how to configure TP-Link Archer C24 and TP-Link Archer C54 routers. These are two almost identical routers, so I decided to show the connection and setup process in one article. The older C54 model differs from the C24 in that it has faster wireless speeds, a black case, and support for some technologies.
 You can read more about these routers in my reviews: Archer C24 and Archer C54. The web-interface (the page with settings) of these models is the same. It means that the process of setting up will not be different.
Before setting up I recommend you to pay attention to two things:
- If your Archer C24 or Archer C54 has already been configured, there have been attempts to configure it, or you have forgotten the password, it is advisable to do a reset. If it is new, only from the store, you don’t have to do it. To reset the settings you need to turn on the router, wait for about a minute, press the WPS/Reset button and hold it for about 5 seconds (you will see the indicators on the router turn off).
- You need to find out what type of internet connection your internet provider uses. And depending on the type of connection – the necessary settings (user name, password, server address). Usually this information is specified in the Internet connection contract.
Connection
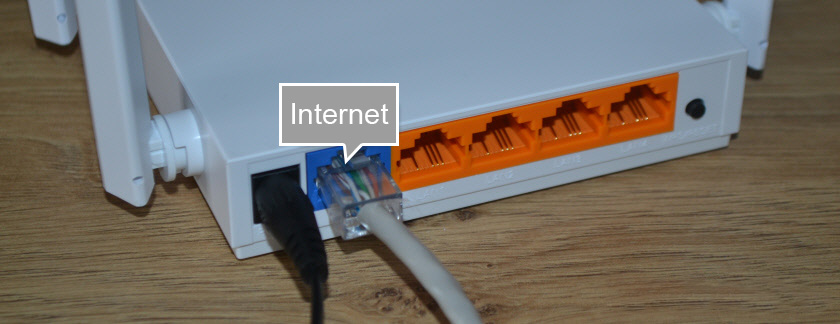
You need to turn on the router (connect the power adapter and plug it into a socket). Connect the Internet (network cable) that is laid in your house from the provider’s equipment or from ADSL modem to Archer C24/Archer C54 in the WAN-port. It is blue in color.
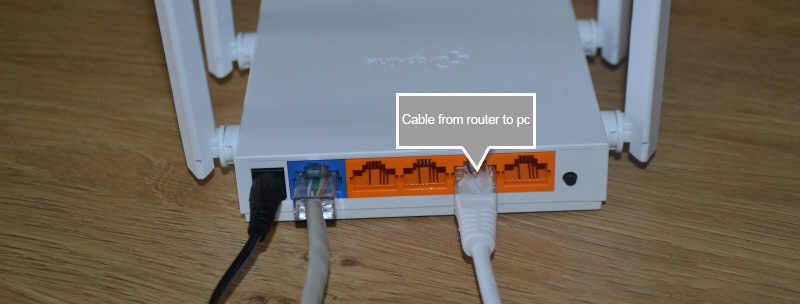
Next, you need to connect to the router from the device from which we will configure it. It can be a PC, laptop, phone, tablet. There are two options for connection:
- With the help of an Ethernet cable. It is included with the router. We plug one end into one of the LAN ports on the router, and the other end into the network card on the PC or laptop.
- By wi-fi. The router immediately after turning on gives out a Wi-Fi network. You can connect to it from any device: laptop, smartphone, tablet, etc. And from this device you can make settings. The factory name of the Wi-Fi network (SSID) and the Wi-Fi password can be found at the bottom of Archer C24 or Archer C54 on the sticker.
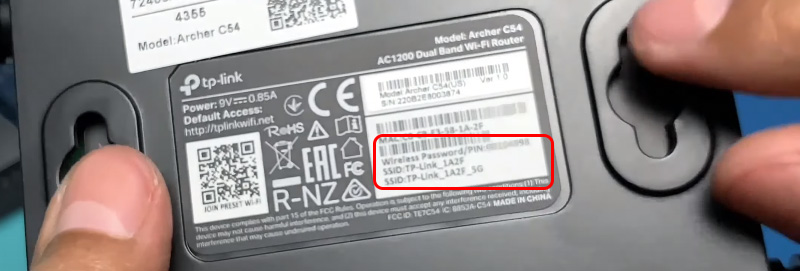 You just need to select this network on your device, enter the factory password and connect. I also noticed that on Archer C54 there is a QR code for connecting to the Wi-Fi network on the bottom of the sticker. Just point your smartphone camera at it and it will offer to connect to this network.
Entering the settings
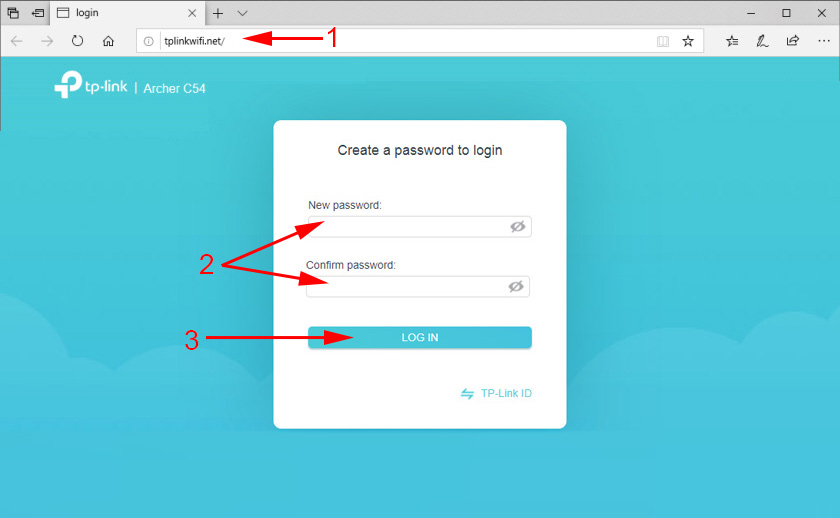
After connecting to the router on the connected device you need to launch the browser and go to http://tplinkwi-fi.net. Important! The address should be entered not in the search bar, but in the address bar of the browser.
The page of our router should open with a proposal to create an administrator password. This means that we have done everything correctly. We need to come up with a password and specify it twice. This is not a wi-fi password! It is a password that will protect the router settings page. Be sure to write it down somewhere. If you forget it, you won’t be able to enter the router settings and will have to do a reset.
If instead of the router page (which is on the screenshot above) appears an error, search results in a search engine or another page, then you have done something wrong. This is where these articles will come in handy: how to enter TP-Link router settings and tplinkwi-fi.net – enter router settings.
Quick setup of the Archer C24 and Archer C54 router
After clicking on the “Let’s get started” button, the quick setup wizard will open. With its help you can set all the necessary settings in just a few steps.
The first step is the time zone.

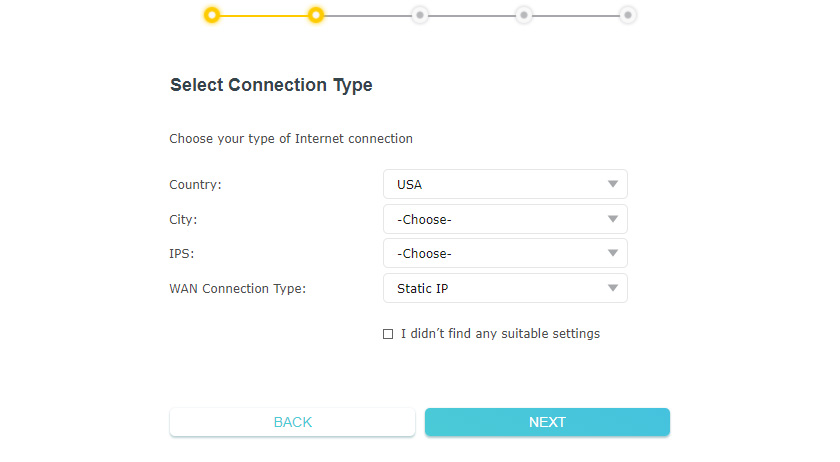
Then the router will offer you to choose a country, city, Internet provider and connection type. Choose. If your ISP is not in the list, check the box next to “Select connection type manually”.
If necessary, select the connection type manually.
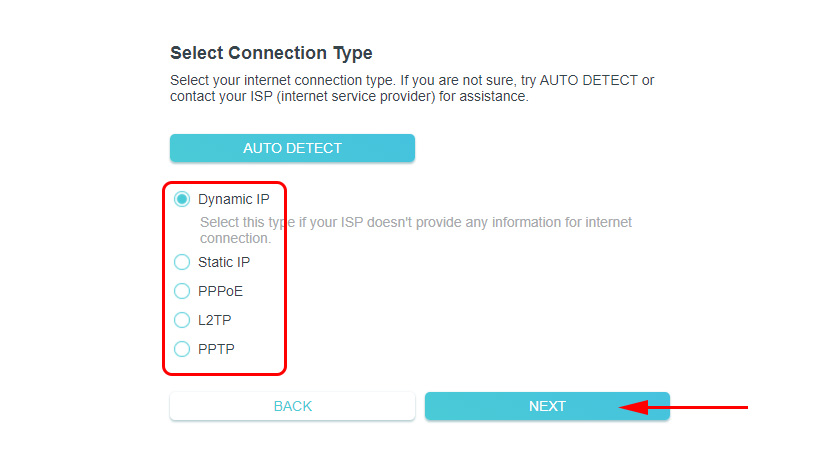
If you have a “Dynamic IP-address”, you will not need to enter any data after clicking on the “Next” button. If you have “Static IP-address”, you will need to specify IP-addresses (your ISP gives them to you). If PPPoE, you will need to specify the user name and password (they are also provided by your ISP). And if you have PPTP or L2TP, you will need to specify the server address in addition to the username and password.
For example: PPPoE settings:

Let me remind you that your username and password are given to you by your ISP. Note (on the screenshot above) that you can set IPTV settings there at once. Prescribe VLANs. If necessary.
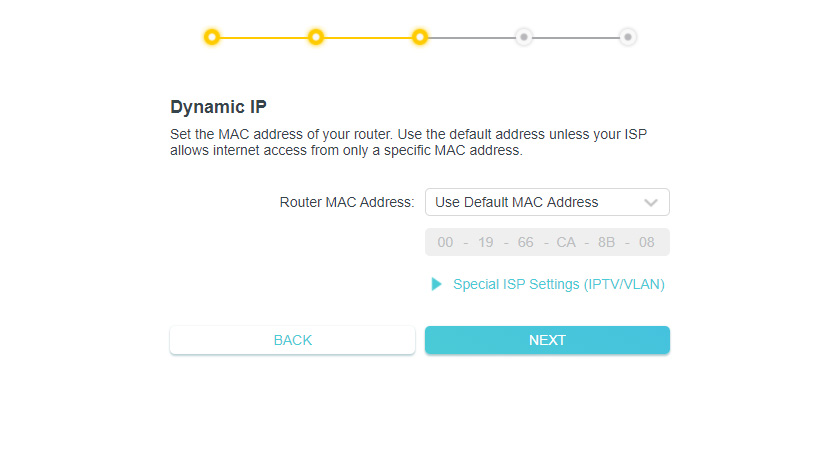
Since I have a connection type “Dynamic IP-address”, the router offers to change the MAC-address of the router. This should be done only if your ISP makes binding by MAC-address. In this case you need to either write down the MAC-address of the new router from your provider, or change the MAC-address of the router to the one to which the Internet is bound.
The next step is to configure the Wi-Fi network. Here everything is simple. Since the router is dual-band (it distributes Wi-Fi at 2.4 GHz and 5 GHz), you need to change the network name (SSID) in each band and set a password for each network. The password can be set as a single password. If necessary, you can disable the network in one of the bands.
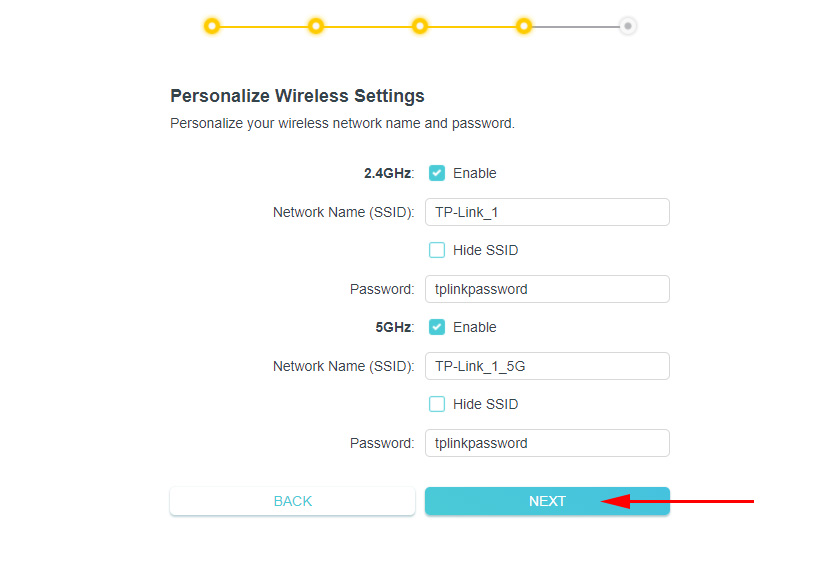
Click “Next”.
Wait for the wi-fi network to restart. Since we have changed the wi-fi settings, the connected devices will be disabled. You need to reconnect to the router’s Wi-Fi network.
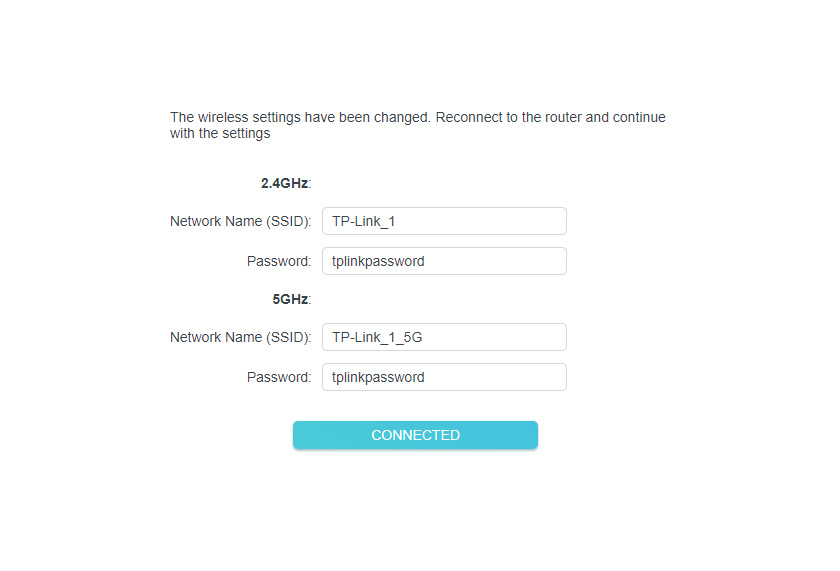
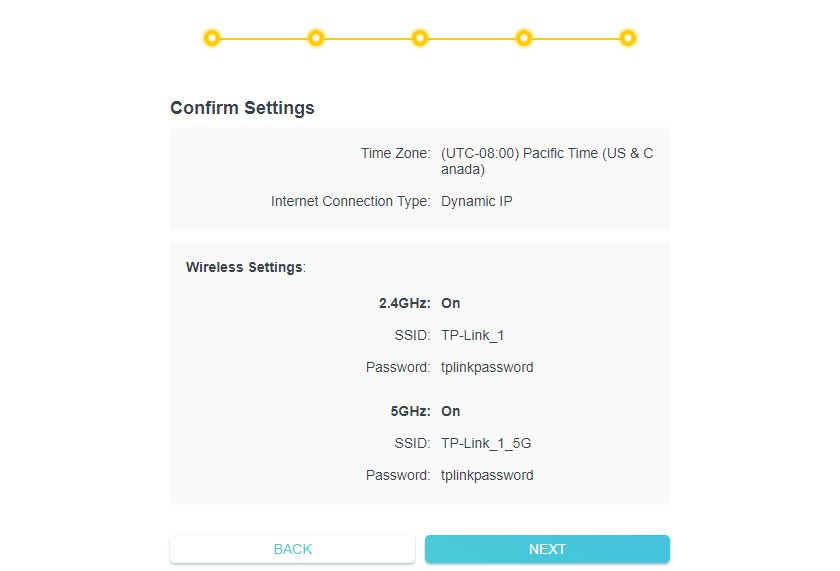
And if you reconnect to the router and click on the “Connected” button, you should see a message that the configuration is complete. Click on the “Finish” button and you will get to the main page with router settings.
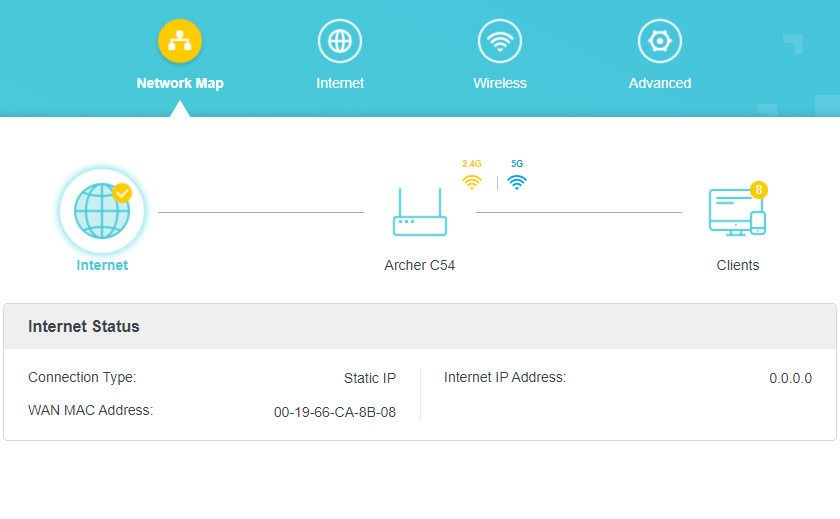
Here you can see the status of Internet connection (I have all Ok), connected devices (clients), or go to other sections to configure other functions.
Setting up the connection to the Internet (provider)
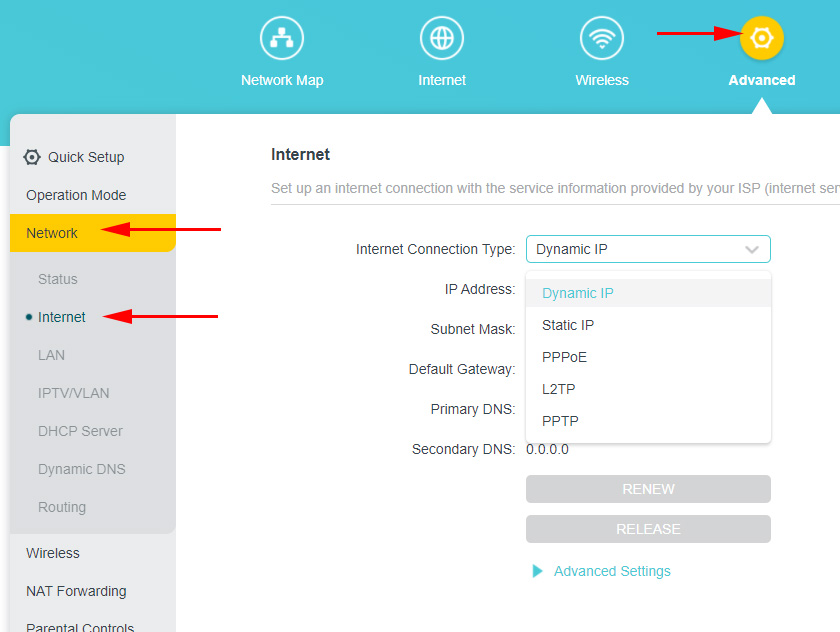
Go to “Advanced Settings” – “ Network “– “Internet”. There you can change the type of Internet connection and set the necessary parameters. If you set incorrect settings on this page, the Internet will not work through the router. What settings to set depends on your Internet provider. See the contract or call support.
Wi-Fi network settings
Wi-Fi settings are located in the section “Advanced settings” – “Wireless mode”. There you can change many settings for the network in each band (2.4 GHz and 5 GHz).
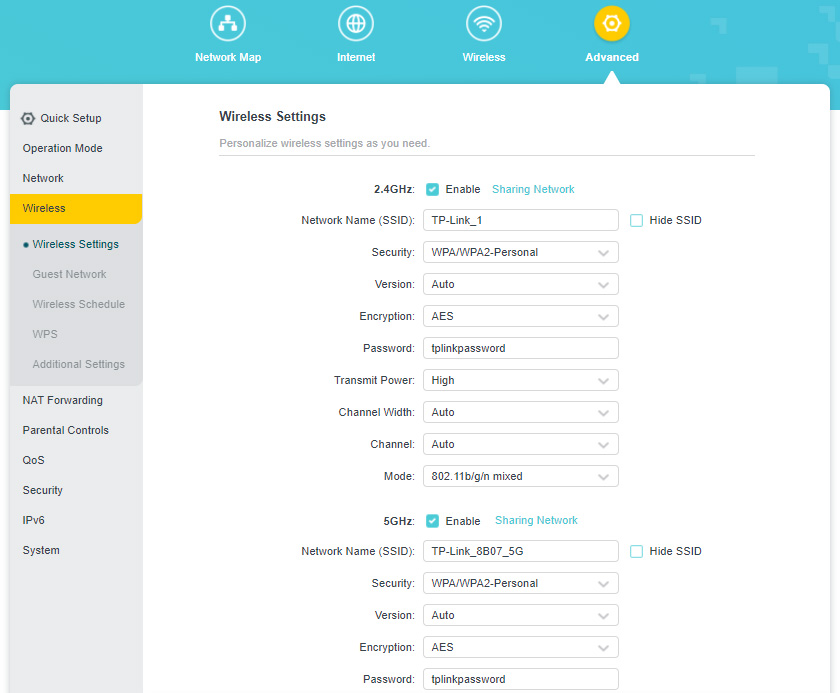
I recommend leaving all the default settings there (don’t change anything). You can only change the network name (SSID) and password. If you didn’t change them during the quick setup process.
Channel and channel width should be left on “Auto”. Protection and encryption are set correctly there by default. Network mode is better to leave “mixed b/g/n”. And if there are no old devices in the house that you will connect to the Wi-Fi network, you can set “802.11n only”.
IPTV/VLAN settings
These settings on Archer C24/C54 are located in the “Advanced Settings” – “Network” – “ IPTV/VLAN “ section. Turn on the “IPTV/VLAN” function and choose the mode: manual or bridge. If “Bridge”, you need to select the LAN-port to which you want to connect the IPTV set-top box. And if “Manual”, you need to specify VLAN IDs. You can get them from your Internet provider.
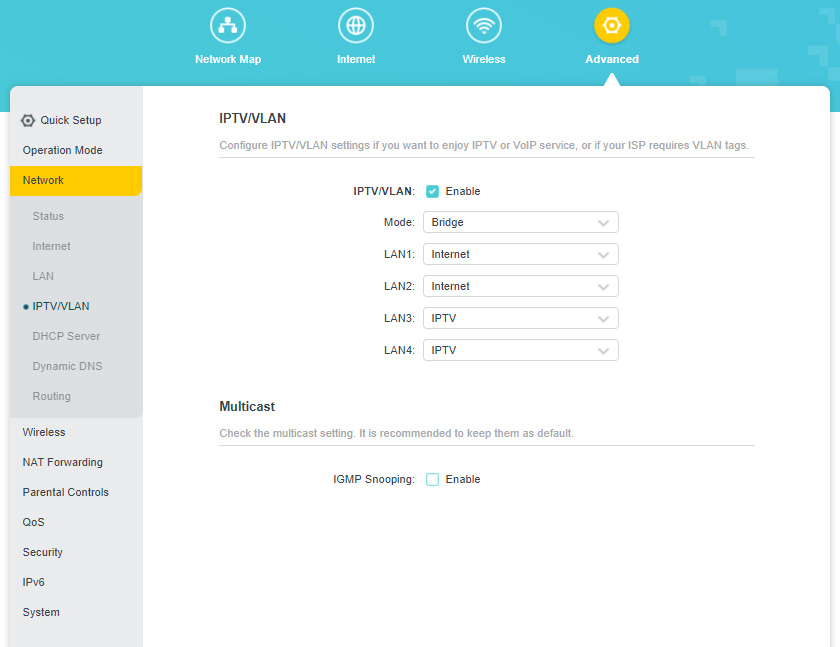
There you can also enable IGMP Snooping. More details in this article: IPTV setup on TP-Link routers.
Firmware update
To update TP-Link Archer C24 or TP-Link Archer C54 router firmware you should first download the firmware from TP-Link website.
Important! You can update the firmware only when you are connected to the router via a network cable.
Important! At the moment of writing this article there is only one hardware version of these routers – V1. There may be other hardware versions in the future. You can see it at the bottom of the case on the sticker. You should download firmware for your region and hardware version from TP-Link website (there may be a menu for selecting the hardware version).
- For Archer C24 – https://www.tp-link.com/uk/support/download/archer-c24/#Firmware.
- For Archer C54 – https://www.tp-link.com/uk/support/download/archer-c54/#Firmware.
Download the file with the latest firmware and save it to your computer. Open the archive and extract the firmware file from there (approximately with the following name: c54v1-up-noboot_2020-08-06_20.33.16.bin).
In the router settings go to “Advanced Settings” – “System” – “Firmware Update”. Click on the “Browse” button and select the firmware file (with .bin extension). Press the “Update” button.
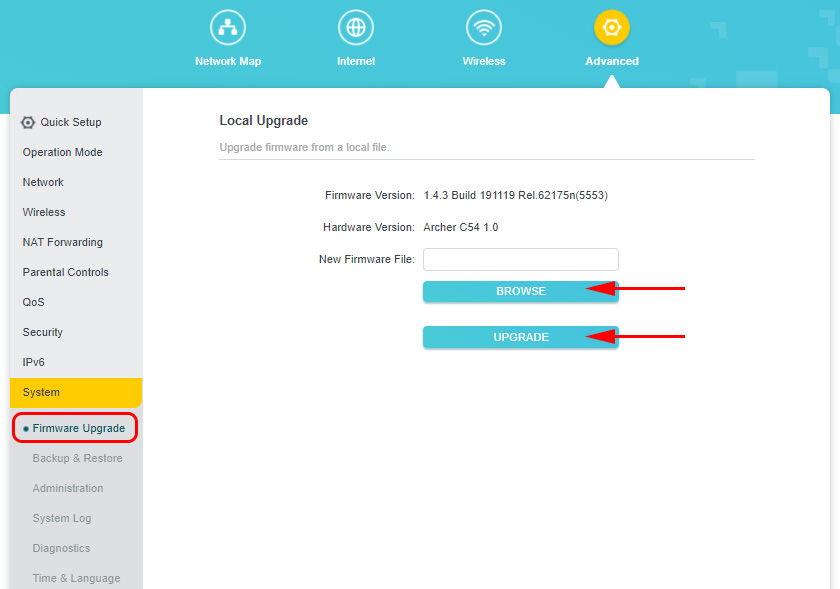
Do not touch or disable anything. After the firmware update is completed, the router will be rebooted.
Configuring in repeater or access point mode
TP-Link Archer C54 and the younger model Archer C24 can work in the mode of a Wi-Fi signal booster or access point. There is a function in the settings to change the router’s operating mode.
For example, to use one of these routers as a repeater you need to go to “Advanced Settings” – “Operating Mode” in the web-interface. Select the “Wi-Fi signal booster mode” and save the settings.

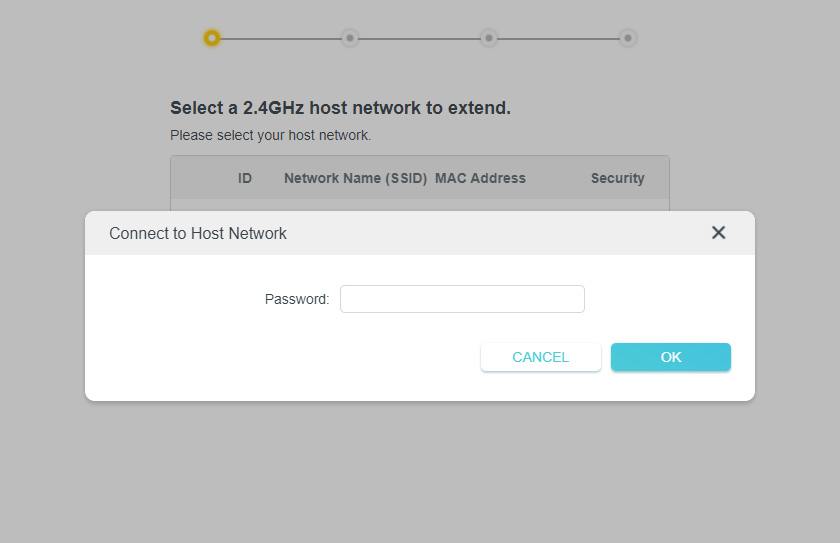
After rebooting the router again go to the settings at tplinkwi-fi.net and we are immediately greeted by the wizard of quick configuration of the router in Wi-Fi signal booster mode.
You need to select an existing Wi-Fi network whose signal you want to amplify and enter its password. First you can connect to a network in the 2.4 GHz range, and then in the 5 GHz range. If, for example, you want to amplify the network only in the 2.4 GHz band, you can skip connecting to the 5 GHz band. And vice versa.
The setup is very simple. I think there shouldn’t be any problems. To return the router to the normal mode of operation you need to either change the mode in the settings, or do a reset (Reset).
If you can’t configure something – ask in comments.
 Setting up the tp-link AC1900 Touch P5 Router
  TP-Link EAP245 AC1750 Access Point. Wi-Fi Solution for Restaurants, Hotels, Shops
  How to Change the Wi-Fi Password on the TP-Link M5250 and M5350 Router
  How to Complete a Full Reset on the TP-Link Router? Restore Factory Settings