
How to Flash The TP-Link Tl-Wr940N and TP-Link TL-WR941ND Router
I have written more than one article about TP-Link router firmware. Most of them are instructions for specific router models. And of course, as soon as I had an opportunity, I decided to write an instruction on flashing TP-Link TL-WR940N (TL-WR941ND) router. I wrote about the configuration of these two models in this article. The model is very popular, which means that the article on updating the firmware should be useful to many.
The process of updating the software on the TL-WR940N router is practically no different from updating other TP-Link models. Everything is the same, first you need to download the firmware file for a certain model and hardware version, connect the router via cable, go to the settings and update the software. If you are interested in the question whether you need to update the firmware, I think you should. However, many people do it only when there are some problems with the router.
Your router TL-WR940N or TL-WR941ND can be either white or black (starting with hardware version v3, and v6 for 941ND). I have the newer version, in the black case. There is no difference at all.
Firmware download for TP-Link TL-WR940N and TL-WR941ND
To find out what firmware to download, you need to know the hardware version of the router. It is indicated at the bottom of the device on the sticker. On my TL-WR940N, it looks like this:
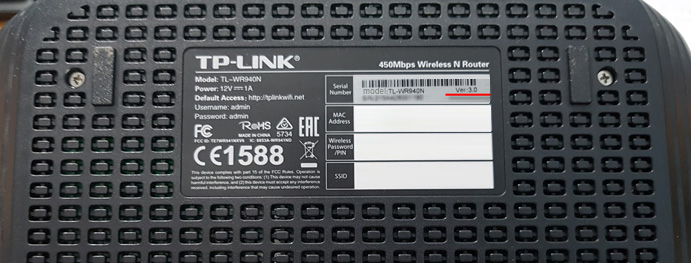
As you can see, I have Ver: 3.0. Remember the version of your router, you will need to specify it on the website. If you have, for example, Ver: 2.3, it means that you have the second hardware version (Ver: 2).
Here are the links to download firmware from the official site:
- For TL-WR940N – https://www.tp-link.com/en/support/download/tl-wr940n/#Firmware.
- For TL-WR941ND – https://www.tp-link.com/en/support/download/tl-wr941nd/v6/#Firmware.
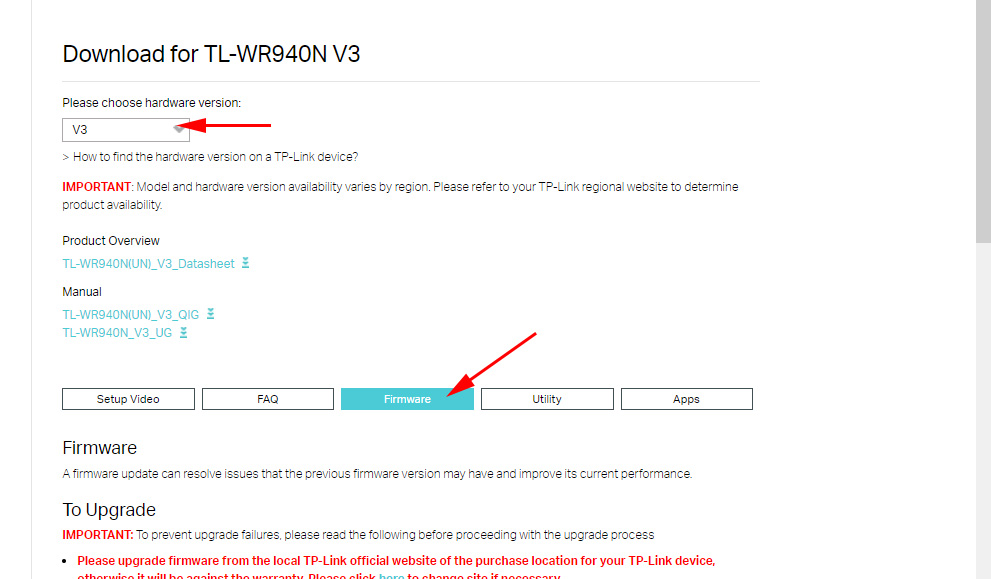
Follow the link (depending on what model you have) and choose the hardware version of your router. Go to the “Firmware” tab, or “Firmware”.
Scroll down the page, and download the firmware you need. There will be all the information on changes, release date, control panel language, etc. Save the archive with the firmware to your computer.
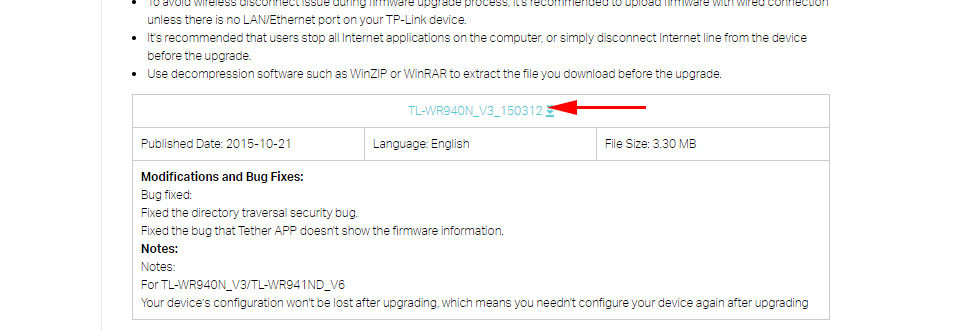
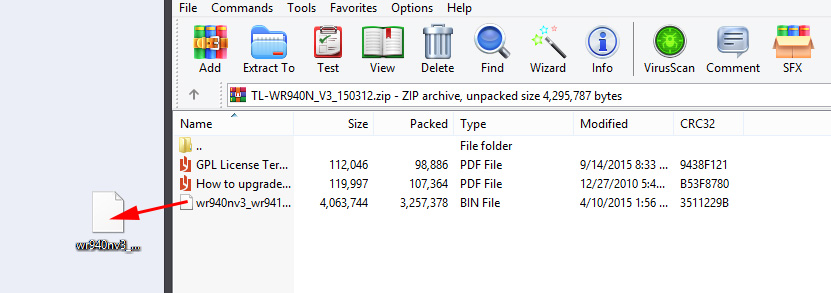
Open the downloaded archive and extract the firmware file from it. It is in .bin format.
Connecting the router
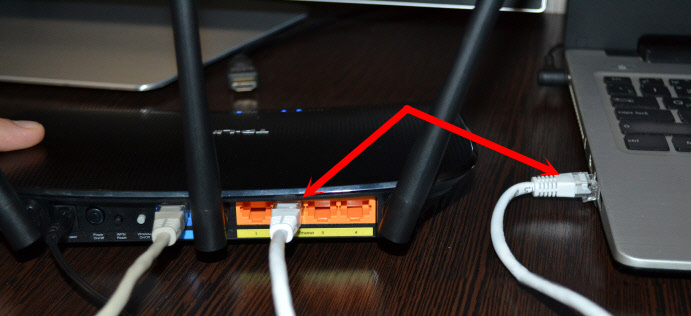
You should update the software when you connect to the router via a network cable. It is dangerous to flash via Wi-Fi. Therefore, take the network cable that comes with the router and use it to connect the router to your computer or laptop.
Everything is ready. Let’s continue.
Updating TL-WR940N (TL-WR941ND) firmware via control panel
On the computer open a browser and enter the router settings at tplinkwi-fi.net, 192.168.1.1, or 192.168.0.1. The router itself has the address to enter the settings.
The authorization page will appear. Specify login and password. The factory admin and admin. But you may have changed them. This is not the password from wi-fi, but from the control panel of the router.

Next, go to the System Tools tab – Firmware Upgrade. Click on the “Select File” button, open the firmware file and click on the ” Upgrade” button to start the upgrade.
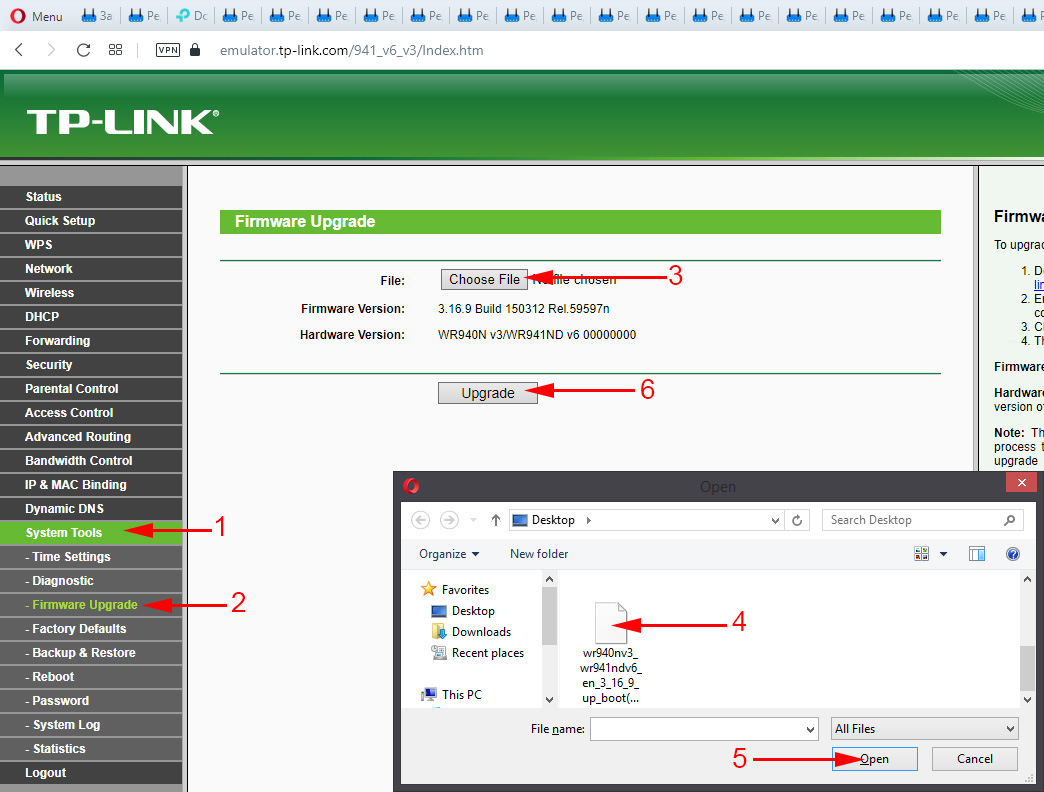
This will start the software upgrade process.
After the update is complete, the settings page should refresh and you should see the control panel. You can continue to use the router.
If you have any problems with TP-Link TL-WR941ND firmware, please leave your questions in the comments.
 Router TP-Link TL-WR940N (V3): Review and Reviews
  How to Connect TP-Link TL-WR740N (TL-WR741ND)
  TP-Link Archer a6: Mu-Mimo Router with Gigabit Ports
  TP-Link RE650 Review and Setting-A PowerFul, Two-Band Wi-Fi Signal