
How to Change the Password for a Wi-Fi Router TP-Link TL-WR841N?

In this small instruction we will consider the process of changing the password on the wi-fi router Tp-link TL-WR841N. We will change the Wi-Fi network password. That is, the password that you need to specify to connect to your wireless network.
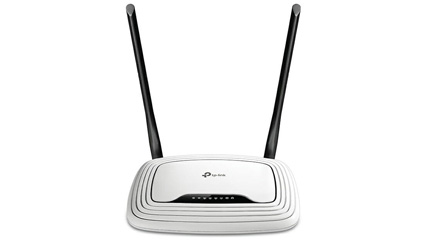
I decided to prepare a separate article just for Tp-link TL-WR841N. Since this router is very popular and I think this article will be useful for many people.
As for changing the password to the Wi-Fi network, there is nothing complicated about it. If you even have a master set up the router and put the password, then most likely you will have to change it. There are different reasons: someone will connect to your network without your knowledge, or you, for example, give the password to your neighbor’s Wi-Fi, and then change your mind. In any case, just change the password on the wi-fi router Tp-link TL-WR841N and no one will be able to connect to your Wi-Fi network.
If you have forgotten your password, you can try to remember it. I’ve already written how to view the password in Tp-Link router settings.
Tp-link TL-WR841N: changing the password for Wi-Fi network
The first thing to do is to go into the settings of our Tp-link TL-WR841N. Connect to the router, by wi-fi, or by cable. Open your browser and go to 192.168.1.1. Specify your password and username. If you haven’t changed them, they are admin and admin. 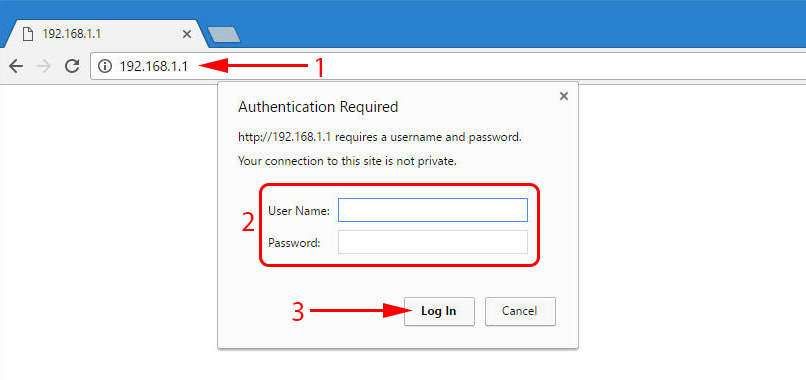 If you do everything correctly, the page with router settings will appear. In the settings go to the Wireless tab – Wireless Security. Select WPA/WPA2 – Personal (Recommended) and in the PSK Password field specify the password that will be used to connect to your Wi-Fi network. The password must be at least 8 characters long. In the Version and Encryption menu leave Automatic. To save, click Save.
 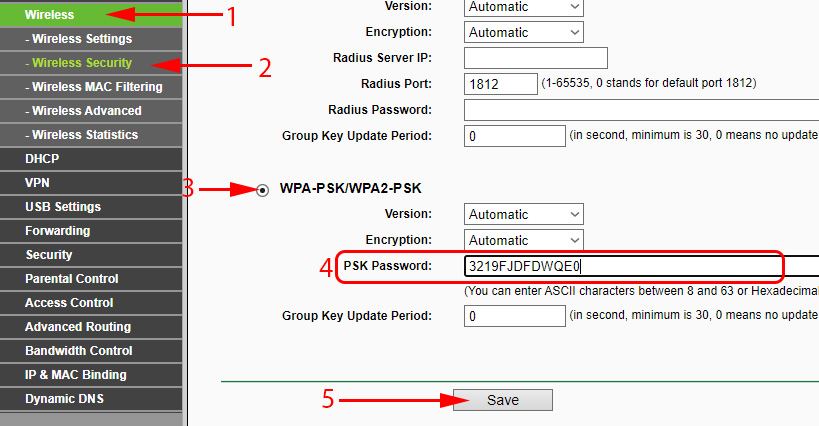 After saving, you need to reboot the router. All devices that were connected to the Tp-link TL-WR841N router via wi-fi will not automatically connect to the network. I wrote more about Wi-Fi security in this article: /setting-up-security-for-wi-fi-fi-networks/how-to-protect-the-wi-fi-network-with-a-password/. We need to do this manually with the new password we just set. If your computer has problems connecting to the network after changing the password, e.g. you get the error “The network settings saved on this computer do not meet the requirements of this network”, then you need to delete the connection to your wi-fi network and reconnect with the new password. See instructions on how to delete Wi-Fi network in Windows 7. And in Windows 10 you need to “forget network”.
 TP-Link RE650 Review and Setting-A PowerFul, Two-Band Wi-Fi Signal
  Comparison of Wi-Fi Routers: TP-Link Archer C20 and Xiaomi Mi Wi-Fi Router 3
  How to Connect and Configure a Wi-Fi Router TP-Link Archer C2300?
  TP-Link TL-WN781ND-Setting and Installing the Driver