
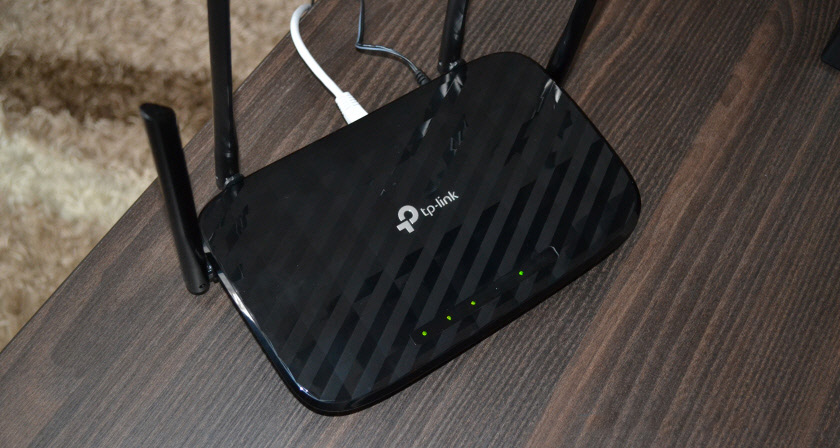
Detailed Instructions for setting up the tp-Link Archer C6 Router
I have already published a review on TP-Link Archer C6, where I told you about the technical specifications and functionality of this router. There you can also see photos and read user reviews. But since you’ve already opened the page with Archer C6 setup instructions, you’ve probably purchased this router and want to configure it. Or you have encountered some problems while configuring it and now you are trying to solve them.
This post will be fully devoted to configuring TP-Link Archer C6. I’ll try to show and tell you in detail how to connect the router correctly, open its web-interface (page with settings) and set basic parameters. With the help of the Quick Setup Wizard it is very easy to do it. We only need to set the router’s password, set the Internet connection parameters and Wi-Fi network parameters. In most cases, these settings are sufficient for normal operation of the router.
 Let’s get straight to the point. If the router has already been configured, you changed some parameters in it and saved them, then I recommend that you immediately perform a factory reset. To do this we’ll need something sharp (paper clip, toothpick). Turn on Archer C6 and wait for it to boot up. Then press the Reset button and hold it for about 10 seconds. All indicators will go out and the router will start rebooting. The button can be released.
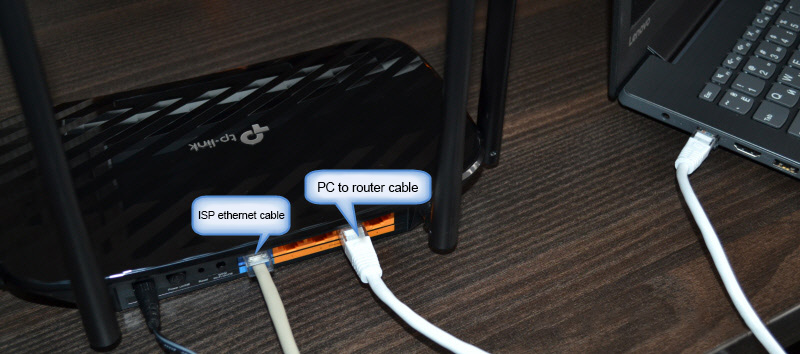
Connect the Internet (cable from the provider or modem) to the blue WAN-port Internet (see the photo below). To configure it, you need to connect to the router from some device: PC, laptop, tablet, smartphone.
Two options for connection:
- If you have a desktop computer, or a laptop (with a network card), it is better to connect using a network cable, which can be found in the set with the router.
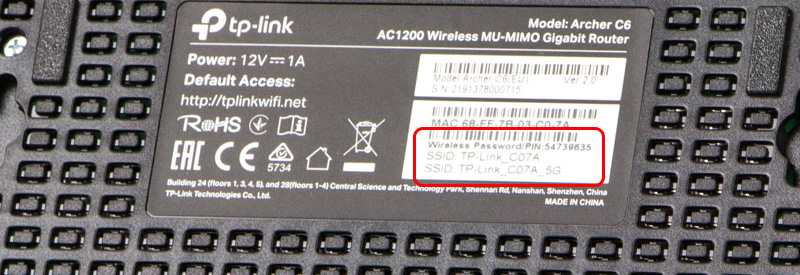
- When there is no possibility to connect via cable, we connect via Wi-Fi (to the network in the range of 2.4 GHz, or 5 GHz). The factory network name (SSID) and factory password are indicated on the sticker on the bottom of the Archer C6.
 Simply select the network on the device with the name on the router, enter the factory password and connect. If you plan to configure the router from your phone or tablet, it might be more convenient to do it not through the browser, but through the TP-Link Tether proprietary application.
Entering TP-Link Archer C6 web-interface and quick configuration
To open the settings of the Archer C6 router, you need to launch any browser on your device (which is connected to this router) and go to tplinkwi-fi.net, or 192.168.0.1. You can read more about it in the article tplinkwi-fi.net – entering router settings, or how to enter TP-Link settings. The address should be entered in the address bar, not in the search bar, otherwise the page of the search engine will open instead of the router page. If you can not open the router settings, then look at this article.
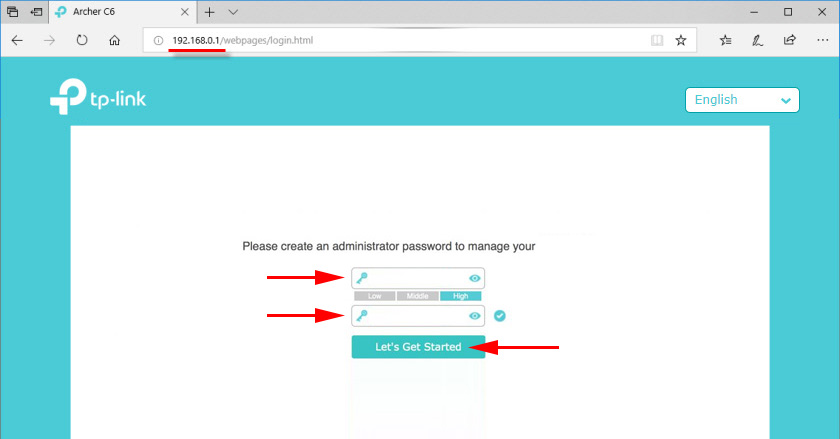
You should see a page where you need to set the router password (administrator password). This password will need to be entered every time you enter TP-Link Archer C6 settings. You need to think up a password, specify it in the appropriate field (2 times) and click on the “Proceed to work” button.
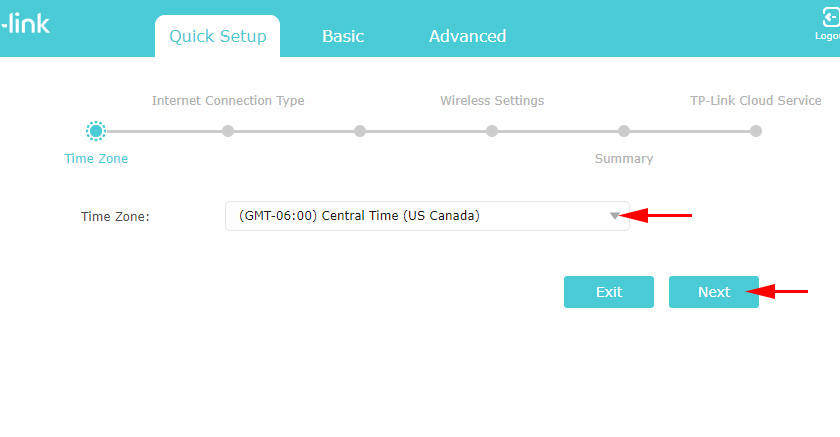
Set the time zone.
Next you need to configure the Internet connection. The usual menu will open, where you need to select the type of Internet connection. Very often users do not know what type of connection their provider uses. If you are among them, then be sure to find out from the support of the provider, or look on their website.
If you have a “Dynamic IP-address”, you will not need to enter additional parameters (if there is no MAC-address binding). And if your Internet provider uses PPPoE, L2TP, PPTP, you will need to specify the username and password (as well as the server address for L2TP and PPTP) to connect to the Internet. This information can be specified in the Internet connection contract.
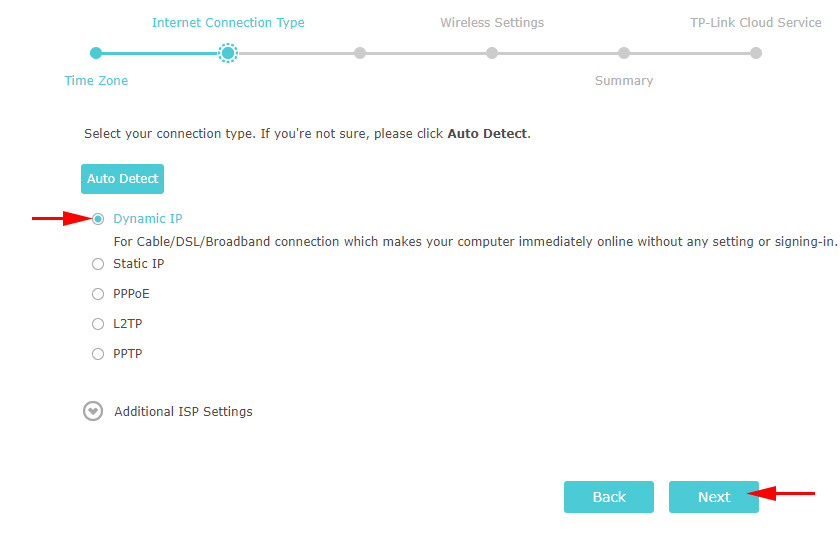
In case of “Dynamic IP address”, the router will ask if you want to clone the MAC address. It depends on your ISP: whether they do the binding or not.

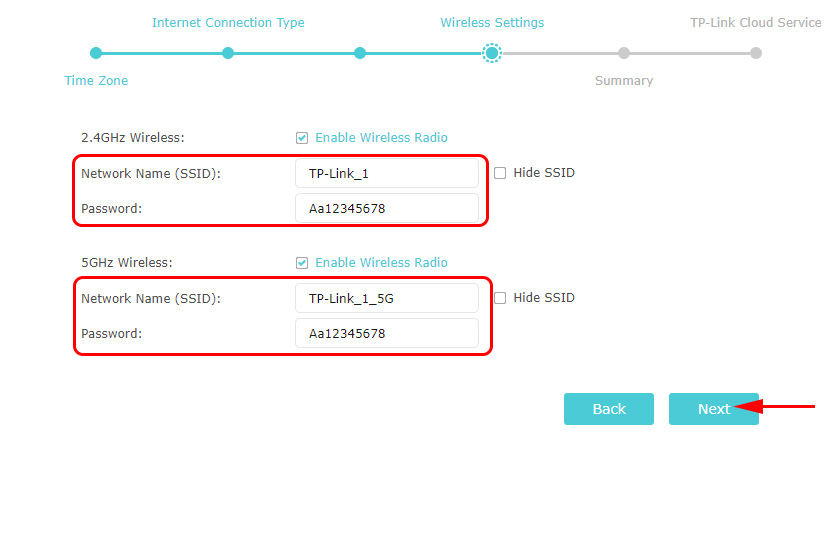
Next we have Wi-Fi network configuration. Here everything is even simpler. You need to change the network name ( SSID) for two networks (one in the 2.4 GHz range, the other in the 5 GHz range) and change the password. It is desirable to write down the password somewhere and do not forget it. Click “Next”.
Check all the settings and click “Save”.
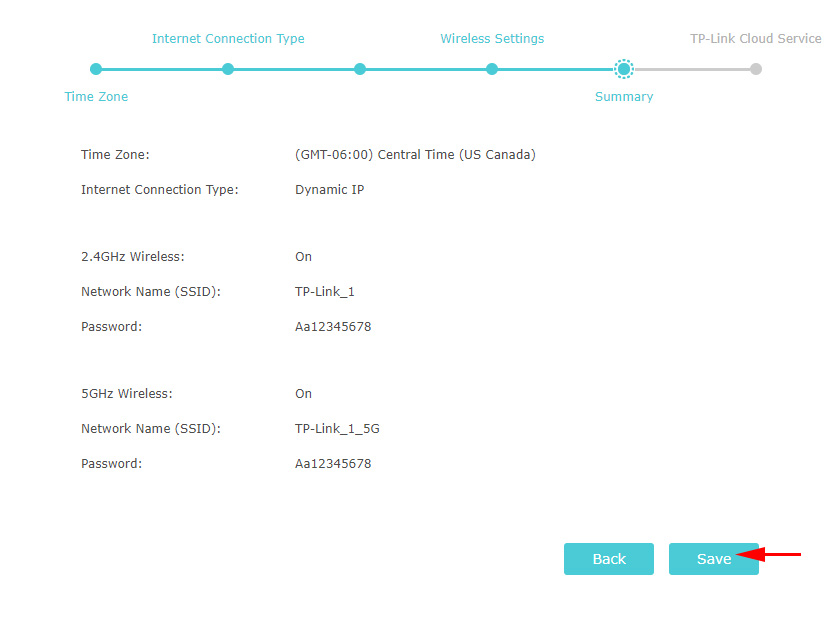
The process of saving the settings will start. You need to wait a bit.
If you connected to the router via wi-fi, you need to reconnect, as we have changed the network name and password.
If the router is connected to the Internet, then the router setup is successfully completed. If the Internet connection error appears, you can change the parameters of connection to the provider in the “Network” – “Internet” section on the “Advanced settings” tab in the web-interface.

The network map will open. You may need to go to 192.168.0.1, or tplinkwi-fi.net manually.
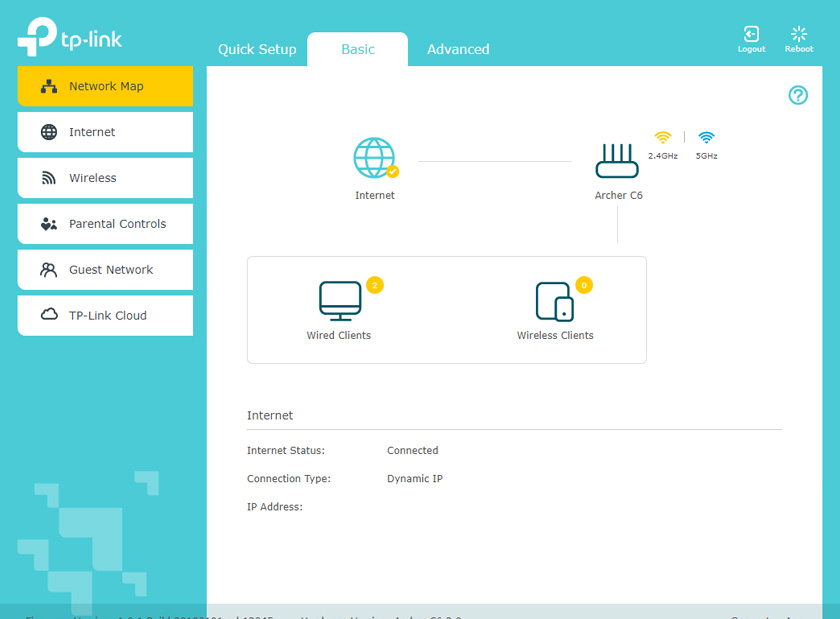
In the web interface there is an opportunity to configure additional features of the router. The basic settings are in the “Basic Setup” section, and the advanced settings are in the “Advanced Settings” section.
I’m not going to tell you once again about setting up IPTV, guest Wi-Fi network, etc., as we have separate instructions on how to configure these features on our site. You can find them via site search, or in the TP-Link category.
Leave your reviews about TP-Link Archer C6 and ask questions!
 TP-Link Archer a6: Mu-Mimo Router with Gigabit Ports
  TP-Link TL-WN781ND-Setting and Installing the Driver
  Smart Rosettes TP-Link HS110 and TP-Link HS100. What is it and How do the Work?
 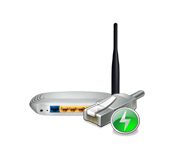 How to Connect TP-Link TL-WR740N (TL-WR741ND)