
Tenda F6 – Review and Setting Up Wireless Router
Today I want to introduce you to the Tenda F6 router. A very interesting model primarily for those who are looking for a functional and beautiful, but inexpensive router for an apartment, or a small house. In the description on one of the sites I read that the model F6 is designed for urban apartments. Perhaps it is because of the powerful Wi-Fi antennas. Tenda F6 has some interesting features, which I will talk about in this review. Let’s look at the appearance and characteristics of this model. And I will also show you how to connect and configure this router.
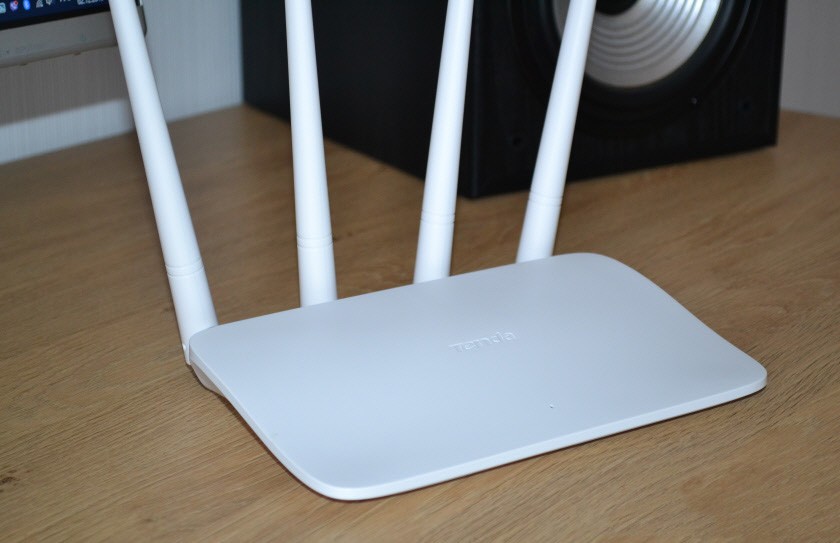
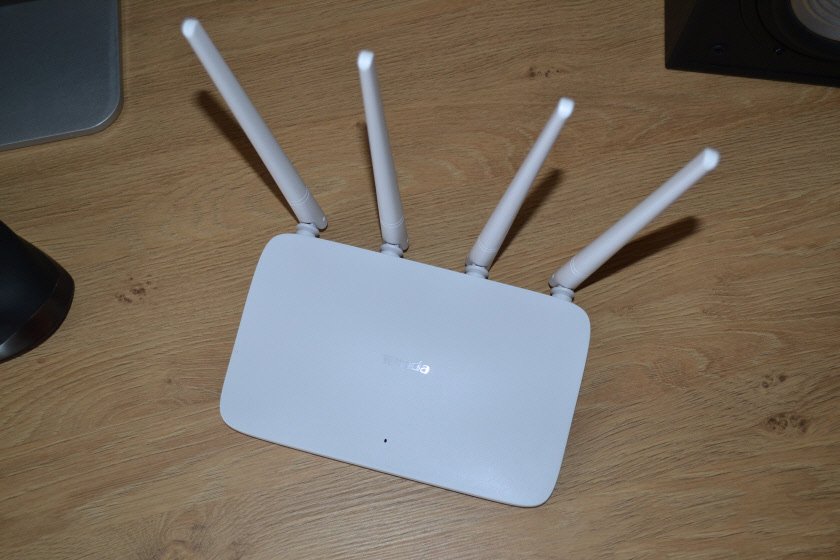
I already unpacked the router and connected it and did some setup and testing. I really liked the look of it. The design of the case is very classy. The white color looks great. Good functionality and simple control panel (web interface) with the ability to change the language. No problems with the configuration. Everything is clear and accessible. There is a quick setup guide in the package. Thanks to the powerful antennas, you will have no problem with the Wi-Fi coverage of the Tenda F6. Four antennas of 5dBi give a stable and strong signal. Let’s take a closer look at the appearance and specifications.
Review of the Tenda F6: package, case, specifications
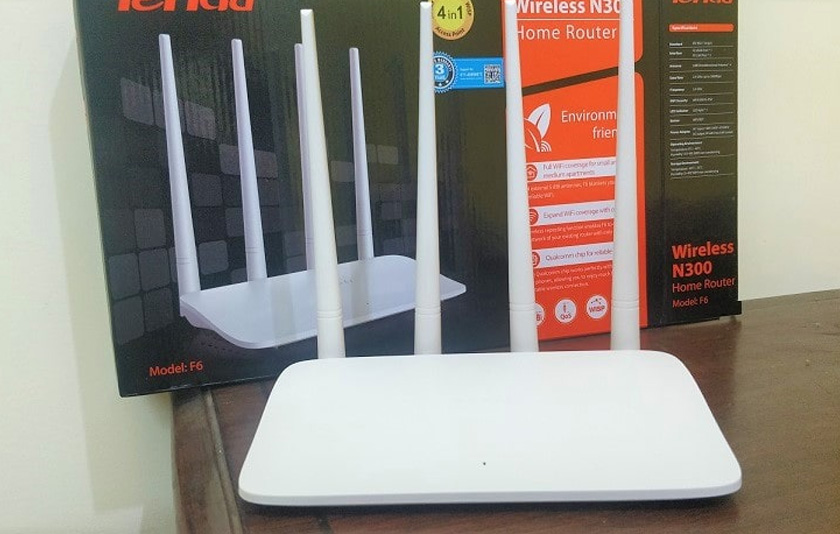
The packaging is in the style of the Tenda company, on which is printed the photo of the router and all the necessary information. Immediately on the box are the main features and capabilities of the router. There is a sticker with the warranty period (two years!) and all the contacts you need to contact customer support.
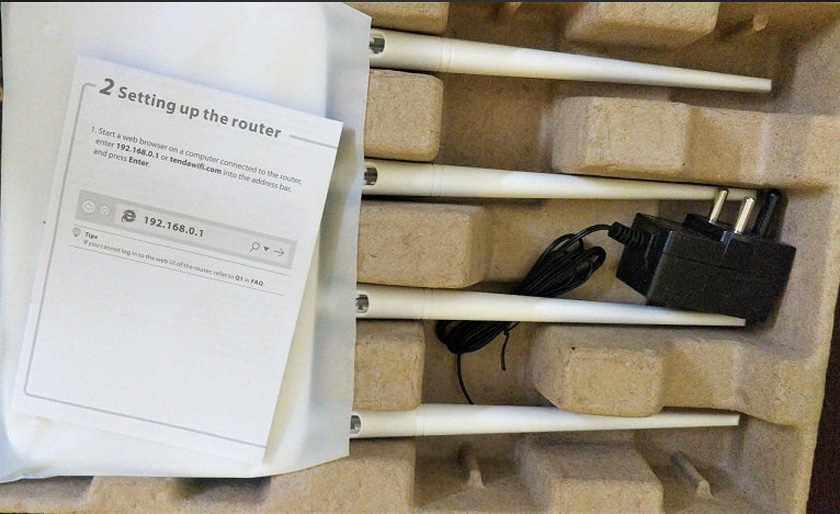
Everything inside the box is neatly folded and protected from damage.
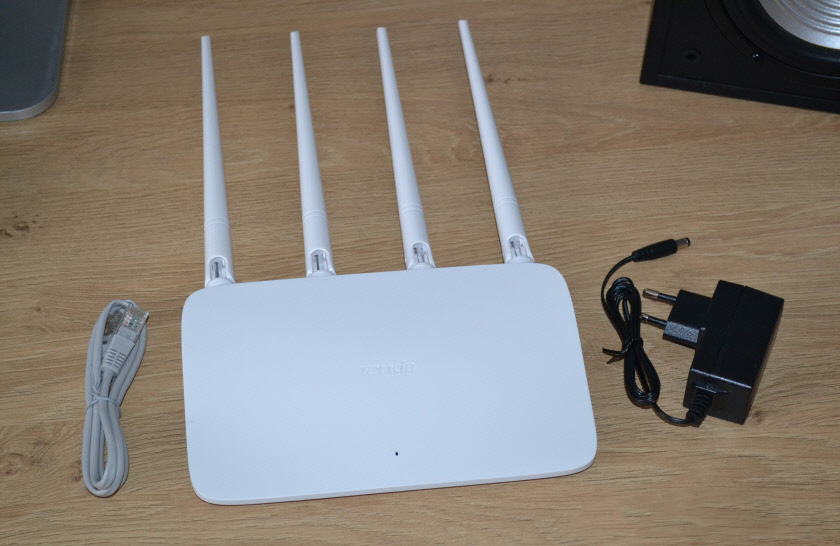
The package is standard: the Tenda F6 router itself, power adapter, power cord, documentation
.
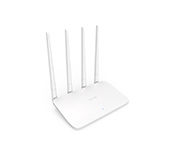
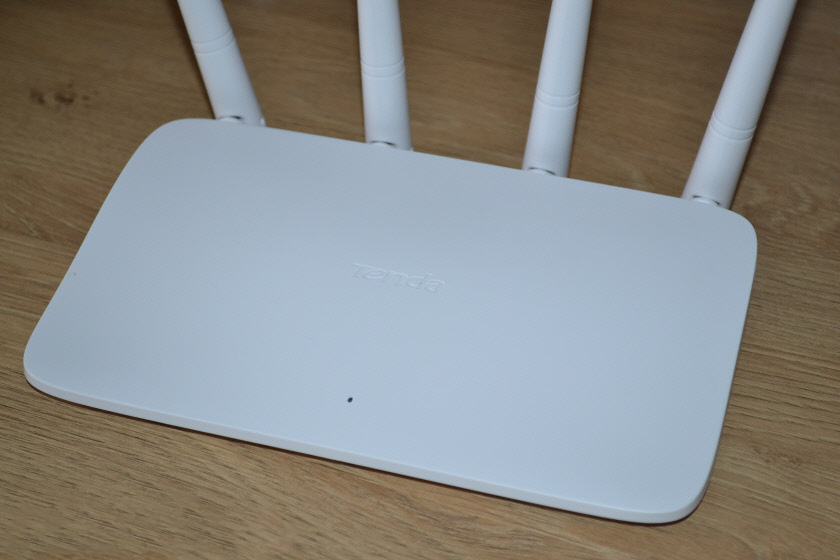
The router’s enclosure is very tightly assembled in two parts, which are made of white plastic. Only the top part is matte, and the bottom part is more glossy, sort of. Nice and pleasant plastic, no extraneous odor. Interesting, curved shape of the case. In the white color it all looks very cool and stylish.
<img class=”white”.
The front panel features one indicator (lights/flashes blue) and the Tenda F6 logo.
The antennas are fixed, big and powerful (at 5dBi). Really liked that they lock tightly in any position and don’t dangle.
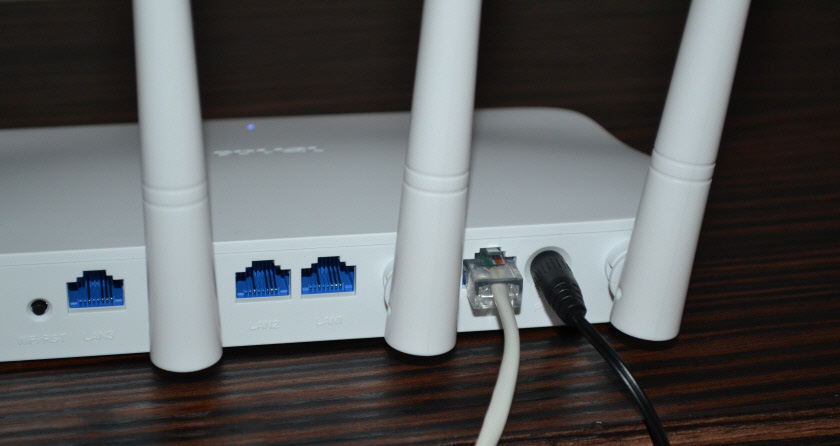
Buttons (more specifically the button) and ports are on the back. There is a wi-fi/RST button (hold pressed for 1-3 seconds – turn Wi-Fi network on/off. Hold for about 8 seconds – reset to factory settings). 3 LAN-ports, 1 WAN-port, and connector for power adapter.

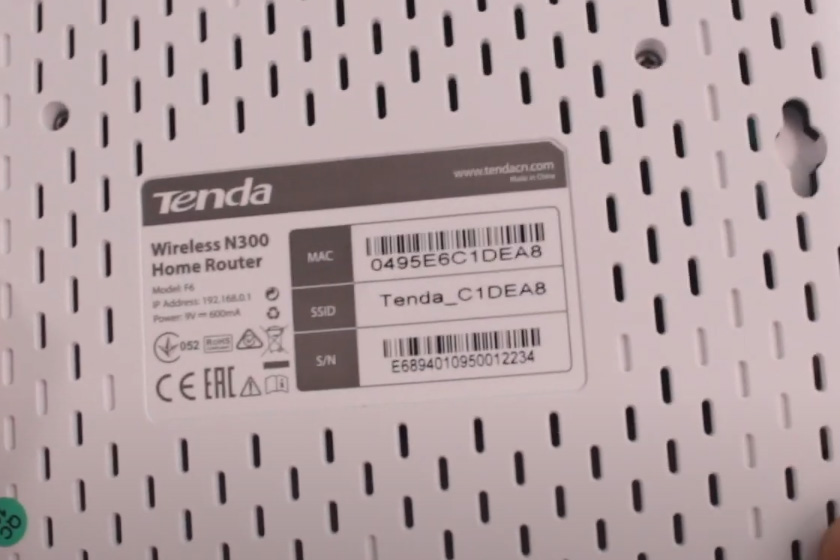
There are holes on the bottom for ventilation, and holes that allow you to hang the router on the wall. There’s also a sticker with factory information.
The Tenda F6 runs on a chip from Qualcomm. It provides a fast and stable connection. The wireless speed is up to 300 Mbps. It is a N300 standard (802.11b/g/n) router. It has no support for the 5 GHz band, only 2.4 GHz. And there is no support for IPTV. So if you want 5 GHz band and/or IPTV support, you can look at the more expensive models in the Tenda lineup. The WAN and LAN ports work at speeds up to 100 Mbps.
I have the ability to set up the WAN and LAN ports at up to 100 Mbps.
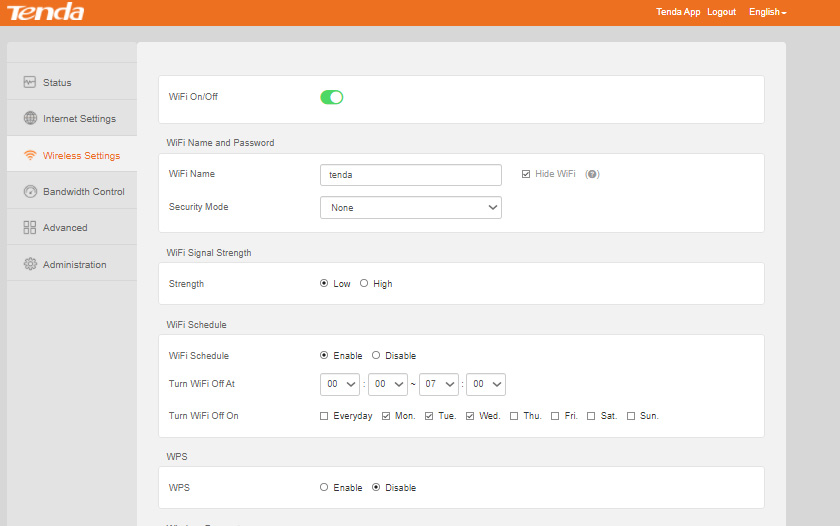
There is an option to set the Wi-Fi network schedule. The router will automatically turn on and off the Wi-Fi network. It also supports WISP. You can set up the router in repeater mode, to enhance the existing Wi-Fi network (about the setting I wrote in this article: repeater mode (repeater, WDS bridge) on Tenda router). There is a QoS (bandwidth management) function.
.
Tenda F6 Wi-Fi router setup
.
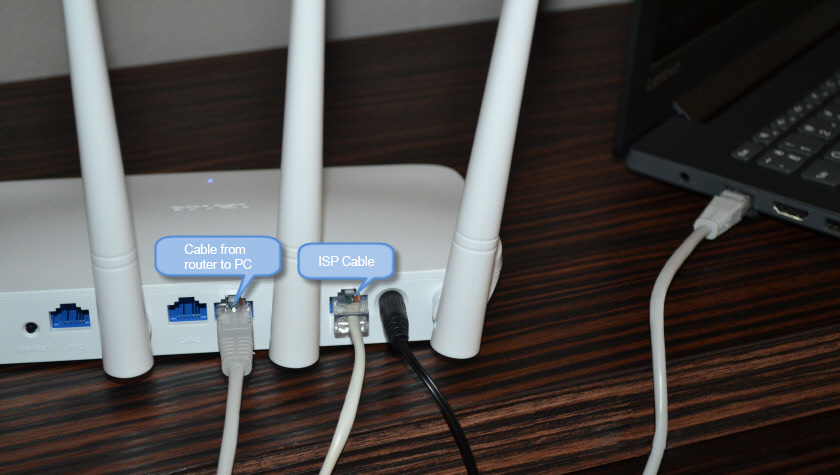
The setup process is easy. But first you need to connect the internet and connect to the router itself. Internet (cable from ISP, modem) connect to the WAN-port. Turn on the power of the router.
.
Furthermore, you need to connect the device to the router from which you are going to do the setup. The best way to do that is with a PC or laptop. And the best way to do that is with a network cable.
If you don’t have a computer, or can’t connect it with a network cable, then connect to the router via the Wi-Fi network. The factory name (SSID) is on the sticker on the bottom. The network is open, without a password. Just select the network and connect to it.

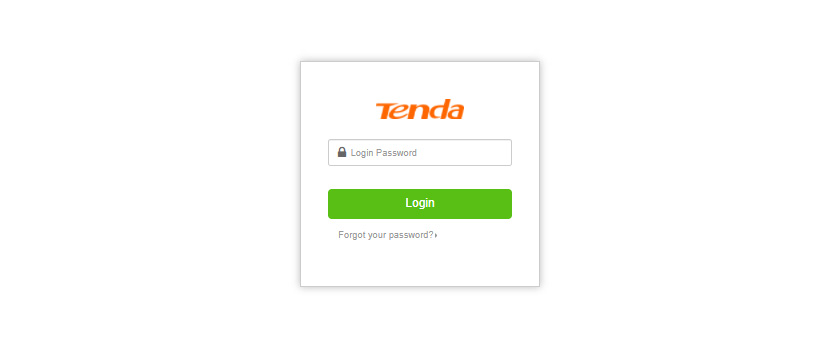
After connecting, we need to open the router settings page (web interface). Open any browser and go to IP-address 192.168.0.1. You have to enter the address in the address bar, not in the search box. I wrote more about this in the article 192.168.0.1 – logging into the router, or modem. admin and admin.
The 192.168.0.1 address will open a page where you can quickly configure the router. Set the basic settings: Internet connection and Wi-Fi network (name, password).
- Select the type of Internet connection (PPPoE, Dynamic IP, Static IP) that your ISP uses.
- If it is PPPoE – set username and password (given by ISP).
- Change the name of the Wi-Fi network and set the password to wi-fi.

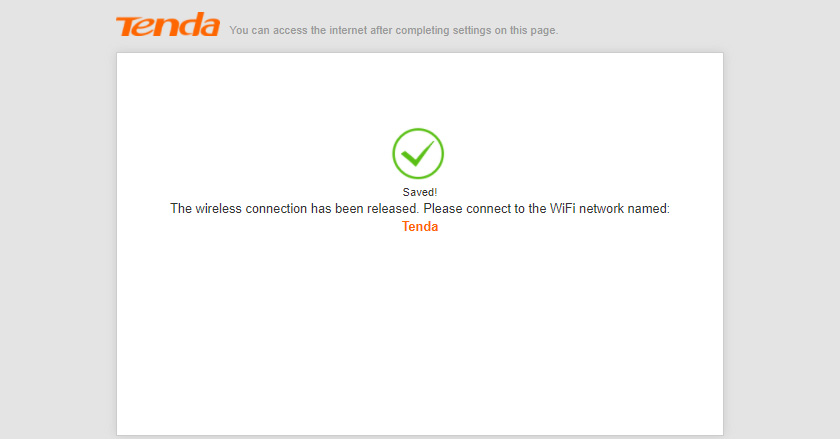
Click Ok, and you will see a message that the router has saved our settings. If your device was connected via wi-fi, and you changed the Wi-Fi network name and/or password, you must reconnect it.
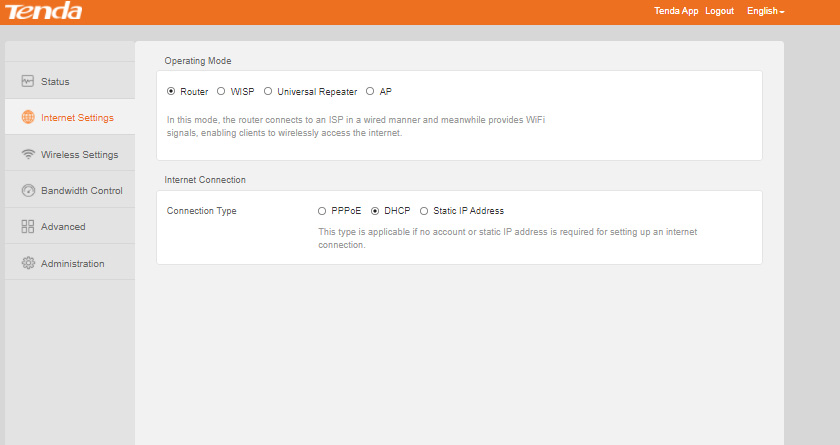
The basic settings are set. And if the internet through the router works and the Wi-Fi network is password protected, then the router setup is complete. But you can go to 192.168.0.1 again and the control panel opens with all the settings. You can change the language. The main page immediately shows the status of the connection to the Internet. As you can see in the screenshot below, in my case it is connected to the internet.

If you don’t have an internet connection, check with your ISP for all the settings and set them under “Internet Settings”. There you can also change the mode of your router to WISP, Universal Repeater, or AP (Access Point), if needed.
Wireless Settings allows you to change your Wi-Fi network name and password. And you can change channel, channel width, wireless mode, and schedule wi-fi.
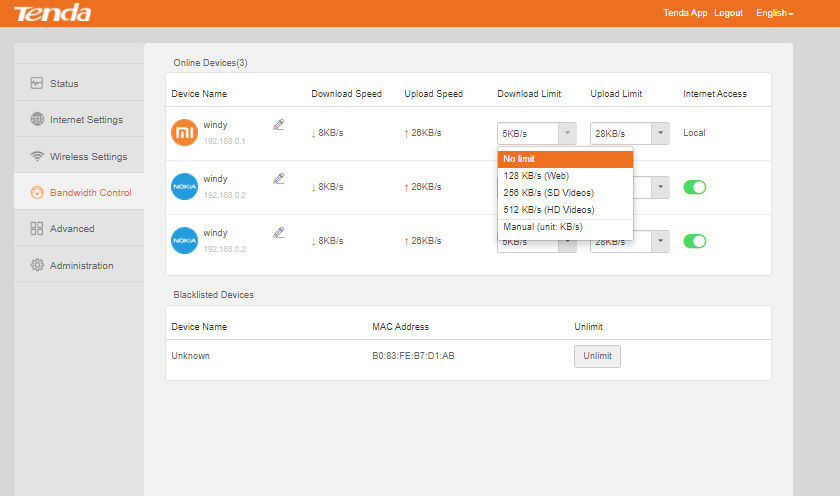
The next section is “Bandwidth Management.”
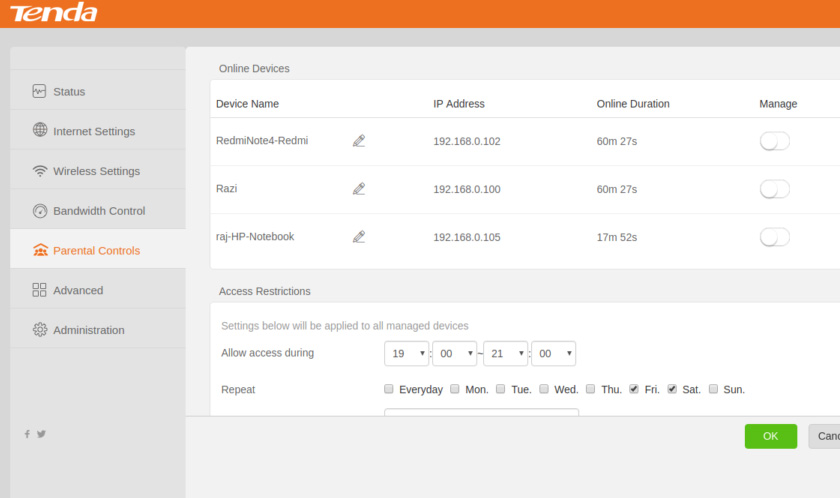
There’s also a Parental Control feature.
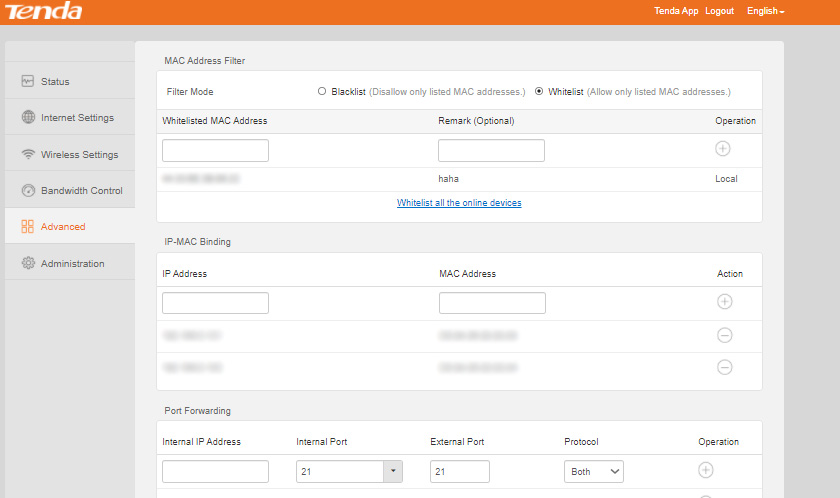
In the Advanced Settings section, you can find MAC filtering, IP address binding, port forwarding, and other settings.
The last tab is Administration. There you can set the time, update the firmware of Tenda F6, reset the settings, set the LAN, WAN, and most importantly – set the router administrator password (to protect the settings). I recommend making sure you do this.Just think of a password, enter it twice and save your settings.
.
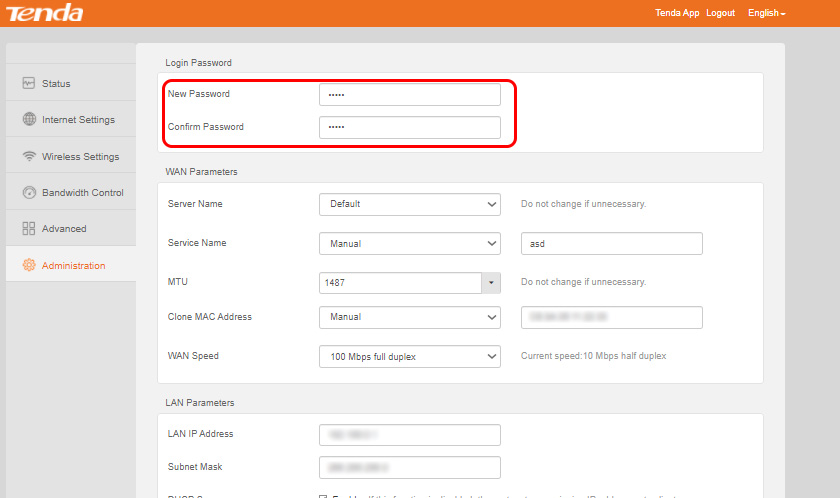
The settings are now protected and you will be prompted for a password when logging in to the web interface.
This concludes the setup of the Tenda F6!
Summary
.
Most of all, I liked the look of the Tenda F6. A really stylish body made of good plastic. In the budget models it is a rarity, as well as well as a button to disable Wi-Fi network. The configuration is very simple. There are all necessary modes of operation, if you want to use Tenda F6 as a repeater or an access point. Tenda F6 copes with its tasks perfectly. I think the router will easily hold about 10 devices under average load. But we have to remember that it is still a low budget model.
Wait for your feedback about the Tenda F6 in the comments!
 Tenda Ac6 Review-Wi-Fi Router for a Large Apartment Support 5 GHZ
 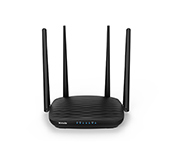 Tenda AC5 - A PowerFul and Technological Novelty from Tenda
 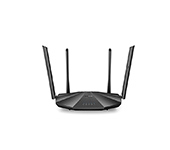 Tenda AC19 Review - Productive Router Router AC2100
  How to go to the Tenda Router Settings?