
Review and Configuration of Wi-Fi Router Tenda FH456
Tenda FH456 is a router that stands out among its competitors with its powerful hardware and maximum Wi-Fi coverage area. This model is suitable for apartments and houses of medium and large area. As far as I understand, this is the senior model in the line of budget routers Tenda. More productive and improved model compared to the popular Tenda F3 and Tenda N301.
In this article I want to not only introduce you to the technical specifications of the Tenda FH456 and show you what this router looks like, but also demonstrate the setup process. This router has a simple and clear control panel, so there should be no problems with the configuration. But I still want to show and explain some points related to connection and configuration.
Appearance and technical characteristics of Tenda FH456
I suggest you first familiarize yourself with the package and see how Tenda FH456 looks like. During the review I will tell you about the technical characteristics of this device. I always start the review with the packaging – let’s not break the tradition 🙂 .
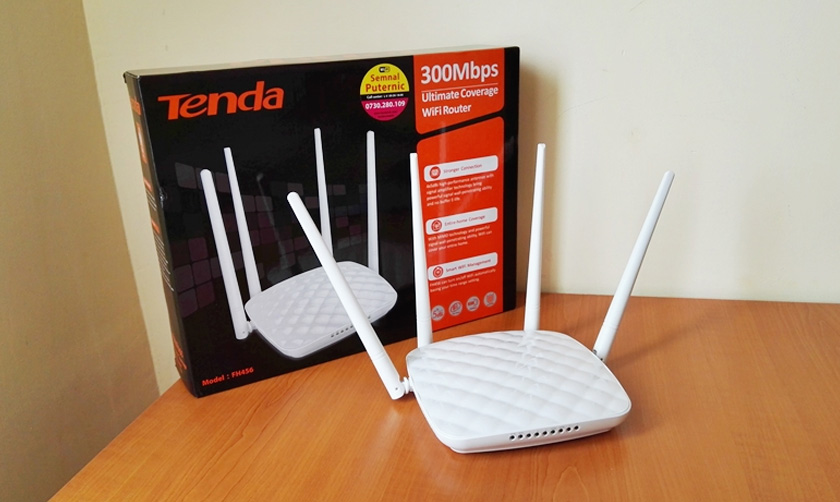
Tenda FH456 comes in a rather large package. On the box itself there is a lot of useful information about this router. All ports and buttons are shown. The main characteristics and features are indicated. Pay attention to the inscription Wall Killer (signal penetration through walls). This indicates that this router is able to provide good wireless coverage even through walls or other obstacles. Mostly, of course, this is the merit of 4x antennas with a capacity of 5 dB.
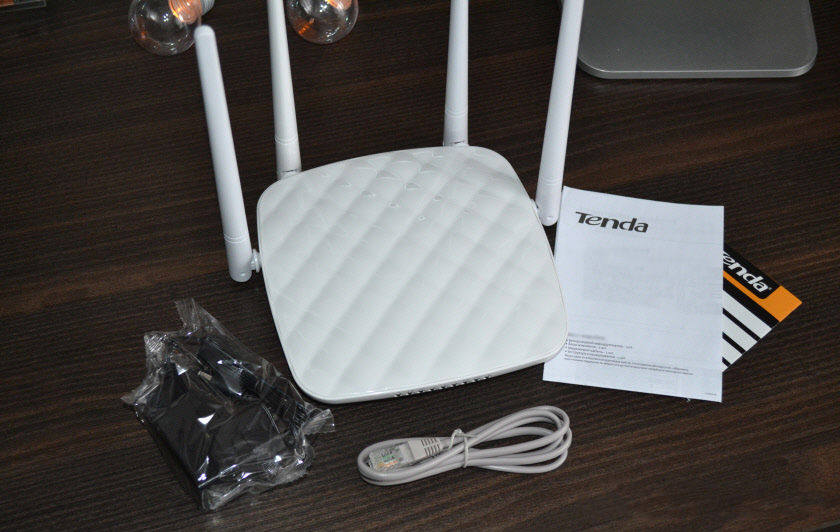
Bundle: router, network cable, power adapter and instructions. In this plan, everything is as usual.
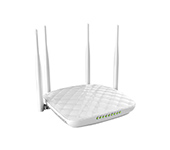
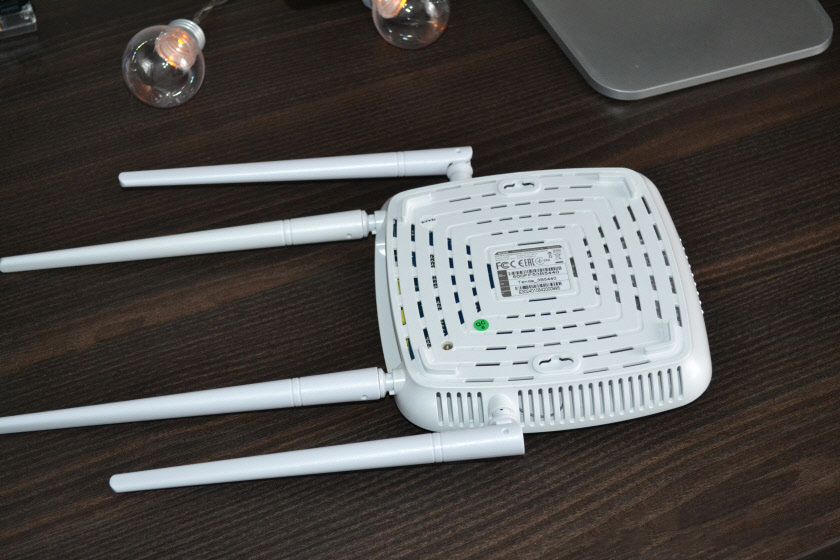
The router itself is made of matte and glossy white plastic. The plastic itself is of good enough quality. No odor. The assembly is excellent. Only the top panel is glossy, which has a puffy structure. Despite the fact that the plastic is glossy, fingerprints, dust and scratches on it are almost invisible. That’s because it’s white. On black plastic, of course, all this is very noticeable.
The antennas are not removable, but they can be rotated and folded. As I wrote above, the power of the antennas is 5dBi. The maximum speed of Wi-Fi network – up to 300 Mbps (standard 802.11n). I also want to note that this router has a Wi-Fi signal booster function. It can be very easily configured as a repeater. To strengthen the existing Wi-Fi network. Not all routers for this price can boast the presence of such a function.
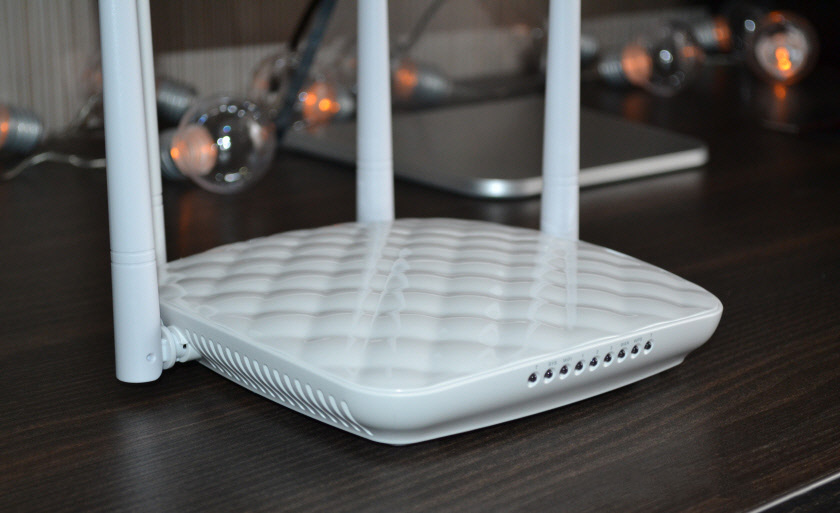
At the bottom and sides there are enough holes for cooling the router board. There are also holes that allow you to hang the router on the wall.
Indicators on the Tenda FH456 are located on the front edge. They are lit in green color.
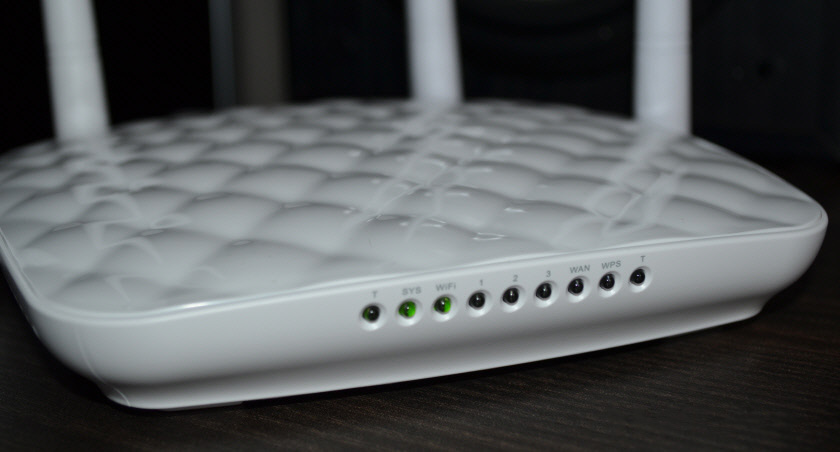
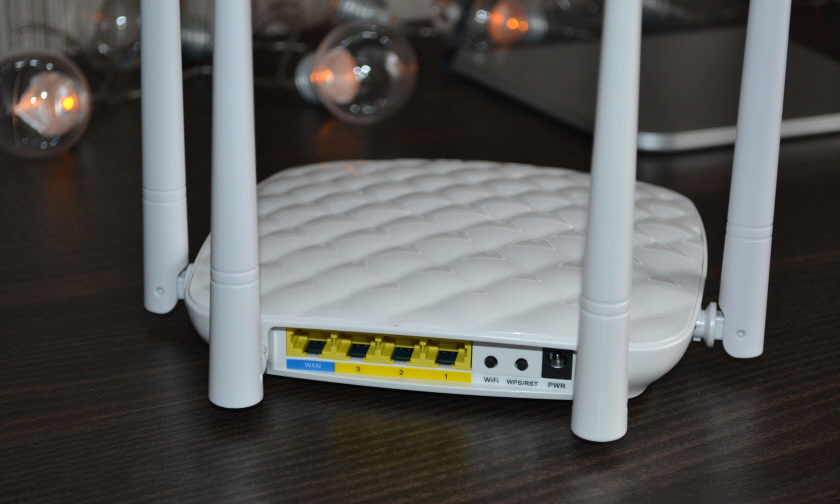
All ports and buttons are located at the back. There is 1 WAN and 3 LAN ports. The speed of the ports is up to 100 Mbps. In addition, there is a WPS/Reset button and a separate button to disable and enable the Wi-Fi network, which is very good. To disable wi-fi, you need to press the corresponding button once (to turn it on, you need to press it again). In addition, in this router there is an opportunity to customize the disconnection and activation of wi-fi by time.
If we talk about functionality, this router has everything you need. For example: parental control, bandwidth control (for speed limitation), WISP mode, repeater and access point. The “Auto Maintenance” feature (automatically rebooting the router between 03:00-05:00 when not in use).
Connecting and Configuring the Tenda FH456
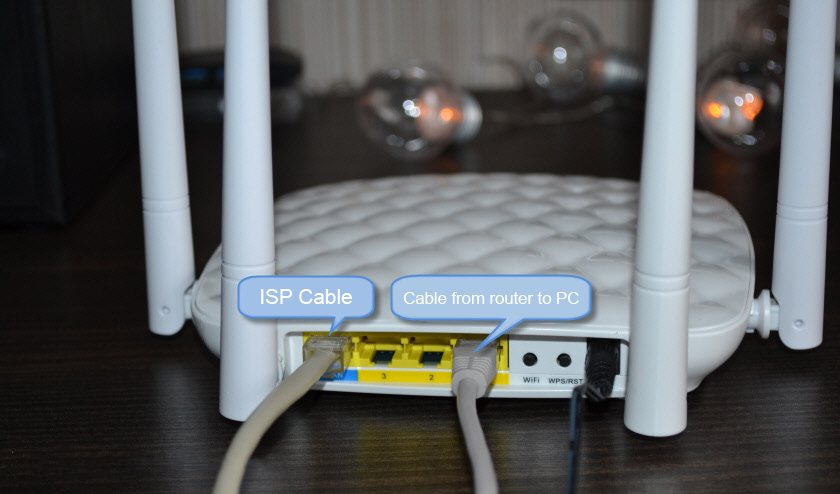
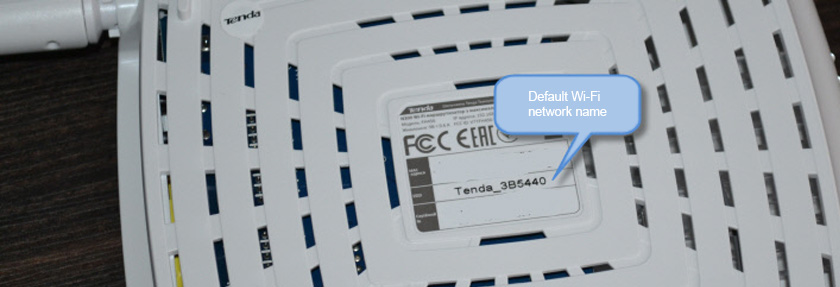
Connect power to the router and turn it on. Do a factory reset if the router has been configured before (or if you have tried configuring it). Plug the Internet into the WAN port (network cable from your ISP or DSL modem). Connect the device from which you are going to configure the Tenda FH456. You can connect either via cable (which is included in the kit) or via Wi-Fi network. You can see the factory network name (SSID) at the bottom of the router. The network is not password protected (at factory settings).
As I’ve already written above, there is a sticker at the bottom, on which besides MAC-address and serial number there is a factory name of the wireless network (SSID) and IP-address for entering the settings.
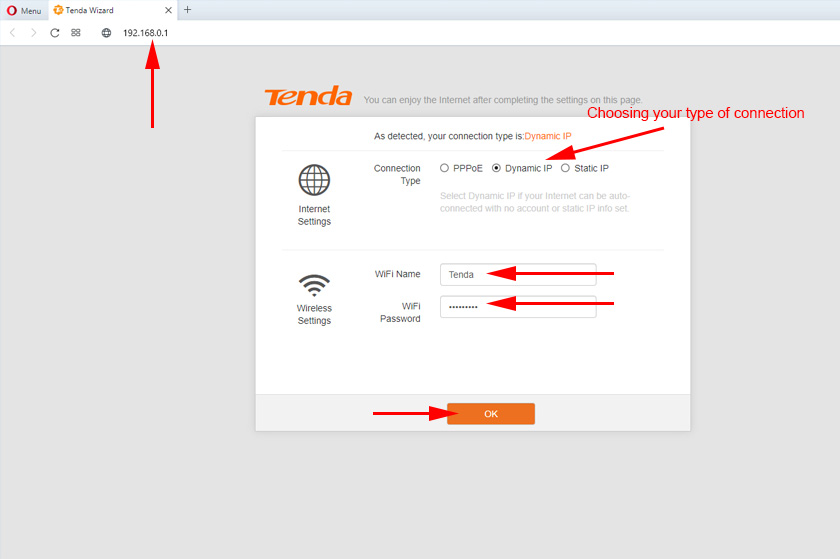
Once connected, you need to open any browser and go to http://192.168.0.1. Read more in the article: how to enter 192.168.0.1, or how to enter the settings of the Tenda router.
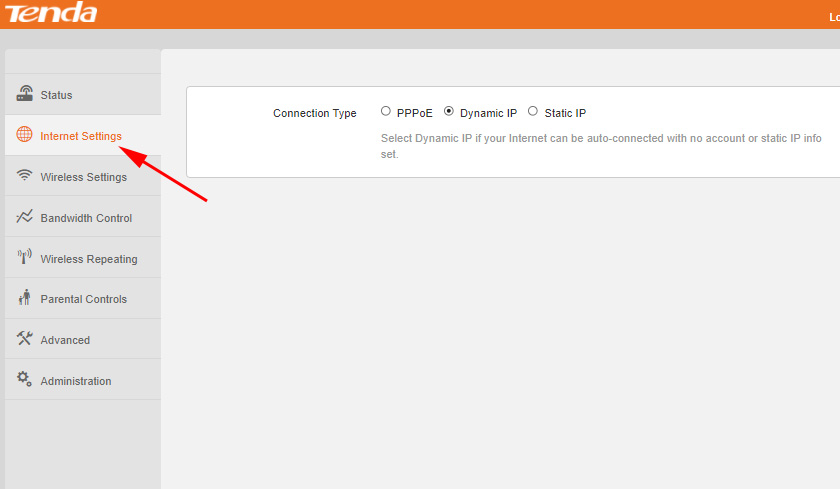
The “Tenda Wizard” page should open, where you need to configure two very important parameters: internet connection and Wi-Fi network.
- In the “Connection Type” drop-down menu, you need to select the protocol that your Internet Service Provider uses for connection. If it is “Dynamic IP address” – you don’t need to set any additional parameters. If it is PPPoE – you need to specify the user name and password. For PPTP and L2TP you need to specify the user name, password and server address in the corresponding fields. All these parameters are provided by your ISP. If you have any questions, please contact your ISP’s support or see the instructions on their website.
- You need to change the name of the wireless network and set a password for wi-fi. I recommend to write down the password somewhere.
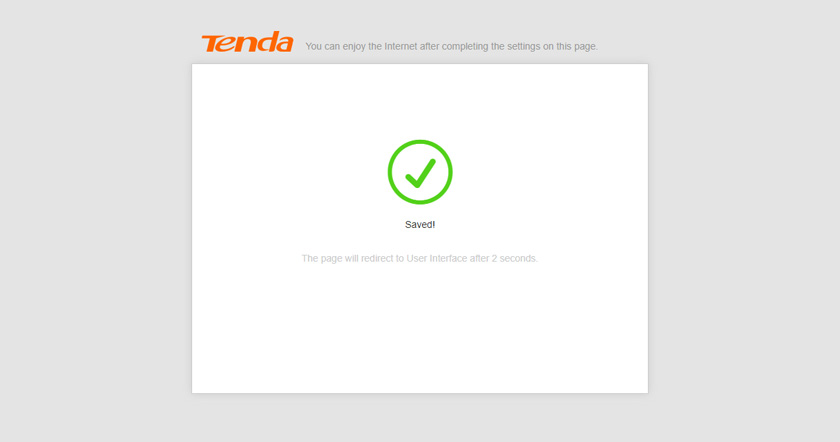
The router will save the settings and ask you to connect to the Wi-Fi network with a new name and password.
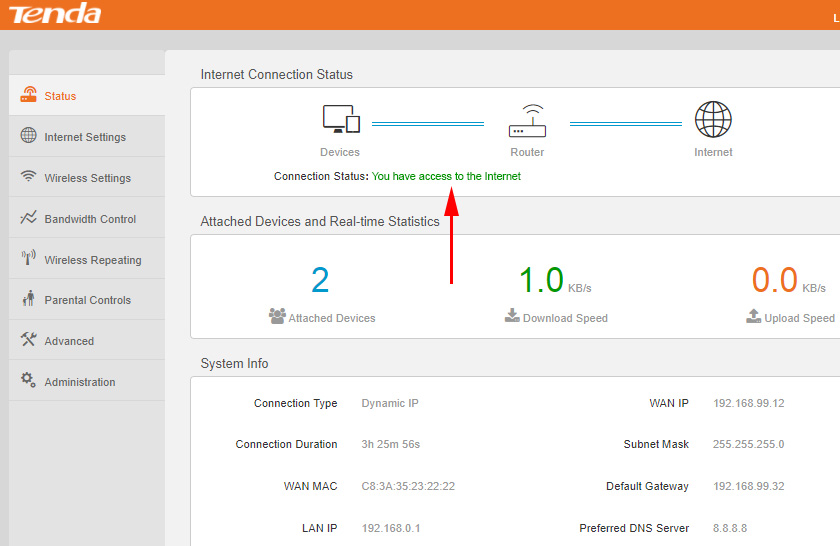
Connect to the new network. If you are connected via cable, just go to 192.168.0.1 again. The main page with Tenda FH456 settings will open, where the first thing to check is the status of your internet connection. If “Connection status: You have access to the Internet” – everything is fine. Also on the main page displays information about the devices connected to the router. And you can see information about the system.
If there is no connection, then you need to clarify all the settings with your provider and set them in the “Internet Settings” section.
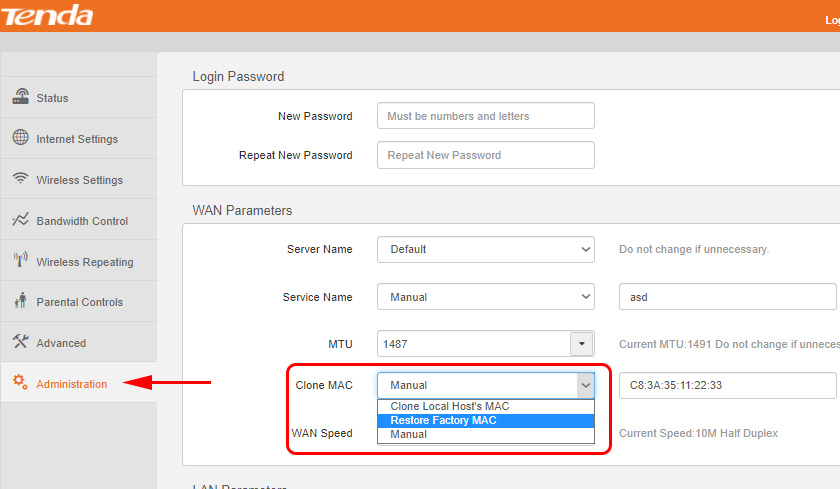
Note that some providers make binding by MAC-address. If your provider also does this, you need to specify the MAC-address of your Tenda FH456 at your provider (in your personal cabinet or through support). It is indicated on the sticker at the bottom. Or clone the MAC address from the computer to which the Internet was bound. This can be done in the “Management” section.
Change the name and password of the Wi-Fi network, disable WPS (by the way, I recommend it), customize the wi-fi schedule, change the signal strength, channel, channel width and other settings can be done in the “Wireless Settings” section.

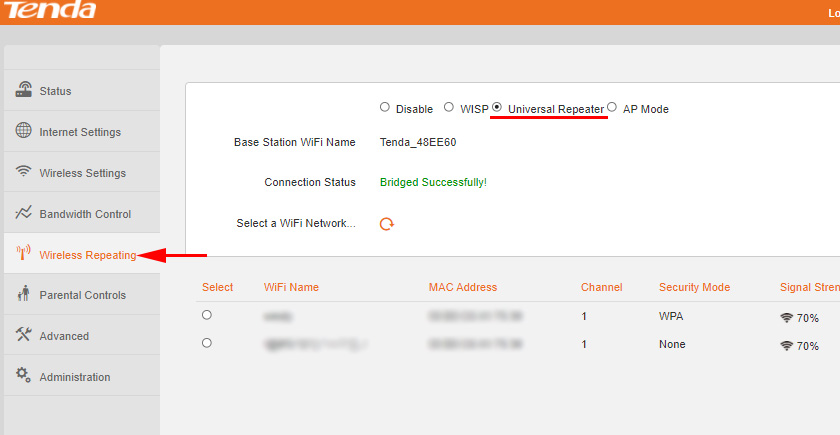
To configure Tenda FH456 as a repeater (Universal Repeater mode ) you can follow these instructions: Repeater mode (repeater, WDS bridge) on Tenda router. In the “Wireless Repeater” section.
The control panel is made very thoughtfully. Without problems you can find the desired settings and change them. If you can not find something, or you can not configure some function, then leave your questions in the comments.
From Tenda FH456 I have only positive impressions. It’s inexpensive, looks decent, works stably, gives good wireless coverage, it’s not difficult to configure. A great option for a simple and inexpensive router for home. Of course, if you don’t need support for 5 GHz (802.11ac), USB, etc.
 Tenda Ac6 Review-Wi-Fi Router for a Large Apartment Support 5 GHZ
  Fast Settings of the Tenda Ac9 Router (AC1200)
  Tenda AC21 Review - Gigabit Router with Support for Modern Technologies
 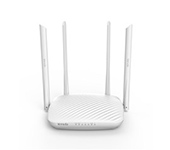 Tenda F9 - Review and Setting Up Router