
How to go to the Tenda Router Settings?

The router manufacturer Tenda has many interesting, inexpensive models that quickly found their consumers, and became polar. Recently I wrote about one such router, it is Tenda N3. In this article, I want to write in detail about how to go into the settings of the Tenda router. This will be the instruction for all models of this manufacturer, since everything is practically the same there. A little information on entering the control panel is in the article on configuring the router Tenda N3. But I decided to write about everything in detail in a separate article.
To set some new parameters, to customize the router after purchase, to change the password, to lock the device, etc., you will need to enter the settings of your Tenda router. What are the settings? It’s a regular page that opens in a browser at the router’s IP address. To be honest, the control panel itself on the Tenda N3 looks very boring and clearly outdated. I don’t know if something has changed (or will change ) in new firmware versions, but I haven’t found any new firmware for Tenda N3. This is a topic for another article. Yes, the control panel doesn’t look very good, especially compared to its competitors. But, as it turned out, everything is very simple and well thought out, and this is the most important thing for a router.
You need a device from which you will enter the settings. The best way is, of course, a computer or laptop that would connect to the router via network cable. But if you don’t have such devices, you can access the Tenda settings from a tablet or phone via Wi-Fi network.
How to enter the control panel on Tenda?
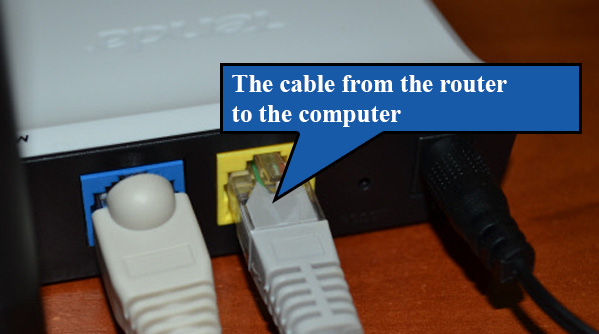
The first thing you need to do is to connect the device from which you want to enter the settings to your router. If you already have everything connected, you can skip this. Computer/laptop, you can connect via cable. A small network cable comes with the router. Just use it to connect your computer to the router.
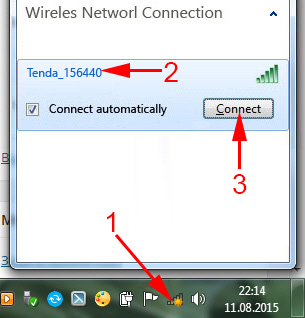
If you don’t have such an option, you can connect via wi-fi. If you have a new router, not yet configured, then connect to the Wi-Fi network, which will appear after turning on the router, and will have the standard name “Tenda_6 digits”. The network will be without password, so there should be no difficulties with connection.
If everything is connected, you can continue.
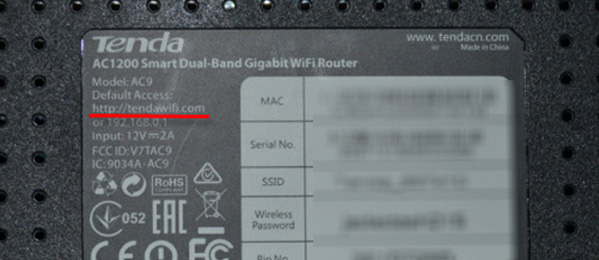
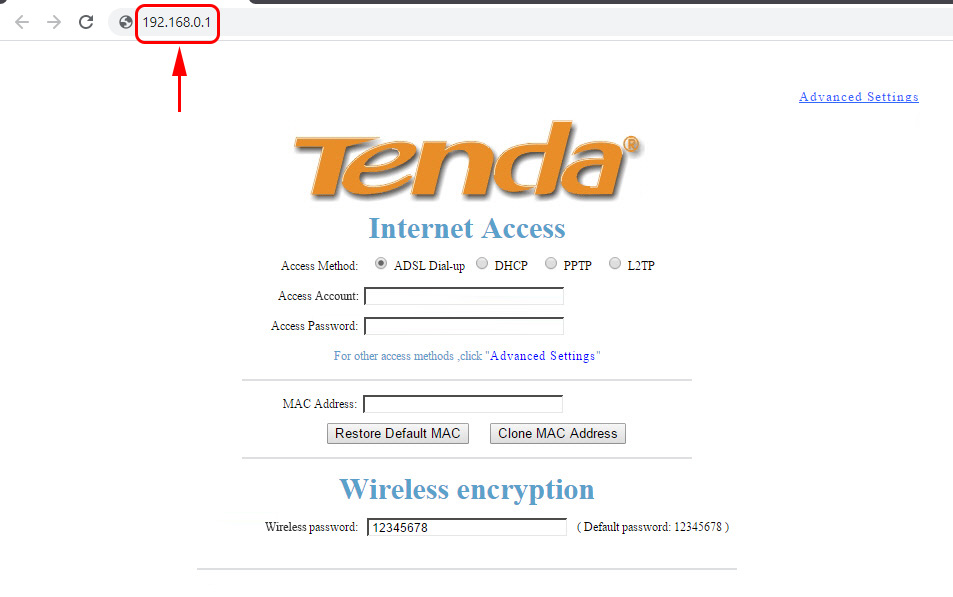
Go to the Tenda router control panel at 192.168.0.1 or tendawi-fi.com
Here it’s simple. The address to enter the settings is listed at the bottom of the device itself. Usually 192.168.0.1 is used.
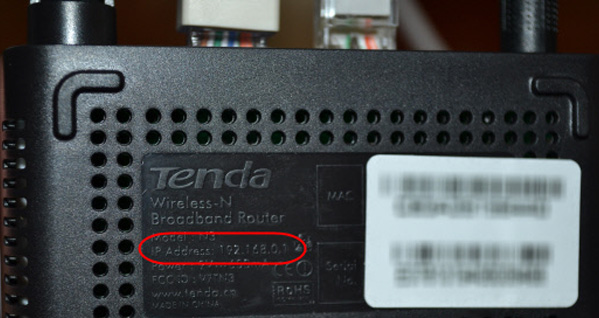
Or tendawi-fi.com.
Open any browser, and in the address bar write (or copy) the IP address 192.168.0.1 (the address specified on the router) Go to it.
If the router is new, you haven’t configured it yet, and you haven’t changed the standard password to enter the settings, the control panel will most likely open at once. You can continue to configure your router.
But, you may be prompted for a password to access the settings. By default, just leave the “Password” field blank and click Ok. The login doesn’t seem to need to be specified, but by default it is admin.
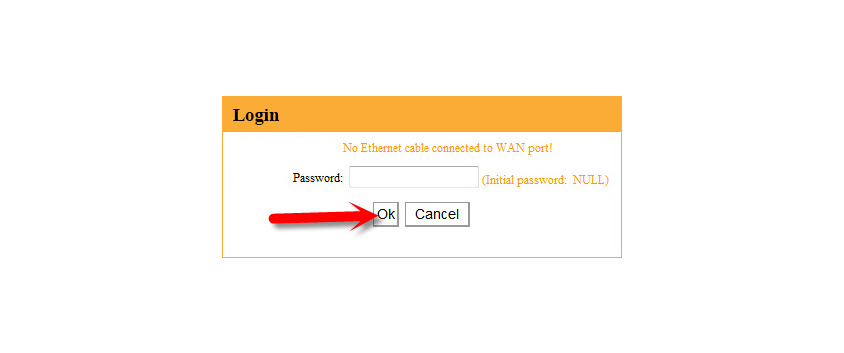
If your password (or empty field) does not match, the “Password” field is just cleared and that’s all, you can’t enter Tenda settings, then most likely the password has been changed. If you don’t know it, you need to reset the router. There is a recessed Reset button, press it with something sharp and hold it for 10 seconds.
Standard data for access to the control panel:
- IP address – 192.168.0.1
- Password – leave blank
- Login – admin
That’s all. If something doesn’t work, the settings don’t open, you can’t access the page at 192.168.0.1, etc., check out this article, where I’ve collected all possible reasons and solutions to this issue.
 Tenda F6 - Review and Setting Up Wireless Router
 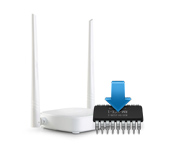 Router Firmware Update Tenda N301
  How to Change the Password on the Wi-Fi Router Tenda?
  Tenda F3 Wi-Fi Settings