
An Error Fails to This Network in Windows 10

Thought I’d write about possible solutions to another problem with connecting to Wi-Fi in Windows 10. This is the error “Cannot connect to this network”. When we select the network we want in the list of available networks, click connect, it seems to connect, but the message “Cannot connect to this network” appears. In Windows 10 it looks like this:

This error can appear because of anything: some failure in the system itself, or on the router, change of Wi-Fi network parameters (password, encryption type), and so on. By the way, the most popular reason is just changing the Wi-Fi network password. If when trying to connect your Windows 10 laptop to Wi-Fi you see an error that it is impossible, there are several ways that can help you. We’ll take a look at them now.
“Unable to connect to this network”. How to fix it?
The first thing to do is to reboot your laptop and router. Very often a normal reboot helps, and you will not need to dig into the settings.
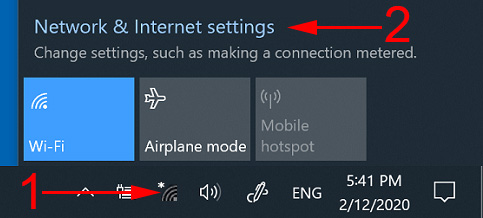
If this method did not help, then you need to delete the network on your computer (forget it). To do this is also not difficult. Click on the Wi-Fi icon and select Network Settings.
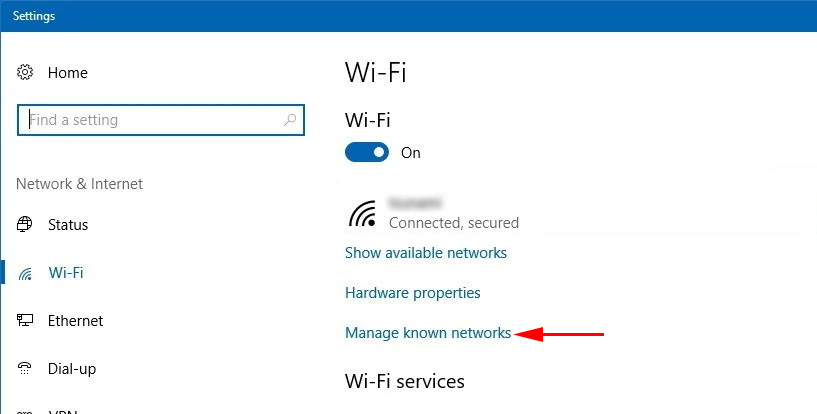
Next, on the Wi-Fi tab, select Manage wi-fi network settings.
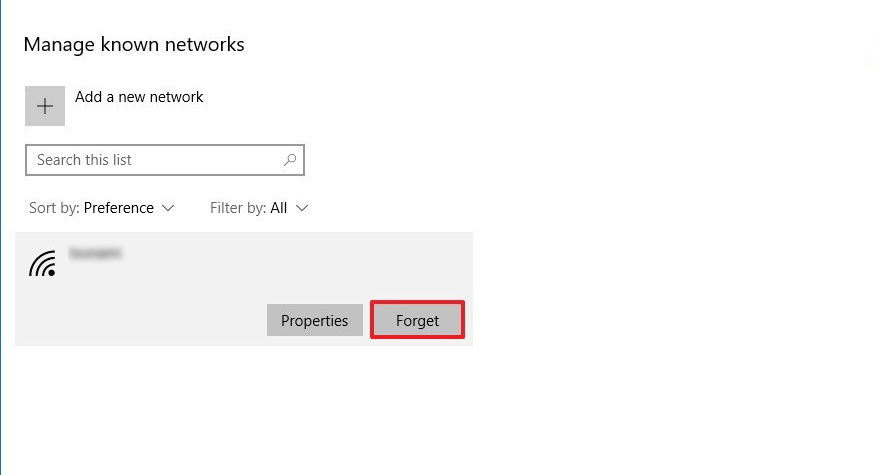
Select the network you can’t connect to and click the Forget button.
After that, try to reconnect to your Wi-Fi network. You will need to specify a password. You can watch this instruction on how to reconnect. I wrote more about how to “forget” a network in Windows 10 here.
Update: try disabling antivirus
In the comments, Alex advised disabling antivirus. It worked for him, the “Cannot connect to this network” error disappeared and he was able to connect to the internet. So, make sure you try to disable your antivirus. Typically, you need to right click on the antivirus icon in the notification panel, and select something like “suspend protection”.
Update: update hardware configuration
Again in the comments, Artem wrote that he got rid of the “Cannot connect to this network” error by updating the hardware in Device Manager. Mikhail confirmed that this method also helped him. That’s why I decided to add this solution to the article. Just go to Device Manager and click on the “Update Hardware Configuration” button. 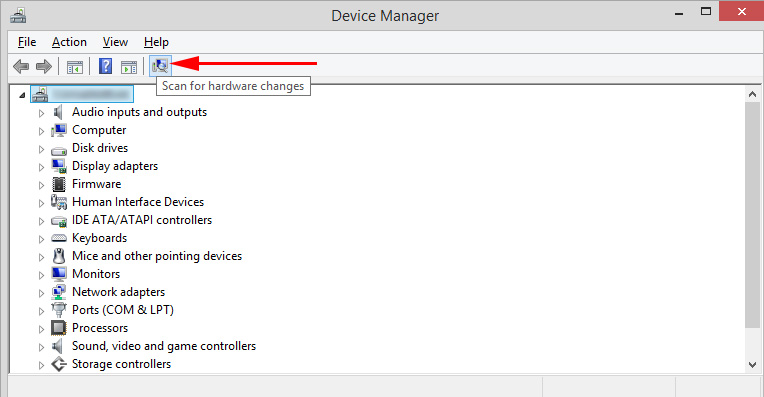 Perhaps this method will also help you. Write about your results in the comments.
Update: change the Wi-Fi network channel
There is information that the “Cannot connect to this network” error may appear because the Wi-Fi network you can’t connect to is on channel 12 or 13. First, I suggest you reboot the router a few times. Perhaps it will automatically select a different channel and everything will connect (if that’s the problem). If that doesn’t work, you can change the channel yourself in the router settings. Try setting any channel, just not channel 12, or 13. If that doesn’t solve the problem, I recommend putting the automatic channel selection back on.
Update: turn airplane mode on and off
The comments suggested that this helped solve the wireless connectivity issue. Open the notification center and activate the “On Plane” mode. Then deactivate it by pressing the button again. 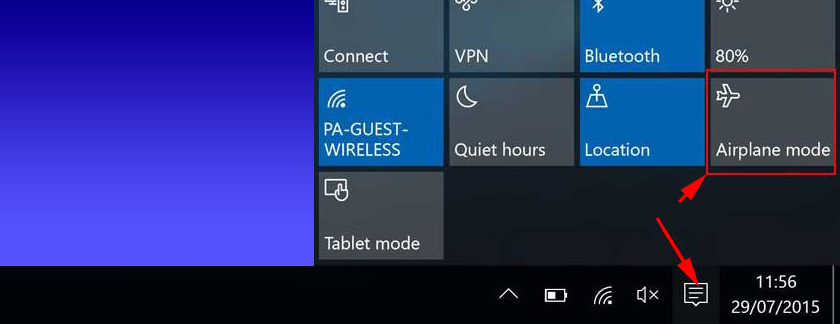 Thanks to Maria for the tip. Share your solution in the comments!
Update: remove the Wi-Fi adapter to reinstall it
Again, a tip from the comments. Alexei said that he got this error after updating Windows 10. Nothing helped except uninstalling the Wi-Fi adapter in Device Manager. It is not difficult to do this. 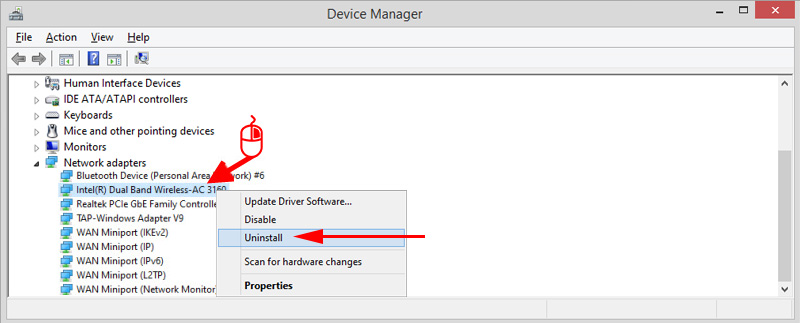 After updating the hardware configuration (button in Device Manager), or restarting the computer, the adapter will be installed again. Alexey’s error disappeared and the computer connected to the Wi-Fi network.
Update: enable “Random Hardware Addresses”
Another tip shared by Artem in the comments. He enabled “Random Hardware Addresses” and Windows 10 connected to the Wi-Fi network and the error disappeared. You can enable it in the settings, in the “Network and Internet” section on the “wi-fi” tab. Near “Use random hardware addresses” set the switch to On. 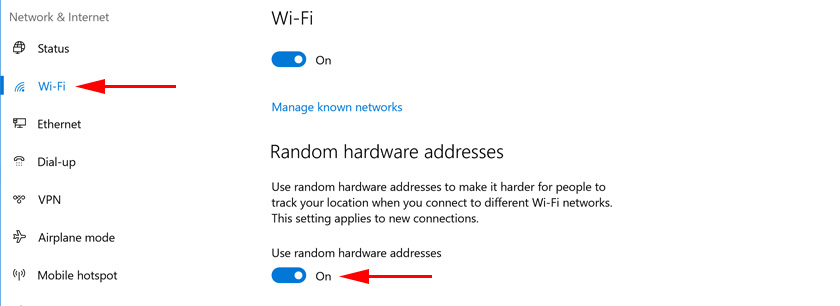 In a nutshell, let me explain how this works. Hardware address is MAC address. It is a unique address of the Wi-Fi module. It is fixed by the router when you connect. If, for example, the MAC-address of your computer is blocked in the router settings, then there will be an error when connecting. There may be a conflict of MAC addresses. After enabling Random Hardware Addresses, Windows 10 starts changing the physical address every time you connect to new Wi-Fi networks. If you know other solutions to the “Cannot connect to this network” issue that appears in Windows 10, you can share them in the comments.
 Resetting Network Settings in Windows 10
  Red Cross on the Internet Icon in Windows
  How to Fix The DNS Probe Finished NXDomain Error? In Windows 10, 8, 7
  Why does the laptop not see the Wi-Fi network of the router? What to do?