
How to Forget the Wi-Fi Network on Windows 10?

Hi, I recently wrote an article in which I explained how to connect Windows 10 to a Wi-Fi network. In this article, I want to show you in detail how to forget a Wi-Fi network in Windows 10. I’ll show you the easiest way, because for some reason everyone shows you how to forget the network through the command line. I don’t understand why this is necessary, because through the settings is much easier and faster.
In Windows 10, the wireless network settings themselves have changed a bit, so the process of deleting a Wi-Fi network profile is different even from Windows 8. By deleting the wireless network profile, the system “forgets” the network. That is, all the data about the network is removed from the system (however, they are not completely removed, with the help of a special program you can pull out the password to the forgotten network). This is useful when you do not want your Windows 10 laptop to automatically connect to any Wi-Fi network. Or, in the case when there are problems with connecting to wi-fi, after changing the password to a wireless network.
Ask Windows 10 to forget the Wi-Fi network
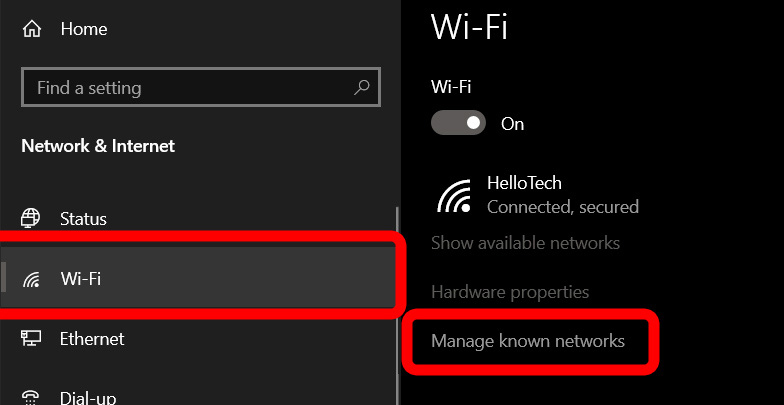
It is done in a very simple way. Click on the Internet connection icon, in the notification panel. Open Network Settings.

Next, select Manage wi-fi network settings.
Select the Wi-Fi network you want to forget from the list and click the Forget button.
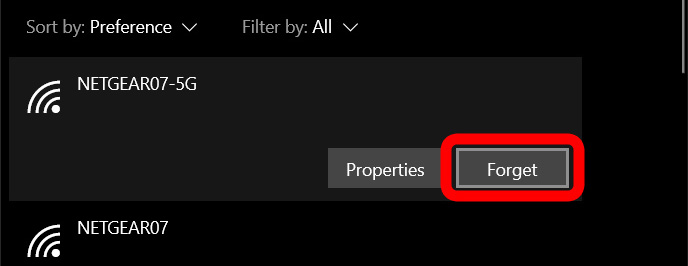
The system will forget the selected network and will not connect to it anymore.
I hope you find my little tip useful. I look forward to your comments!
 Wi-Fi Sense in Windows 10. What is This Function and How Will It Turn It Off?
  How to Connect a Regular Computer (PC) To A Wi-Fi Network?
  How to Connect to Wi-Fi In Windows 10?
  Properties of Wi-Fi Network In Windows 10, Automatic Connection, Network Profile, IP Parameters and Limit Connection