
How to Close Access to the TP-Link Router Settings? We Reliably Protect the Settings with Password and Filtering at the Mac Addresses
It is very important, having installed a Wi-Fi router in your home or office, to reliably protect not only the wireless Wi-Fi network, but also access to the control panel of the router. This article will be fully devoted to setting up protection for access to the settings of the router firm Tp-Link. First, we will change the standard admin password, which is used to enter the Tp-Link control panel, to some more complex one, and then, allow access to the settings only to one computer (filter by MAC address).
Poor protection (or lack thereof) of the control panel, in conjunction with poor protection of the Wi-Fi network, is almost completely open access to the settings of your router. For example, you gave your Wi-Fi password to your neighbor. By connecting to the network, he can access the settings (if they are not secured). We certainly don’t want that. Or, by hacking into your wireless network, an attacker could make any settings on your router.
From my observations, few people protect the control panel, and that’s a big mistake. It’s a couple minutes’ work.
Since Tp-Link routers have almost the same control panel (which is why I love Tp-Link), this article can be called a universal article for routers from this company. It will be suitable for such popular models as: TL-WR940N, TL-WR841N, TL-WR842ND, TD-W8960N, TL-MR3420, TL-WR741ND, TD-W8968, TL-WR843ND, TL-WR1043ND.
Protect the control panel of Tp-Link router with a password
This is the first thing you need to do. In general, I recommend you to change the password while configuring the router.
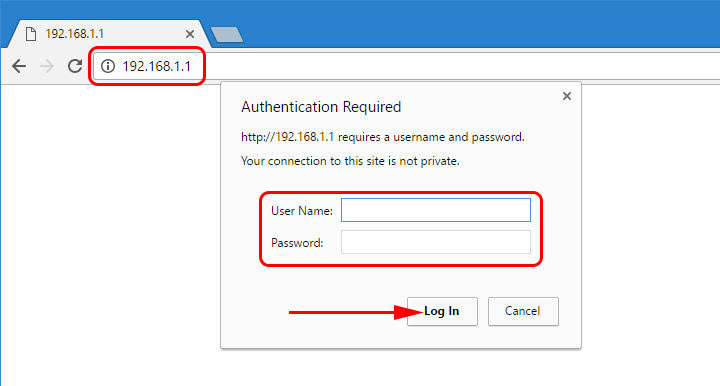
Go to the settings. The procedure is standard: we connect to the wireless network from the router we need, or via cable. Type in the browser address 192.168.1.1, if it doesn’t work, then 192.168.0.1. Enter login/password, by default – admin and admin. Actually further we will change these standard data.
 In the settings go to System Tools – Password. In the Old User Name and Old Password items specify the old login and password, respectively. By default, these are admin and admin (if you haven’t changed them yet).
In the New User Name field specify a new login that will be used when entering the settings (you can leave admin). And in the New Password and Confirm New Password fields, specify a new password that you will enter when entering the router control panel.
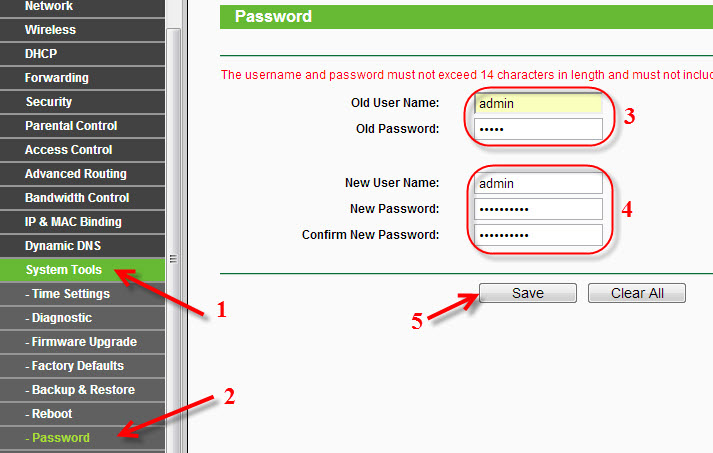
Write it down on a piece of paper, or in a document on your computer.
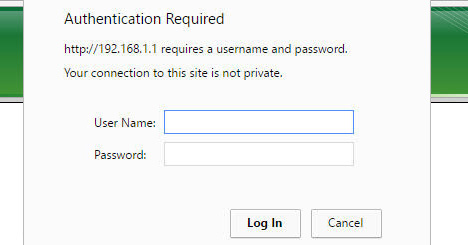
Immediately after clicking the Save button, you will be prompted for the login and password. Enter the new data and you will be back in the settings.
 We have changed the password, we still need to block access to the settings for all computers except for one, yours. Well, or two, three, as you need.
Allow only one computer to access the settings (by MAC-address).
Most likely, you have one computer from which you configure the router. So, now we are going to allow access to the settings page by IP address only for him, and for the rest of the devices we will deny access. When someone wants to access the settings at 192.168.0.1 or 192.168.1.1, he will see an error.
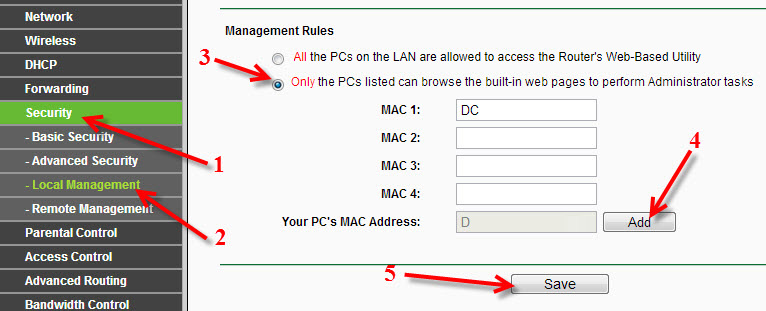
Do this configuration from the computer you want to allow access to. Open the Security – Local Management tab.
Enable“Only the PCs listed can browse…”. Click on the“ Add” button. In the MAC 1 field will appear the MAC address of your computer that you are currently working from. This means that only it will be able to access the settings of the Tp-Link router. In the MAC 2, MAC 3, etc. field you can specify more MAC addresses of the devices for which you want to open the settings.
Click on the Save button to save.
You are done! You can take another device that is connected to the internet through your network and try to access the settings. You will see an error. And you will only be able to configure the router from a computer that you have allowed access to.
The settings of your router are secure. I advise you to make a backup copy of the settings so that you can quickly restore them if necessary.
 How to Install (Change) Password On a Wi-Fi Asus Router?
  How to Change the Wi-Fi Password on the Huawei Hg532e, ZTE ZXV10 H108L)
  Type of Safety and Encryption of a Wireless Network. Which to Choose?
  Maximum Protection of the Wi-Fi Network and Router from Other Users and Hacking