
Mikrotik Hap Lite Tc Router Settings

I have to be honest, until recently I was not familiar with MikroTik routers at all. I had heard some things, read some things, and all the time I thought they were some kind of networking devices for professionals. Complicated setup, lots of features and all that. But I recently saw several models of MikroTik on sale. I decided to buy a MikroTik hAP Lite TC to see for myself, configure it, and tell you about it.
In this tutorial, I will show you how to configure the MikroTik hAP Lite TC. Using this guide, you will be able to configure almost any MikroTik RouterBOARD router. RouterOS itself, on which this manufacturer’s devices run, is very complicated at first glance. In fact, it is not only complex at first glance 🙂 There are a real lot of different sections, settings, etc. On my router, RouterOS itself is in English. But, if you understand, you realize that for a regular MikroTik setup you don’t need to go through any sections, search for something, etc. at all. There all the most necessary and important settings are on one page. Which opens immediately after entering the control panel. Now we will consider all this in detail.
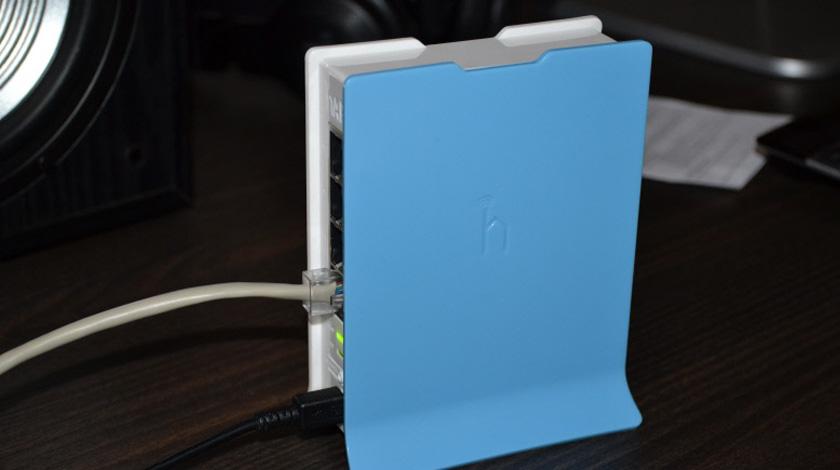
I want to say a few more words about the router MikroTik hAP Lite TC. I liked the device. The body is made of high-quality plastic, although it stinks a little. Inexpensive, cool, apparently powerful and very functional. But all this functionality is not necessary for most users. It’s cool that it’s powered by microUSB. You can record even from the USB port of a computer, or a poverbank. Or without problems to find another power adapter if the native one breaks. Did not like the very boring packaging, completely incomprehensible configuration instructions (in English), and most importantly – the lack of a network cable in the kit. Such they are, routers MikroTik RouterBOARD. At least the model hAP Lite TC.
Judging by the instruction that comes with the kit, this manual should come in handy for many. As for MikroTik, I am a complete dummy. So the instruction, as you understand, is for dummies like me 🙂 🙂
Connecting the MikroTik router and preparing for configuration
To set all the necessary parameters, we first need to connect to the router and connect the internet to it. Since there is no network cable in the kit, you will most likely connect to it via Wi-Fi network. You can configure it not only from a laptop or PC. You can use a tablet, phone, or other device.
First, connect the power adapter and plug it into a power outlet. You can also immediately connect to MikroTik Internet (network cable from your provider or modem). Into the Internet port.
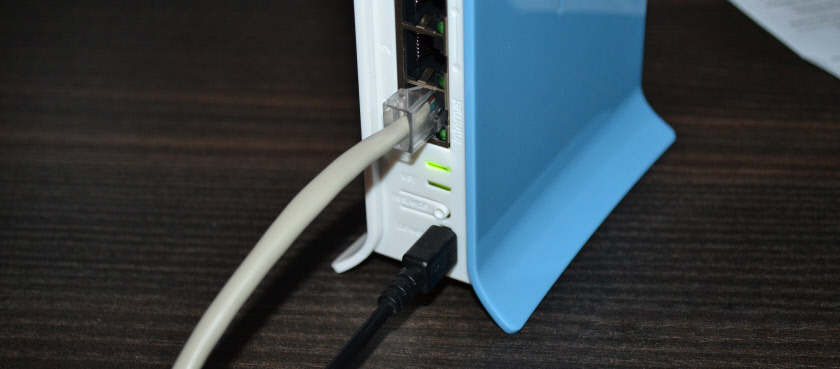
If you have a network cable, and there is no way to connect via wi-fi, then just plug one end of the cable into the LAN port of the router, and the second into the port of the network card of your computer.
Next, simply connect to an open Wi-Fi network with “MikroTik” in its name.
It looks like this:
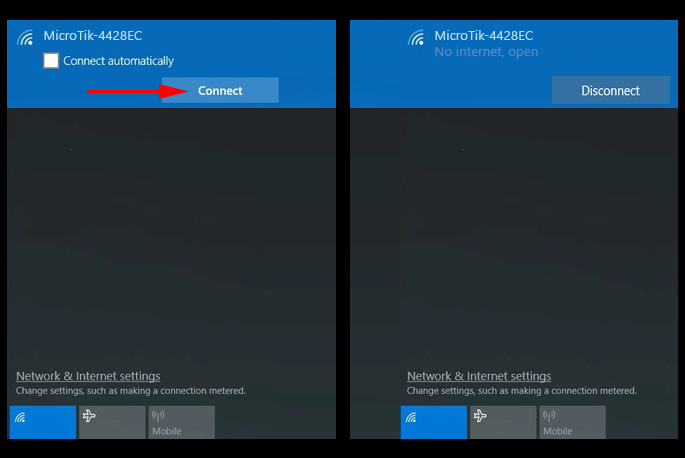
You may not be able to access the internet right away. We have not yet configured the router’s connection to the ISP. This is normal. Let’s move on to the configuration.
Configuring MikroTik on the example of the hAP Lite TC model
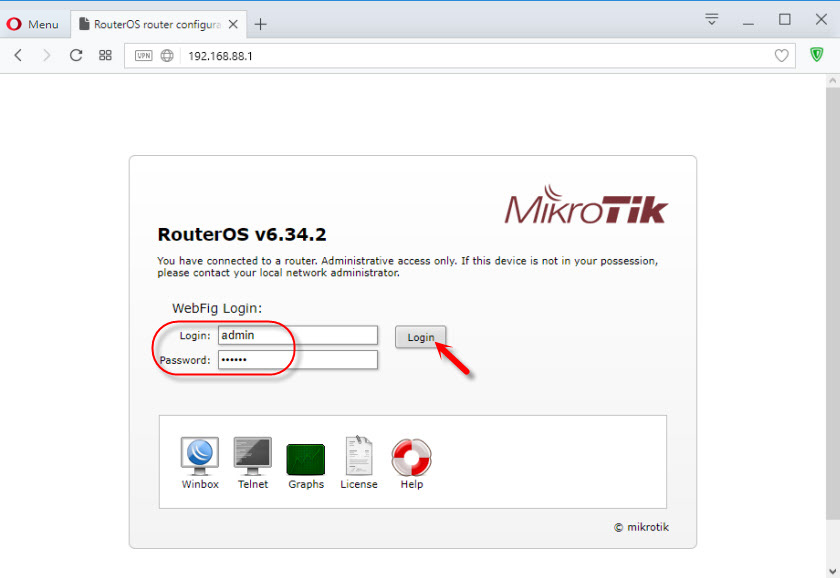
To enter the router settings, you need to go to 192.168.88.1 in any browser. I wrote more about it in the article: 192.168.88.1 – login to MikroTik router (RouterOS). The RouterOS control panel (v6.34.2 in my case) should open right away. Check that the router is working in “Home AP” mode.
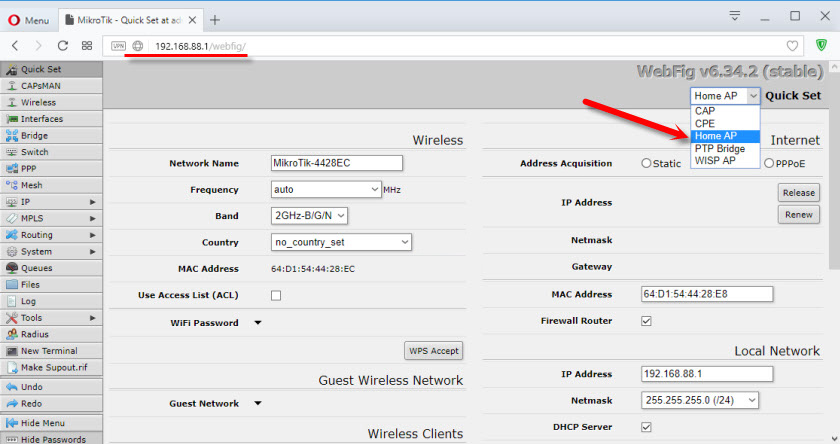
As I wrote above, all basic settings can be set right on the main page “Quick Set”. It is divided into blocks. We need to configure the following:
- Internet connection (Internet).
- wi-fi network (Wireless).
- Set a password to protect the control panel (System).
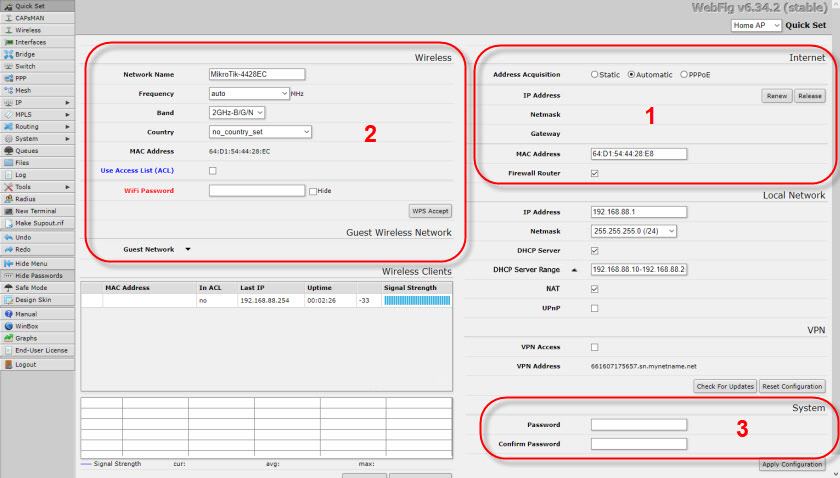
These settings are enough in most cases.
Configuring the Internet on MikroTik (Dynamic IP, PPPoE)
Important! If you already have internet through your router, then most likely your ISP uses Dynamic IP connection type, and no additional configuration is needed. Since the connection type is “Automatic” by default. You can configure the Wi-Fi network right away.
So, if your connection type is “Dynamic IP”, without MAC-address binding, then everything should work at once. If you have MAC-address binding, you need to either specify the MAC-address of the router from the provider (it is specified in the MAC Address field), or look up the MAC-address of the computer to which the Internet is bound and write it in the “MAC-address” field in the router settings.
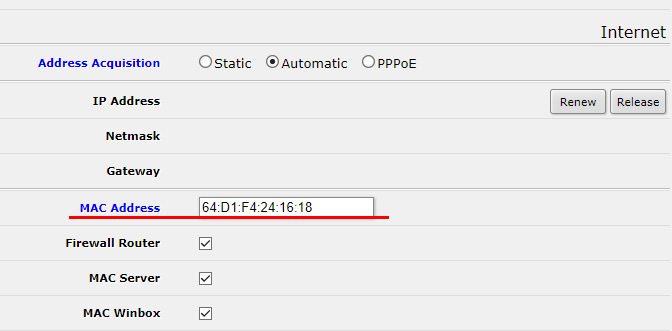
Don’t forget to save the settings by clicking on the “Apply Configuration” button (in the lower right corner).
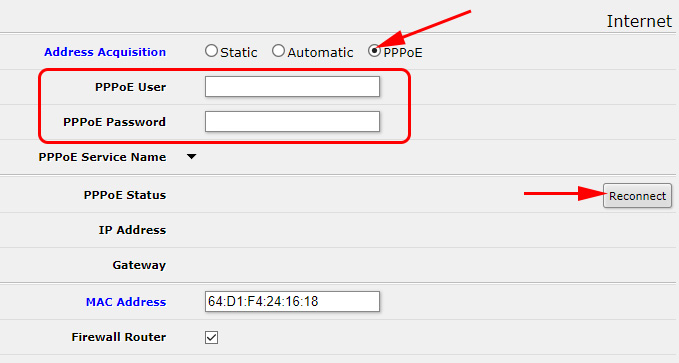
PPPoE configuration
Select the PPPoE connection type, set the user name and password (the provider gives them) and click on the “Reconnect” button. The router should connect to the Internet. If all is well, then go to the configuration of the Wi-Fi network. This is discussed later in the article.
But PPTP connections were not added to this list for some reason. Probably because it is not very popular. But nevertheless, some providers use it.
Configuring L2TP/PPTP
First, in the “PPP” section you should add “PPTP Client”.
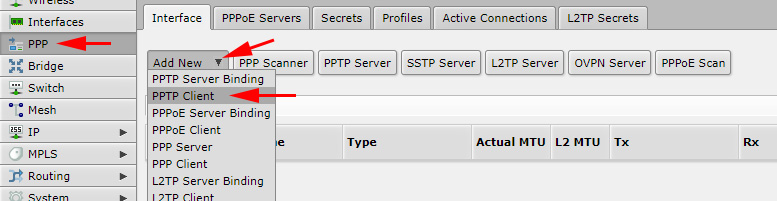
Then set the server address (Connect To), user name (User) and password (Password). This data is provided by the provider. Check the “Add Default Route” box. Then save the profile by clicking on “Apply” and “Ok”.
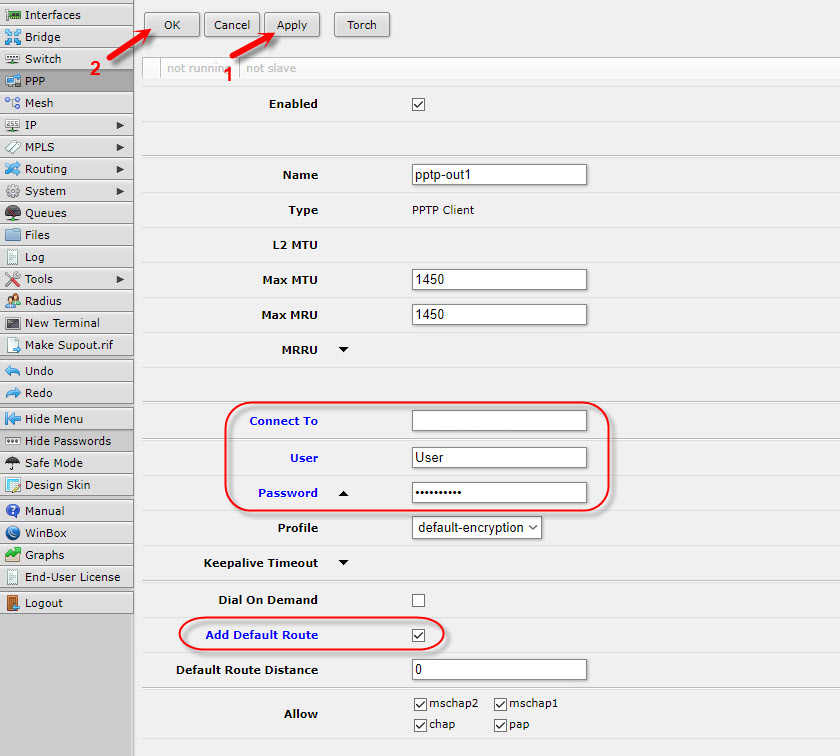
Friends, I’m not sure that the PPTP configuration instructions are correct. Unfortunately, there is no way to check it. If I wrote something wrong, please correct me in the comments.
Setting up Wi-Fi network and password on MikroTik hAP Lite TC
On the same page, we are interested in the “Wireless” section. It’s on the left.
In the “Network Name” field, we change the name of the Wi-Fi network. In the drop-down menu “Country” it is desirable to specify your region, and in the field “wi-fi Password” set a password (minimum 8 characters), which will be used when connecting to the Wi-Fi network.
Below you can configure the guest Wi-Fi network and see the list of connected Wi-Fi clients.
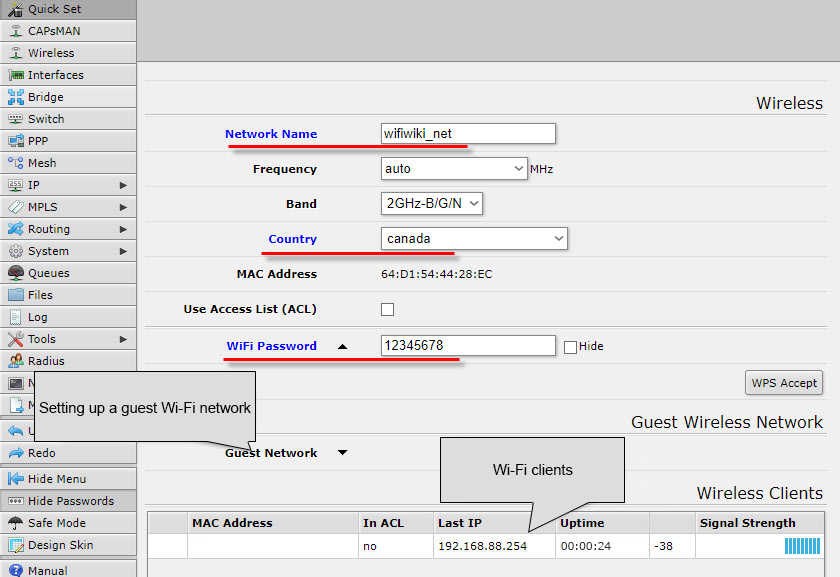
Memorize or write down the wi-fi password. You can save the settings with the “Apply Configuration” button, or set a password to protect the settings at once.
Password for RouterOS web-interface
When we went to 192.168.88.1, the control panel opened at once. Everyone who is connected to the router via Wi-Fi network or cable will be able to enter it. To protect it, you need to set a password.
On the main page, in the lower right corner, in the “System” section, in the “Password” and “Confirm Password” fields, make up and specify a password. Save the settings by clicking on “Apply Configuration”.
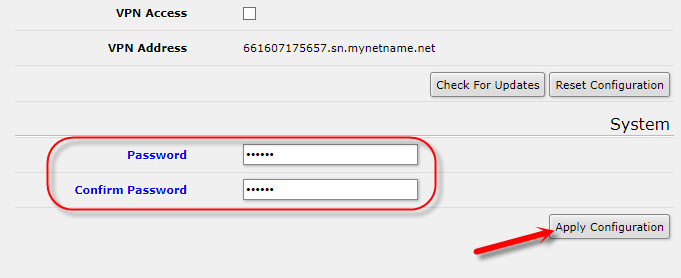
You will be “thrown out” of the system. And to enter the settings again, you need to specify the password you set. The user name is admin. Now you will have to authorize every time you log in RouterOS.
Try not to forget the password, or you will have to reset your MikroTik router and configure everything again.
Afterword
I apologize in advance if I made a mistake somewhere in the instructions. There is no possibility to check everything on my own. For example, connection via PPPoE, or PPTP. You need a provider that uses a certain protocol. The setup itself seemed to me even easier than in popular manufacturers with a more friendly interface. I agree that it will be difficult to configure, for example, filtering by MAC-addresses, blocking sites, speed limitation and other functions. You need to understand it.
For a long time I couldn’t understand how RouterOS itself works. And I understood. It works “clearly”. Yes, there are a lot of settings there. But everything is quickly opened, saved, deleted, etc. Nothing hangs, or reboots several times.
Leave comments, share useful tips and ask questions!
 How to Reset the Password and Settings of the Mikrotik Routerboard Router?
  192.168.88.1 - Entrance to the Router Mikrotik (Routeros)