
Windows Failed to Connect to the Wi-Fi Network. Error Solution in Windows 7
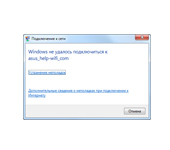
When connecting to a Wi-Fi network in Windows 7, it is not uncommon to see the error “Windows failed to connect to…”. It will indicate the name of the network you tried to connect to. The error is actually very popular. It appears not only in Windows 7, but also in Windows 8 and Windows 10. The causes and solutions are usually the same. If you have Windows 10, see the separate article on solving the problem with “Cannot connect to this network”. In Windows 10 there is a slight difference exactly in the appearance of the menu items.
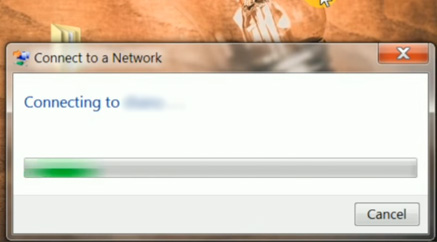
How it all looks like: the usual way we try to connect to Wi-Fi in Windows 7, goes first “Connect to (name of network)”:
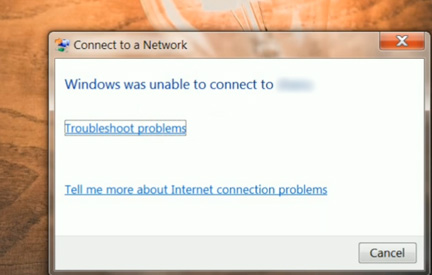
And then comes the error “Windows failed to connect to (name of Wi-Fi network)”:
One simple solution almost always helps. If you have encountered such an error on your computer, then now we will try to fix it. Most often, this error appears after you have changed some parameters of your network. Password, security type, etc. And before, you have already successfully connected to this network.
The solution to the error “Windows failed to connect to…”
The solution is simple: you need to delete our wireless network in Windows 7 settings and reconnect.
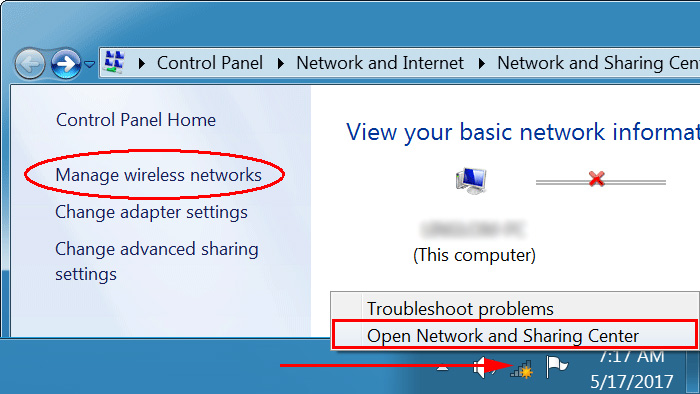
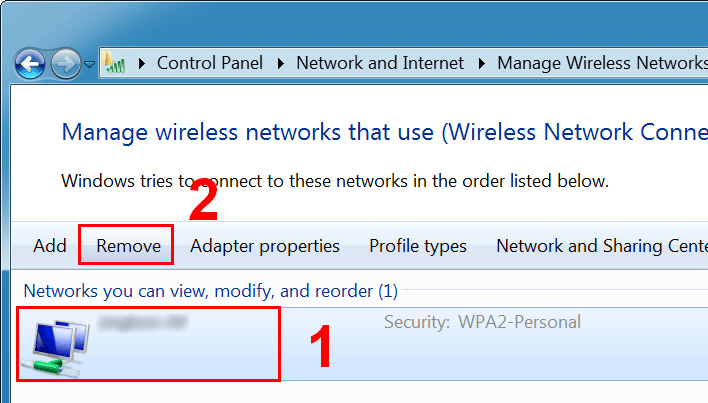
Right-click on the Internet connection icon (in the lower right corner), and select Network and Sharing Center. Next, go to Wireless Network Management.
Look for the Wi-Fi network in the list, when connecting to which we have an error, right-click on it and select Delete.
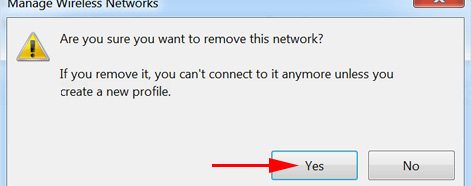
A warning window will appear, click Yes.
I described this whole process in the article: Remove Wi-Fi network on Windows 7.
And then, we just try again to connect to this network. There will be a request for a password, specify it, and everything should connect.
If the above method did not help:
This solution always works for me. But, you may have another reason, or something else. So, a few more tips:
- Reboot your router and your computer.
- Change your network password per the instructions: /setting-up-security-for-wi-fi-networks/how-to-protect-the-wi-fi-network-with-a-password/. You may have a security type installed that Windows 7 just doesn’t “like”.
- You can also change the name of the Wi-Fi network itself (SSID). After that, the laptop will “think” that it is a new network.
- Also, when the error “Windows failed to connect to wi-fi” appears, you can try to change the mode of the wireless network (b/g/n). This is roughly how it looks on ASUS router:
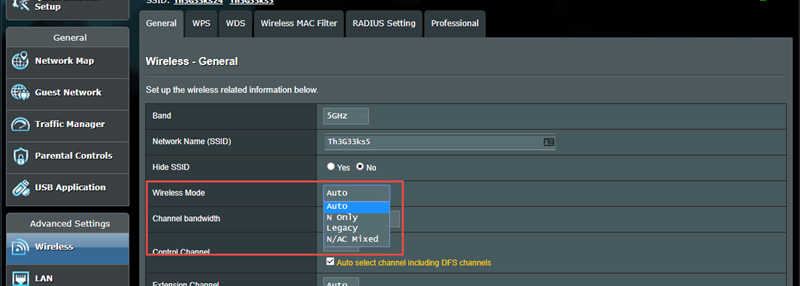 This is especially relevant if you have an older laptop. Sometimes the router is set to 802.11n mode, which older laptops may not support and only work in the older 802.11g mode. So, you need to check and set the router to “auto” or 802.11 b/g/n mode. Don’t forget to save the settings and reboot the router.
If the problem persists, the advice did not help, then describe in the comments after what happened, and what you have already tried to do. I will try to give you some advice.
 The Internet Works, and the Browser Does Not Load Pages. Doesn`t go to sites
  Pages are not comletly Loaded. The Browser Doges Not Fullly Open Sits and Pictures
  Internet Connection Error. What to do and How to Fix in a Browser?
  Error In Resolving General Access to the Internet