
Installing and Changing the Wi-Fi Network Password on TP-Link TL-WR741ND (TL-WR740N)
Changing the password of your Wi-Fi network is probably the most popular configuration that everyone tries to perform on their own. Well agree, it’s silly to call a wizard just to set or change the password of your wireless network. Now I will tell you in detail how to configure Wi-Fi network protection on two popular routers: Tp-link TL-WR741ND, and Tp-link TL-WR740N. These are really very popular routers, so the instruction will come in handy for many people.
As for setting a password for the wireless network, you should do it when you first set up the router. If you haven’t done it, follow these instructions. Well and change the password as a rule in the case when it is successfully forgotten, or when there are suspicions that several neighbors have already connected to Wi-Fi.
Or go to the router settings, and look there for the key, or install a new one. To do this is very simple.
Instructions on how to change the password on Tp-link TL-WR740N
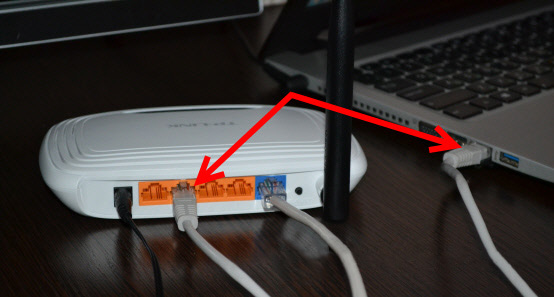
You can perform these settings both from your computer and from your mobile device. The main thing is that you must be connected to the router, in my case it is Tp-link TL-WR740N. You can connect either via Wi-Fi network or network cable. Here we go:
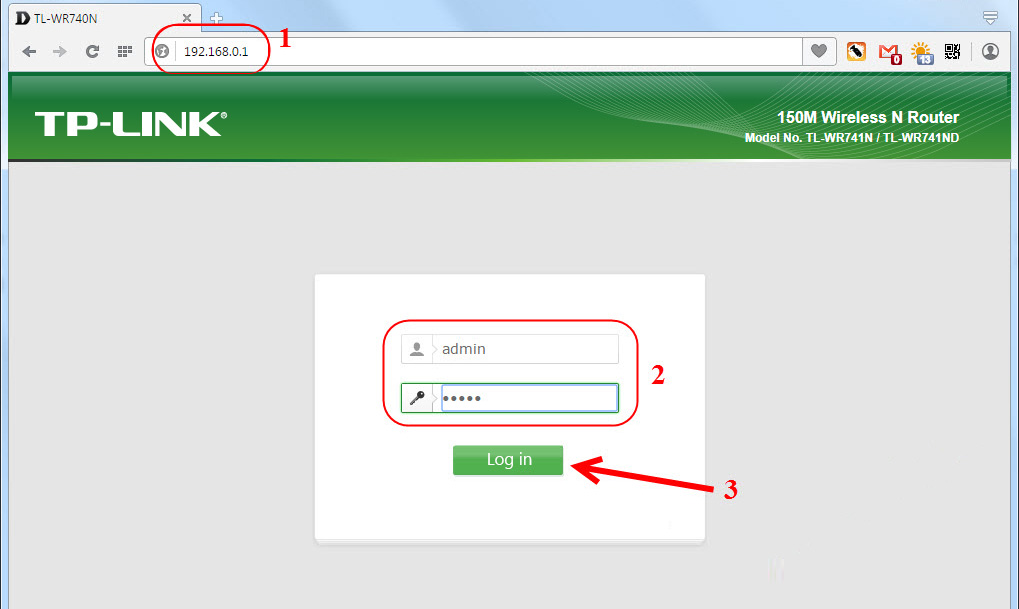
Once connected, we need to go into the settings. Open a browser and go to http://tplinkwi-fi.net, or 192.168.0.1. You will be prompted for a login and password. The defaults are admin and admin (these data and the control panel address are listed at the bottom of the router). If you have already changed these data, specify your own. And if you have forgotten them, you will have to reset all the settings and configure the router again.
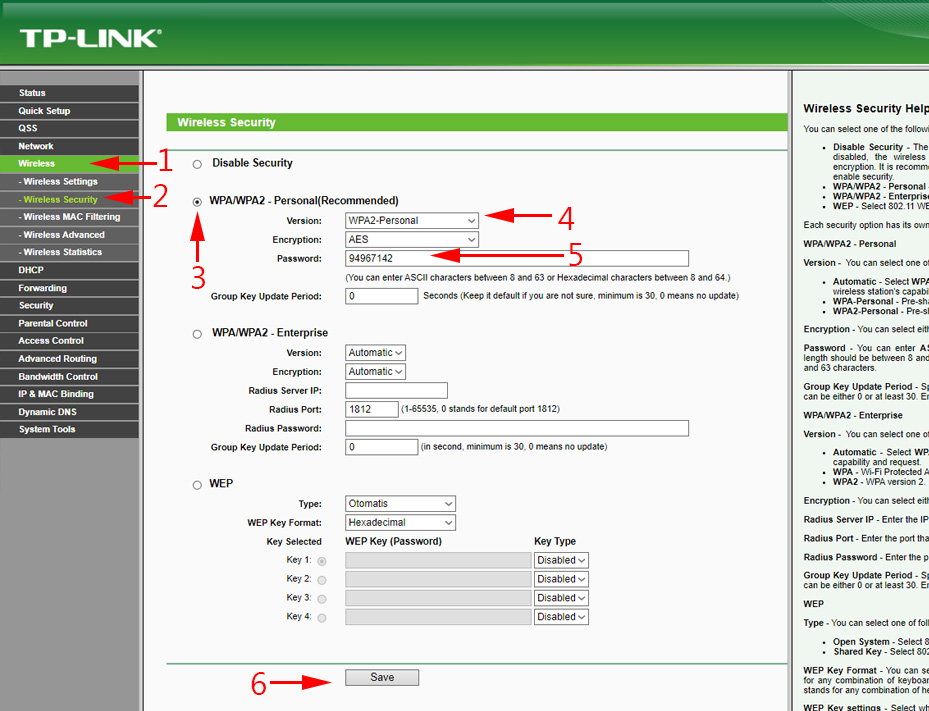
Then go to the Wireless section – Wireless Security. If you are setting the password for the first time, check the box next to WPA/WPA2 – Personal (recommended), then in the Version menu select WPA2-PSK, and in the Wireless Password field make up and write down the password that will be used to connect to your wi-fi. The password must be at least 8 English letters and numbers. You can use only numbers, but in this case the password will not be very secure.
If you want to remember or change the password, just look it up or set a new one in the Wireless Password field. Click the Save button.
That’s it. Try not to forget the password you set.
If you have trouble connecting after changing your wi-fi key
It is possible that after changing the wireless network password, when you connect your computer to this network you will get the error “Windows cannot connect to…” or “The network settings saved on this computer…”. In such cases, you just need to delete the Wi-Fi network in the settings, and re-establish the connection. How to do this, I wrote in this article. And if you have Windows 10, the instructions are here.
 Router TP-Link Archer C2 and 3G/4G USB Modem
  Powerline Setting TP-Link TL-WPA4220KIT Adapters
  TP-Link TL-WR842N: Review and Reviews. Is the Any Support for 3G/4G Modems
  Detailed Instructions for setting up the tp-Link Archer C6 Router