
How to Configure TP-Link TL-WR740N? Wi-Fi Setting and the Internet
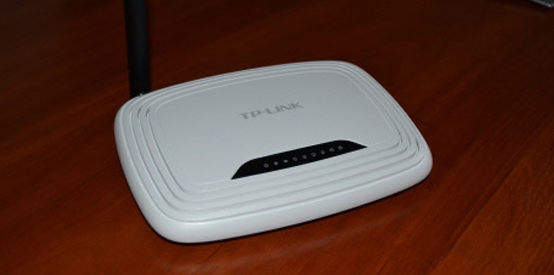
In this instruction, you and I will be configuring the TP-Link TL-WR740N router. This is a very popular router, which is in great demand because of its low price and quality. Many of my friends have TP-Link TL-WR740N, which perfectly copes with its task. And it is created exclusively for home use. And if you have a lot of devices at home, and the house itself is big, then TL-WR740N may not cope with its work. This is normal, because it is a budget router.
But even despite its low price, it looks great. Beautiful design, matte body, there is an opportunity to hang the router on the wall, all these are undoubtedly pluses. Of course I would like to see a power on/off button, and a separate button to disable wi-fi, but unfortunately there is none. The only problem is when connecting a large number of devices, in online games, when downloading torrents, the Internet can be lost. And the router will have to reboot frequently. I wrote about it here. But this is quite normal for a budget model.
This model has been released for a very long time, there are already 6 hardware versions, which means that it has been refined and updated six times (in terms of hardware). This router has received a lot of awards and won a lot of contests. It is truly a people’s model.
Now I will show you how to configure TP-Link TL-WR740N. This will be a complete instruction on how to configure the Internet, Wi-Fi network, and set a password for the wireless network. Well, let’s look at the process of connecting the router. It doesn’t matter if you have a new router just from the store or if you’ve already used it, the instruction will be fine for you. However, this instruction will work for Tp-Link TL-WR741ND as well.
If you’ve already tried to configure the router, it’s a good idea to do a TP-Link TL-WR740N reset. To do this, turn on the power and press the WPS/RESET button on the back of the router for 10 seconds.
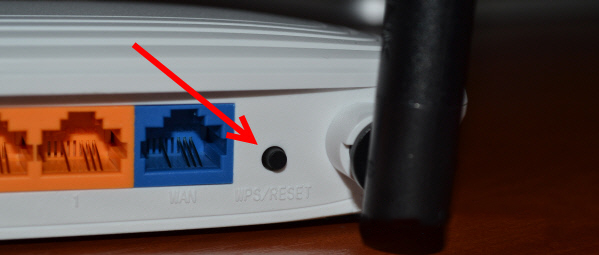
You can look at the LEDs, they should all light up. After that, you can release the button.
Connecting the TP-Link TL-WR740N router
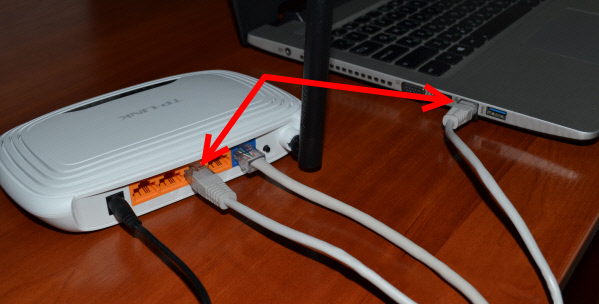
Take the power adapter and connect it to the router. Connect it to the mains. Next, plug the Internet into the WAN socket (it’s blue) on the router. Network cable from the Internet provider. And if you have internet via ADSL modem, then connect TP-Link TL-WR740N to the modem. On the router cable into the WAN connector, and on the modem into the LAN.
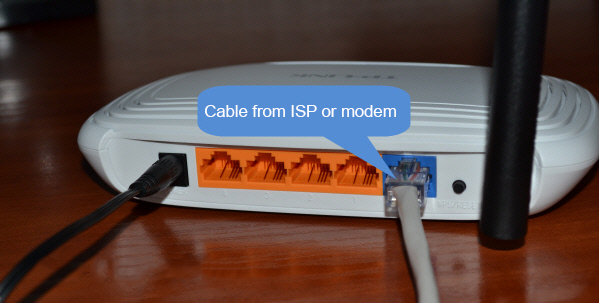
Now you need to decide from which device you will configure the router. If from a computer or laptop, I advise you to connect to the router on the cable that comes in the kit. Plug the cable into the LAN socket (yellow), and on the computer into the network card socket.
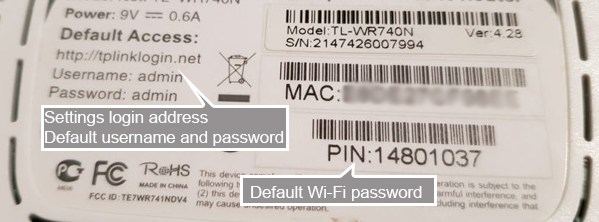
And if you want to configure your TL-WR740N via wi-fi, just connect to its Wi-Fi network. If the router is new, it will have a standard name. For example, mine is “TP-LINK_9C00”. And to connect, use the standard password, which is listed on the bottom of the router on the sticker.
Just connect to the wireless network. If there will be a status of “no internet access”, that’s normal. It means that you just need to set up a connection to your ISP. That’s what we’re going to do now.
TL-WR740N: Configuring Internet Connection (WAN)
1. If you had to run a high-speed connection to connect to the Internet, you don’t need it now. You can delete it. This connection will be set up by the router after it is configured.
2. If you already have Internet on your computer through the router, without launching different connections, then most likely your provider uses Dynamic IP connection technology, and you do not need to configure the Internet connection. You can go straight to the Wi-Fi network setup (see below).
We need to enter the control panel.
Enter TP-Link TL-WR740N router settings
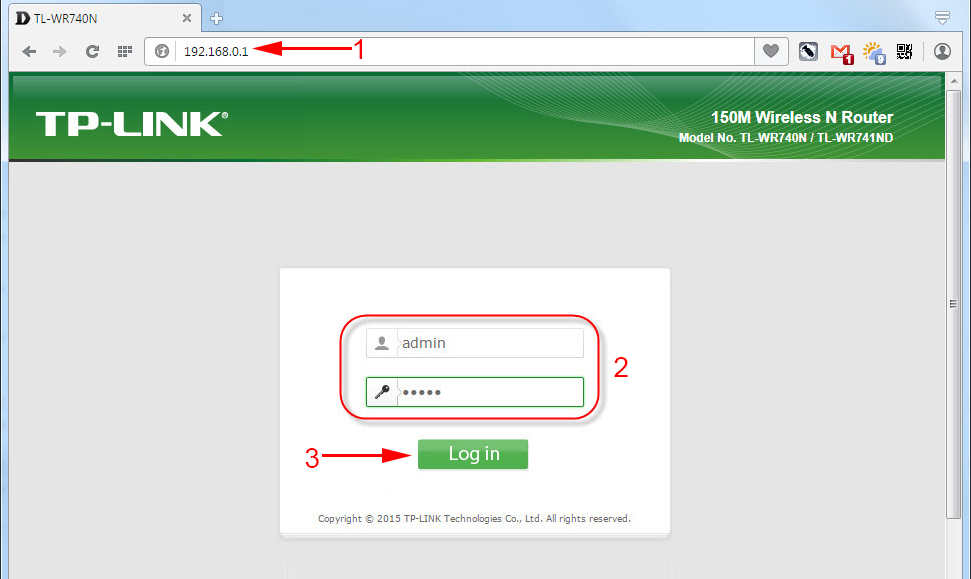
If you are already connected to the router, just open any browser, enter the address 192.168.0.1 (on older versions it can be 192.168.1.1), or http://tplinkwi-fi.net in the address bar, and go to it. Enter your username and password. If you haven’t changed them, it’s admin and admin. And if you have changed them and forgot them, let’s reset the settings.
Perhaps you will still need a more detailed article on logging into the control panel Tp-Link, and advice on how to solve the problem when you can not enter the settings.
Configuring PPPoE, L2TP, PPTP
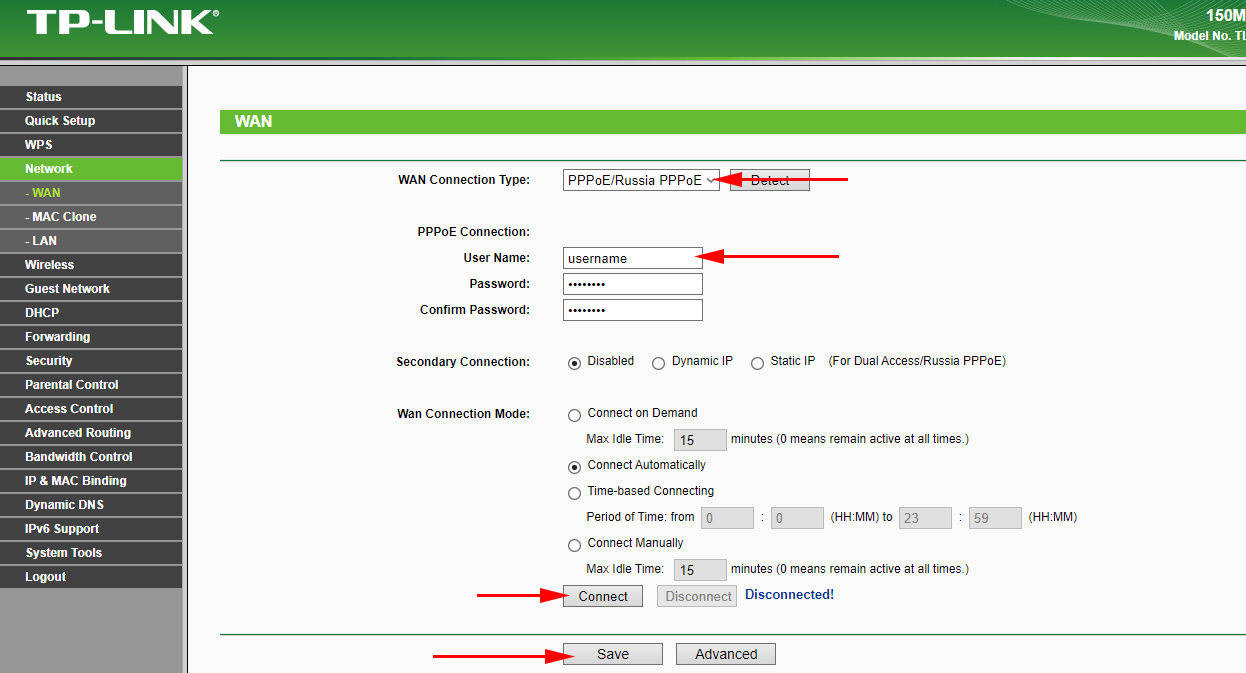
Go to the Network – WAN tab in the settings. In the WAN Connection Type menu we need to select the connection type.
If you have Dynamic IP, select it and immediately click on the Save button. You don’t need to set any more parameters there. After that the Internet through the router should work.
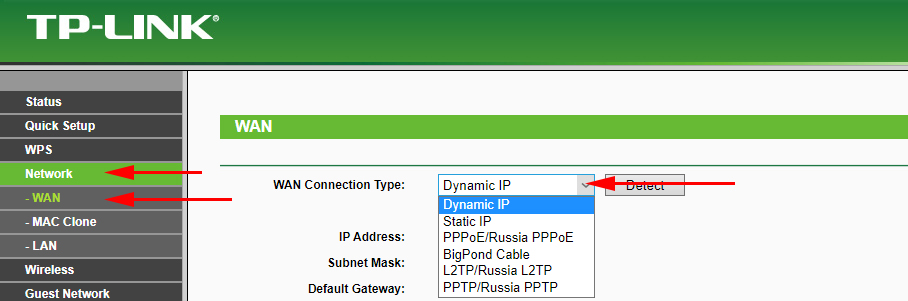
And if you have PPPoE, PPTP, or L2TP, you will need to set the necessary parameters for connection, which were issued by the provider.
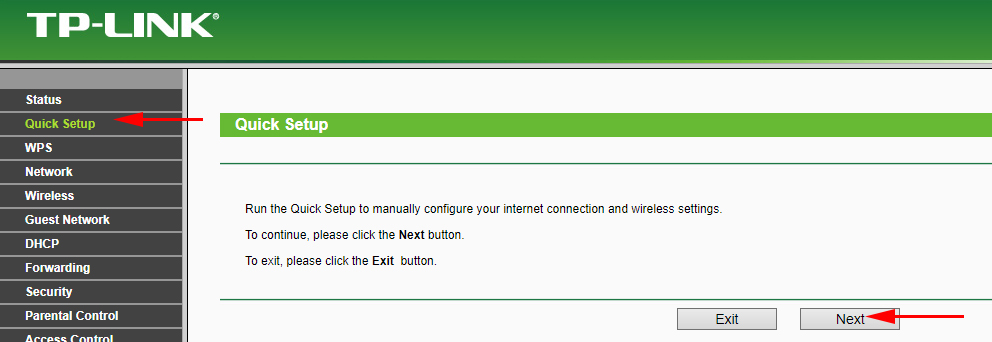
If you have not managed to set up the Internet in this way, then go to the Quick Setup tab and try to configure everything with the help of step-by-step instructions. There you can just select your country, ISP, etc. You might find it easier that way.
Only proceed to the Wi-Fi setup when the internet through the router is already working.
Setting up Wi-Fi and password on TP-Link TL-WR740N
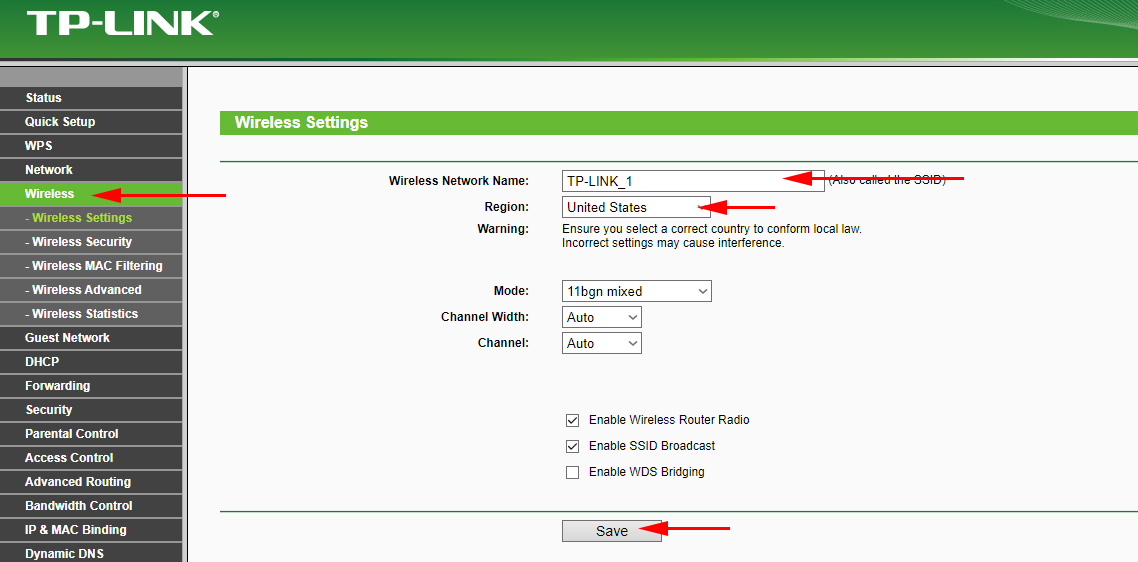
Let’s move on to setting up the wireless network and setting a password for wi-fi. In the control panel, open the Wireless tab.
Here we need to change the name of the Wi-Fi network, select our region and click the Save button.
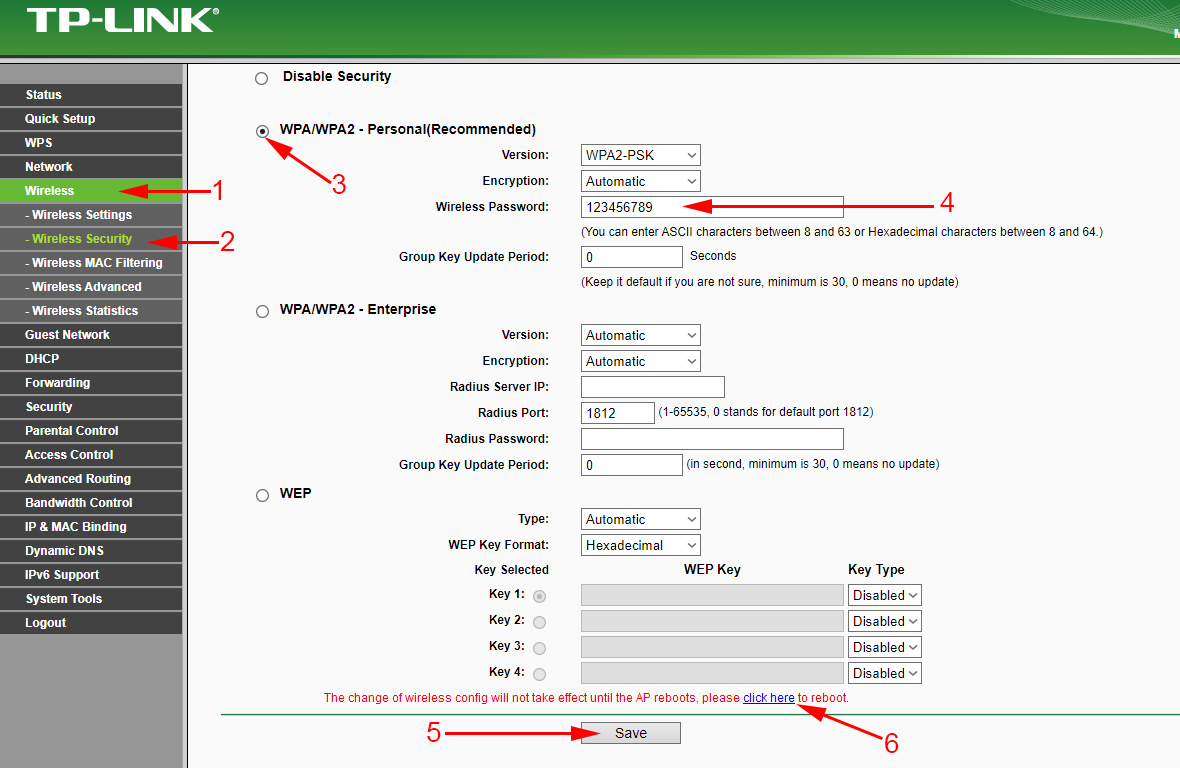
To set a password, go straight to the Wireless tab – Wireless Security.
Here you need to select the item WPA/WPA2 – Personal (recommended), set the other parameters as I have on the screenshot below, and in the Wireless Password field, think up and write down the password that will protect your wi-fi. The password must be at least 8 characters long. Click on the Save button, and you can immediately click on the “Click Here” link to reboot the router.
After rebooting, you will need to reconnect the devices that you connected via wi-fi. Already with a new password, and to the network with a new name, if you have changed it.
Changing admin password to enter the settings
I advise you to go to the settings, and on the System – Password tab, change the password used to enter the router settings from the standard admin to something more complex. To do this, you will need to specify the old username and the old password, and set a new one. You can leave the username admin, but the password should be different.
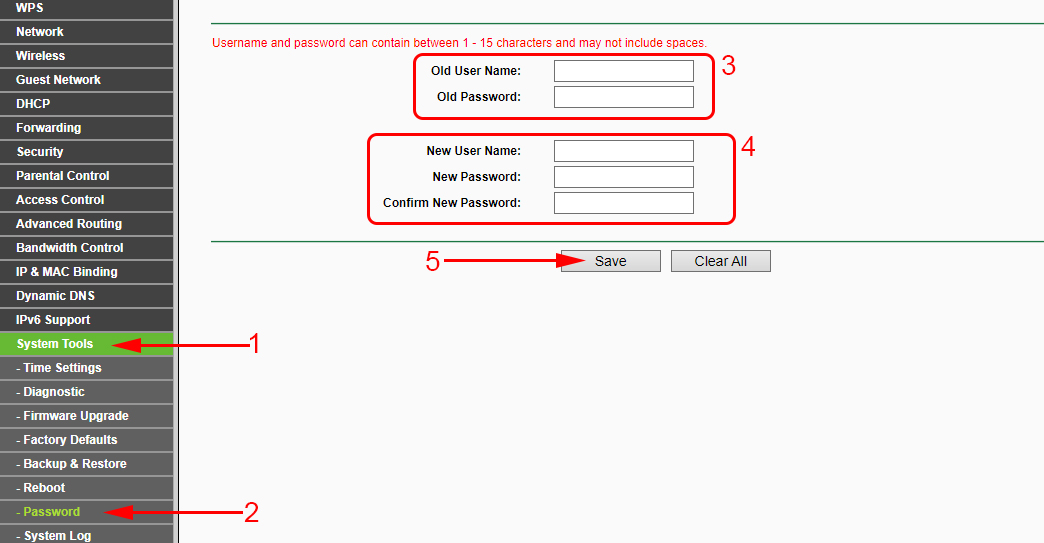
Write down the password, so that you do not forget it. And if you forget it, you will have to reset the settings to factory defaults and customize everything again, as you won’t be able to get into the control panel.
It is not difficult to configure TP-Link TL-WR740N by yourself. It is not more complicated than other models of this manufacturer. The main thing is to make the Internet work through the router and the status “No Internet access” on your computer.
You can configure it both from a computer (it doesn’t matter if you have Windows 10, Windows 7, or other OS) and from a mobile device (smartphone, tablet). And if you have TL-WR740N hardware version 5 and higher, you can use TP-LINK Tether proprietary program to configure and manage the router. Everything works, tested it.
If you still have any questions about configuring this router, ask them in the comments.
 How to Change the Wi-Fi Password on the TP-Link M5250 and M5350 Router
  How to Connect and Configure a Wi-Fi Router TP-Link Archer C2300?
  TP-Link: Wi-Fi does not work. The Router Does Not Give Out Wi-Fi Network
  TP-Link Archer T2uh Ac600-Review, Driver Installation, Setting