
TP-Link TL-WR741ND SETTINGS. Connection, Setting Wi-Fi Network
Tp-link TL-WR741ND is one of the most popular budget routers, which has been on the market for a long time and sells very well. It differs from TL-WR740N only by a removable antenna, well, and other hardware. A good popular router, which is great for a small house, and to connect several devices. It is Tp-link TL-WR741ND that we will configure in this detailed instruction.
I will tell and show you how to connect the router Tp-link TL-WR741ND, how to enter the settings, connect it to the Internet, configure the Wi-Fi network and set a password. It does not matter if you have a new router, or it has already been configured before, everything will work out.
Let’s configure it according to the scheme
- Let’s connect Tp-link TL-WR741ND to the Internet and connect a computer to it.
- Let’s go to the router settings.
- Let’s configure the Internet connection (WAN).
- Set a password for Wi-Fi and configure the wireless network.
- Set protection for access to router settings.
In the configuration of any router, the main thing is to configure the Internet. The router should be able to connect to the ISP and receive Internet from it. If our TL-WR741ND can’t connect to the Internet, it won’t be able to distribute it to your devices. And it will be “No Internet access” (Restricted). And it’s not difficult to set up Wi-Fi network and put a password.
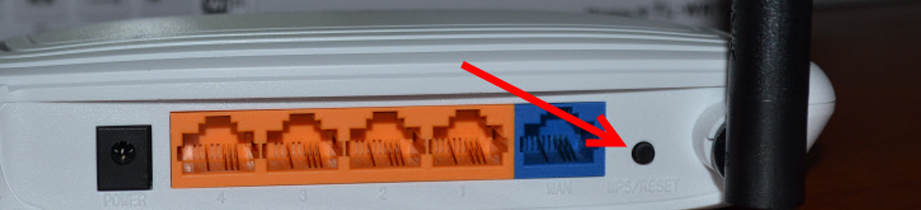
If the router has already been configured, or you have tried to customize it, it is better to do a factory reset. To do this, press the WPS/RESET button for 10 seconds when the router is turned on.
TL-WR741ND settings will be reset. You can continue.
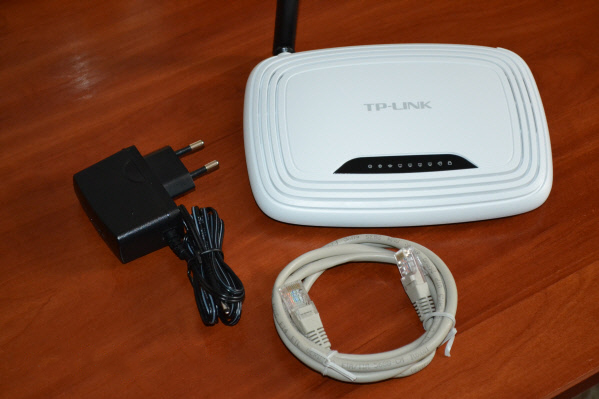
Connecting the Tp-link TL-WR741ND
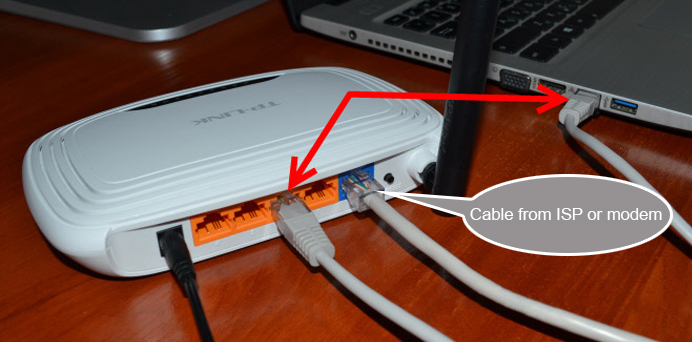
Connect the power adapter to the router. Then plug the cable from your Internet provider or ADSL modem into the blue WAN socket. If you will be configuring the router from your computer, you can connect to it with the network cable that is included in the kit. It looks like this:
If you’ve connected everything correctly, that’s half the battle. In some cases (when the provider uses Dynamic IP connection), the Internet will work through the router. If this is the case, you can go straight to the settings and go to the wi-fi setup.
You can connect to Wi-Fi and configure the router wirelessly, even from your phone or tablet. Immediately after turning on the router, a Wi-Fi network will appear. It should not be password protected, just connect to it. If the network will still be protected, the standard password (PIN) is listed at the bottom of the router on the sticker. There are several hardware versions of the router out there, and the newer ones already have the default network buried with a password.
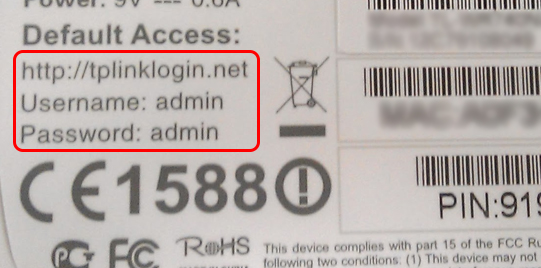
How to enter TL-WR741ND settings?
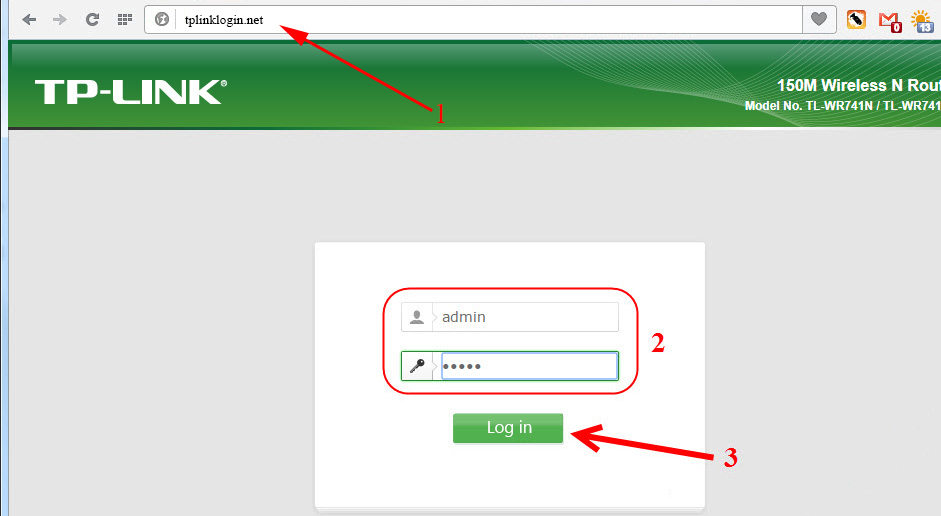
After connecting, open any browser on the computer (from which we will configure). In the address bar type the address http://tplinkwi-fi.net, 192.168.1.1, or 192.168.0.1 and go there. The exact address is indicated at the bottom of the router on the sticker. There is a default user name and password, which you need to specify to get into the settings. The standard ones are: admin and admin.
Entering the control panel looks like this:
You may still need detailed instructions on how to log in to the control panel, and what to do if you do not go into the settings.
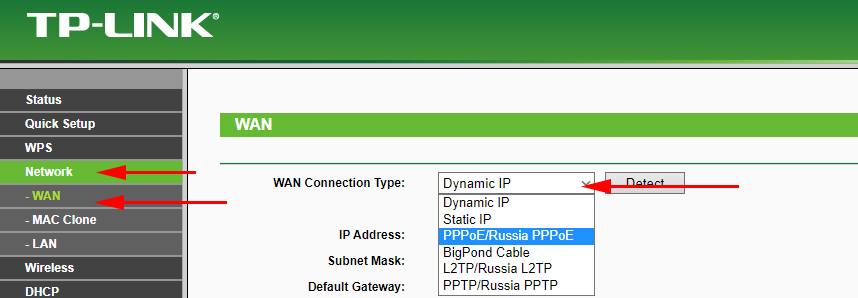
Setting up Internet connection
In the control panel go to the Network – WAN tab. From the WAN Connection Type menu, select your connection type from the list.
If you have Dynamic IP, you can save the settings at once, and the Internet through the router should work. And if you have PPPoE, etc., you need to set the necessary parameters. As a rule, this is a user name and password. Maybe also IP address. And save the settings by clicking the Save button.
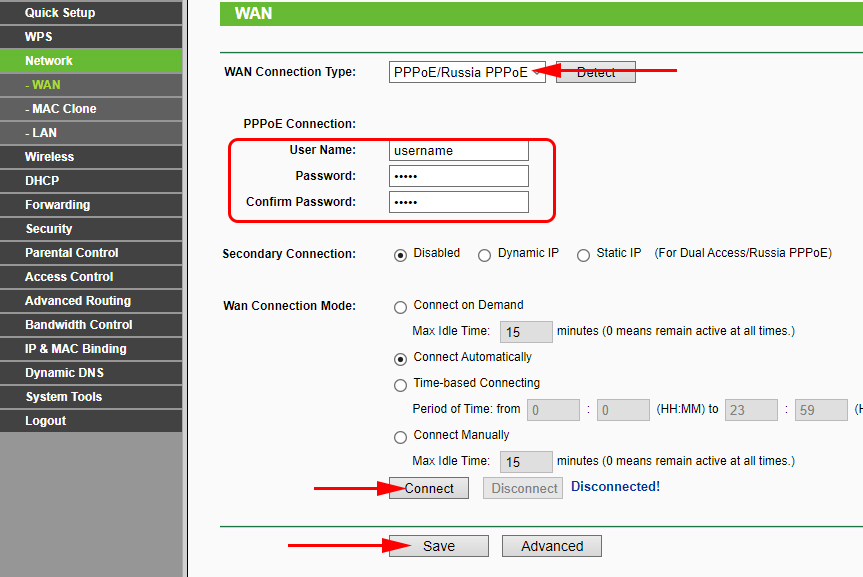
The router should connect to the ISP. Go to the next settings only when the Internet via Tp-link TL-WR741ND is already working.
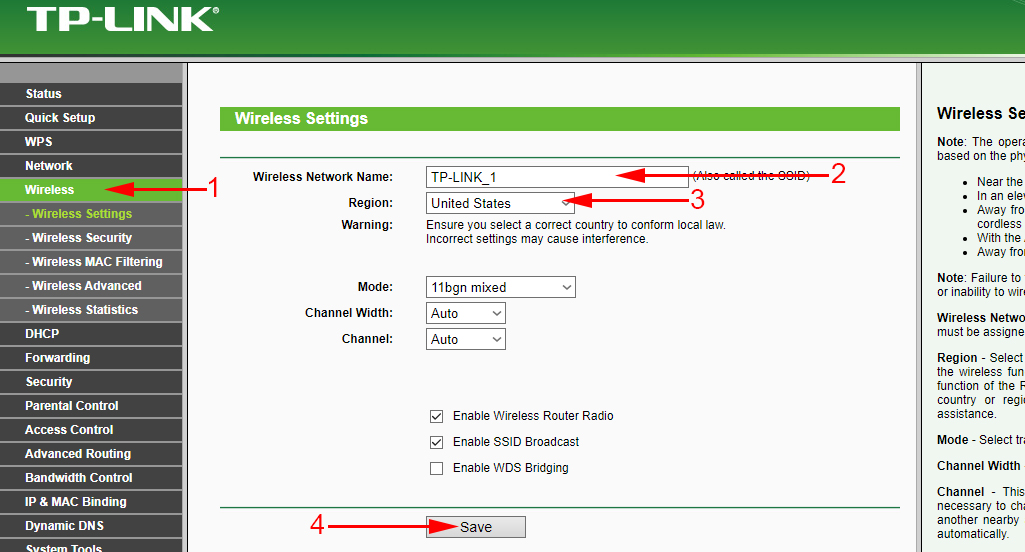
Setting up Wi-Fi on Tp-link TL-WR741ND and setting the password
To configure the wireless network, go to the Wireless tab. There we need to change the name of the Wi-Fi network (Wireless Network Name), specify our region and save the settings by clicking the Save button.
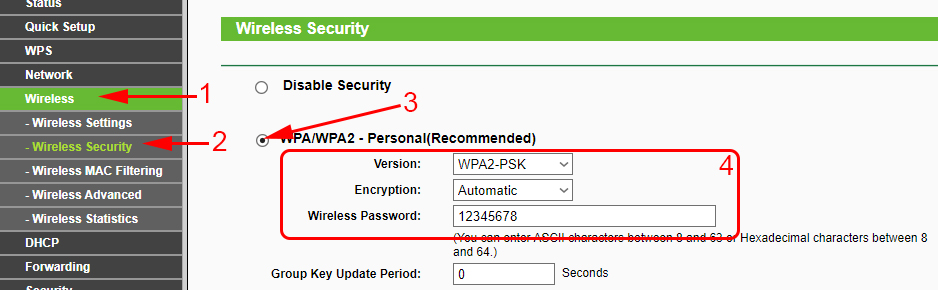
Right away we go to the Wireless Security tab. Here we will change or set the password for our Wi-Fi network.
Select the item WPA/WPA2 – Personal(Recommended). Set Version and Encryption as I did in the screenshot below, and in the Wireless Password field specify the password that will protect your network. Minimum 8 characters.
Save the settings and reboot the router. If you have already connected some devices via wi-fi, you will need to reconnect them. After all, we have changed the network name and password. And try not to forget the password that you set. If you forget it, this article will come in handy.
Changing the password to enter the settings
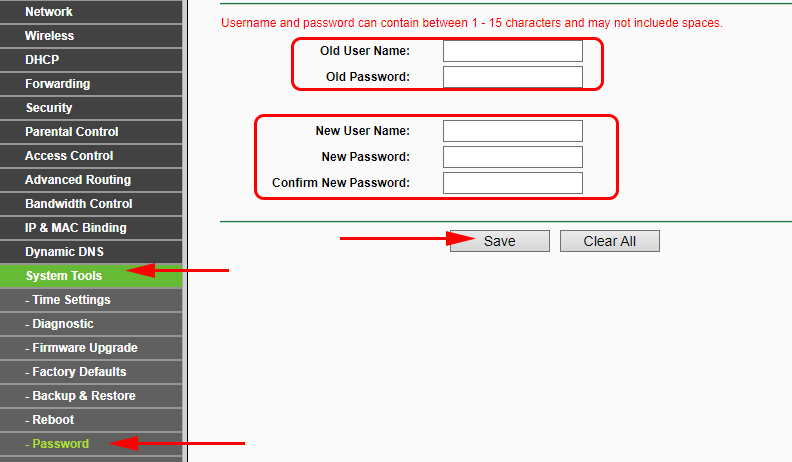
If everyone who connects to your Tp-link TL-WR741ND can’t enter its settings, we need to change the standard admin password. To do this, open the System Tools – Password tab in the settings.
Specify the old username and the old password (if you haven’t changed them yet, then admin). And specify the new settings. Click the Save button.
Now you will have to specify the set password and username when logging into the control panel.
We have considered only the basic settings, which are enough for the router to work normally and distribute the Internet. If you want to configure something else, for example, make a port forwarding, change the password, etc., then see the instructions for routers Tp-Link in this category: /tp-link/.
If you still have any questions about configuring TL-WR741ND, please ask them in the comments to this article.
 TP-Link Archer C20 and Archer C20i Roter Firmware
 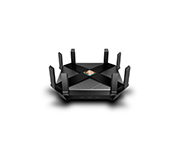 TP-Link Archer Ax6000-Super-Speed and PowerFul Router with Support for Wi-Fi 6 (802.11AX)
 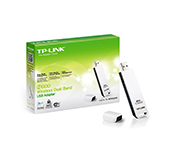 TP-Link Archer T2uh Ac600-Review, Driver Installation, Setting
  Detailed Instructions for setting up the tp-Link Archer C6 Router