
Connection and Setting Wi-Fi Router TP-Link Archer and Archer and Archer C9
Today we are going to configure two powerful routers from TP-LINK. I will show the process of configuration on the example of TP-LINK Archer C8. But since the Archer C8 and Archer C9 models are almost identical, the instructions will be the same. They are the same externally, and they have the same, new control panel. It is no longer green, as we used to see on TP-LINK routers, but a new, modern one in blue colors. And this will be the first instruction on this site on how to configure TP-LINK wi-fi router with the new control panel.
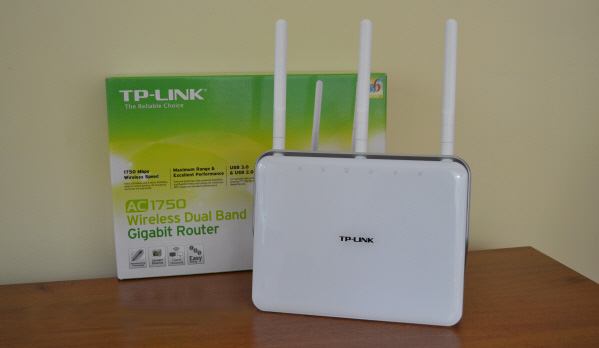
I will write about the TP-LINK Archer C8 router itself and about the new settings page in a separate article. Let’s make a small review of this router, and as usual, I’ll write my review. As for TP-LINK Archer C9, it is a bit more expensive and more powerful. There are no special differences in it. Both routers are powerful, of course dual-band, give a very good radius of coverage of Wi-Fi network, and have a set of modern features. In addition, they look very cool.
I’m glad that finally TP-LINK has made a new web-interface for its routers, although only for flagships. In the new control panel, it’s very easy to figure out. TP-LINK Archer C9, in hardware version V3 has a multilingual web-interface. I’m going to make screenshots of the English version.
We will configure it according to the standard scheme:
- Installing and connecting the TP-LINK Archer C8 (C8) router.
- Setting up the router using the Quick Setup Wizard. Setting up the Internet, Wi-Fi network and password.
- Changing the most necessary parameters through advanced settings.
- Changing the password to protect the control panel.
If you have a desktop computer or laptop, I advise you to configure the router from it. If you have only a smartphone or tablet, then they can also be configured. This can be done through a browser, in the usual way, or with the help of the proprietary program TP-LINK Tether.
Connecting TP-LINK Archer C8 (C9) router
We take our router, screw the antennas to it. Next, connect the power adapter and plug it into the socket. If the indicators on the front panel do not light up, then the power is turned off by the button on the back of the router.
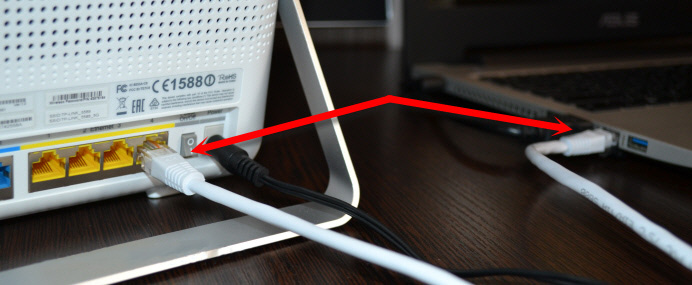
Take the network cable that comes with the kit, and connect the computer to the router. On the router, plug the cable into the LAN (Ethernet) connector (it’s yellow), and on the computer into the network card. If you want to configure via wi-fi, it is enough to connect to the Wi-Fi network of the router, which will appear immediately after turning on the power. The Wi-Fi password is indicated on the back of the router on the sticker (Wireless Password/PIN). The SSID (the factory name of the Wi-Fi network) will also be listed there.
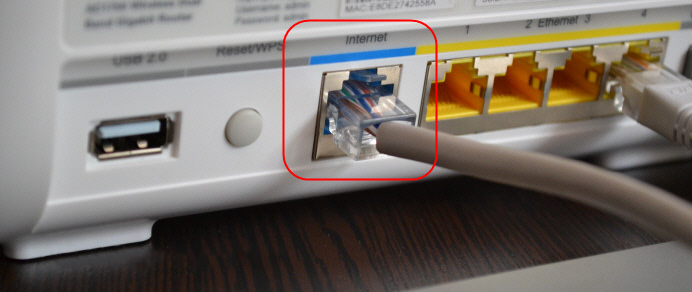
Next, you need to connect the Internet to the router. Connect the cable from the Internet provider or from the modem to the WAN socket (Internet). It is blue.
As a result, the device from which we will configure must be connected to the router by cable or wi-fi.
If the router is not new, I would advise you to reset the settings on TP-LINK Archer C8 (C9). That the old settings would not interfere with us. To do this, when the router is turned on, press Reset/WPS button for 5 seconds (you can see this button on the photo above). Press it, hold it, and look at the indicators on the front panel. The power indicator will start blinking, then all the indicators will go out and the router will be rebooted. And the settings will be reset to factory defaults.
Quick setup of TP-LINK Archer C8 and Archer C9 router
Depending on the internet provider and connection method, immediately after connecting the router, it can already give out internet. Usually, there is a connection, but no internet access. This is normal, the router is not yet set up. In any case, you need to go into the settings, and configure the router to work with your ISP, Wi-Fi network, set a password, etc.
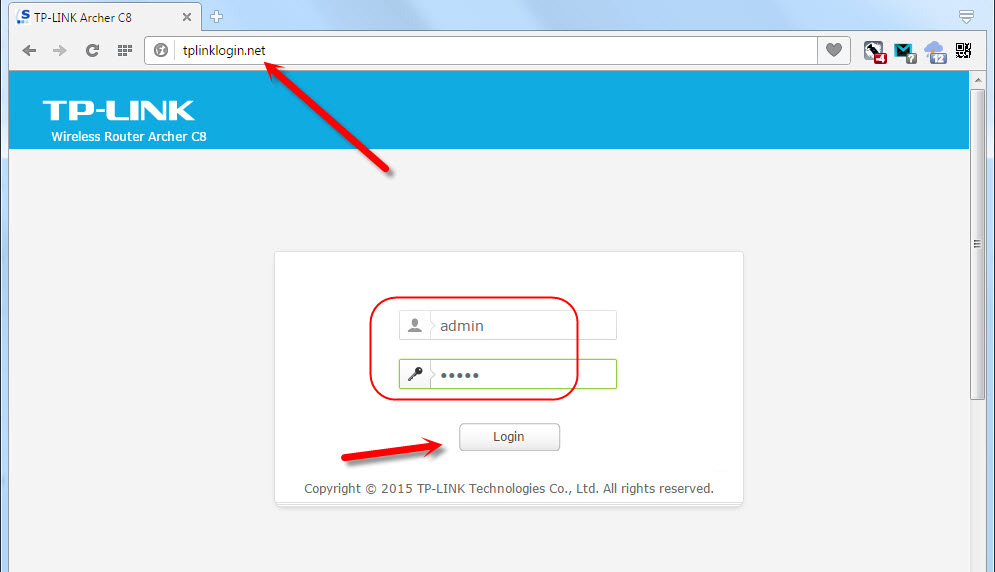
To enter the Archer C8 router settings, just open any browser and go to the address tplinklogin.net, or 192.168.0.1. Next, the authorization page will appear, where we specify the user name, password (factory, admin and admin), and click on the “Login” button. The address to enter the settings, username and login are on the back of the router. If you can’t enter the settings, you can see the solutions in this article.
A quick setup wizard will open at once. That’s what we need. With its help, you can quickly and easily configure the router.
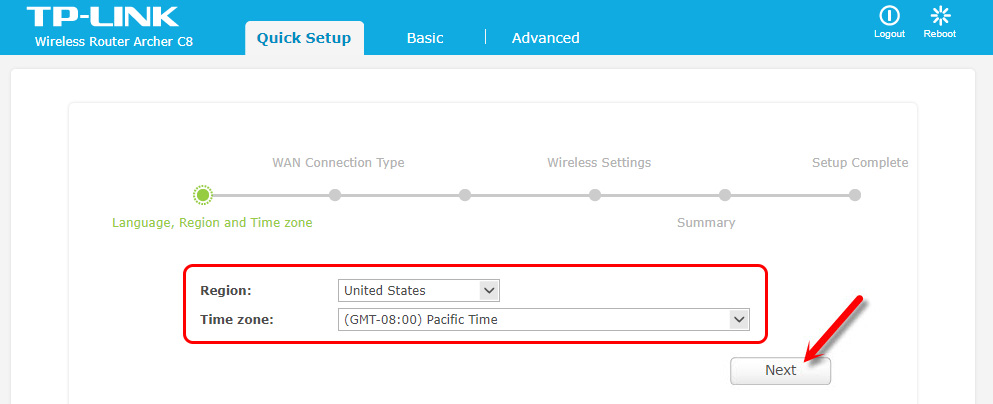
In the first window, we need to specify the region, and time zone (or, only time zone). Nothing special. We specify and click ” Next“.
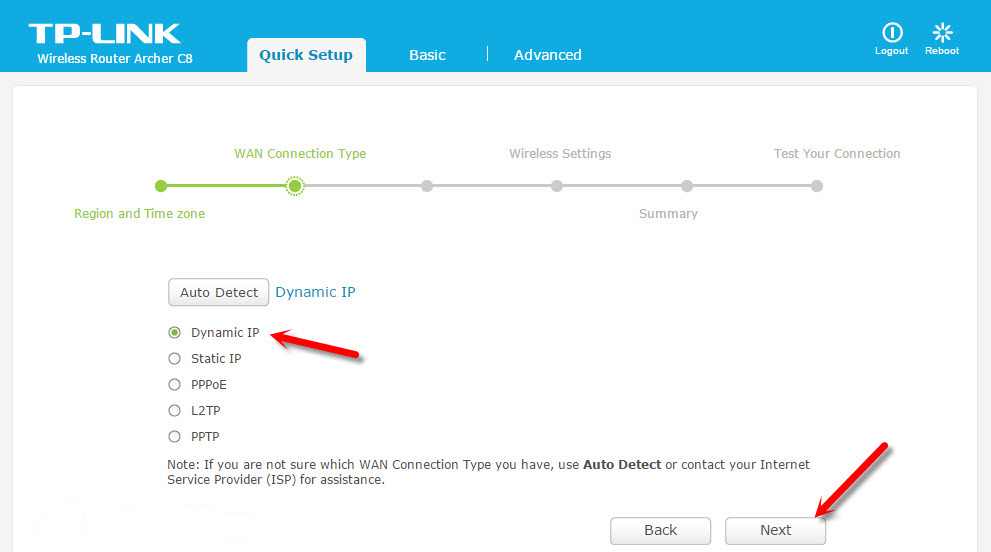
The next page is very important. You need to specify the type of connection, and if necessary, set the parameters for connecting to the Internet provider. If you do this incorrectly, the Internet will not work.
If you know what type of connection your ISP uses (Dynamic IP, Static IP, PPPoE, L2TP, PPTP), then select it and click “Next”. Or click on the ” Auto Detect” button and the router will try to detect the connection type itself. I, for example, have Dynamic IP.
If you also have Dynamic IP, the router will ask you if your ISP does MAC address binding. If not, then leave the item “No, I do not need to clone MAC address”, and go to wi-fi configuration. If there is a binding, then select “Yes, I want to use the main computer’s MAC address”. And the router will clone the MAC address of the computer from which you are configuring it now. Nowadays few providers use MAC binding, but there are some.
Everything is clear with dynamic IP. But, let’s go back a little bit and understand the configuration of PPPoE, L2TP, PPTP.
Setting up PPPoE, L2TP, PPTP connection on TP-LINK Archer C8 (C9)
Select the appropriate connection type and click “Next”.
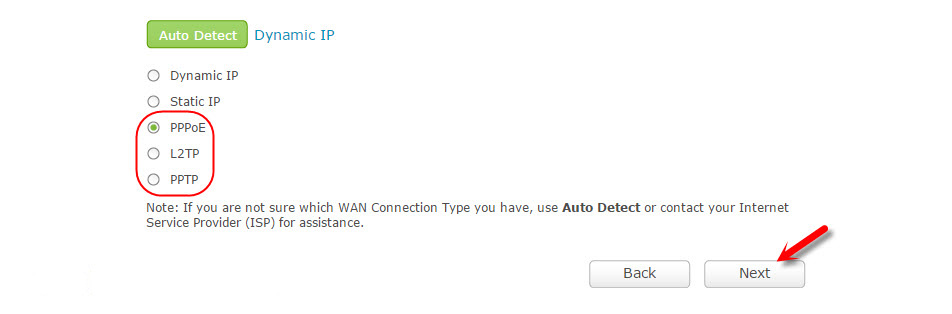
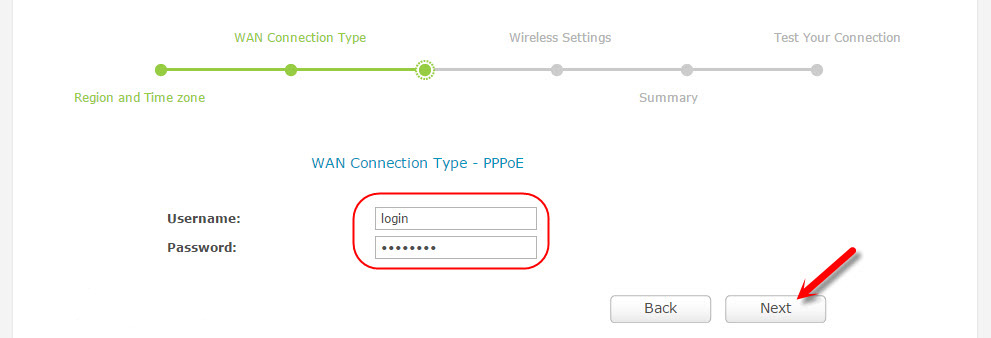
If you have PPPoE (TTC, Vodafone, Dom.ru), you will be prompted for login and password. They are issued by your Internet provider. Specify them and click “Next”. Wi-Fi network settings will appear.
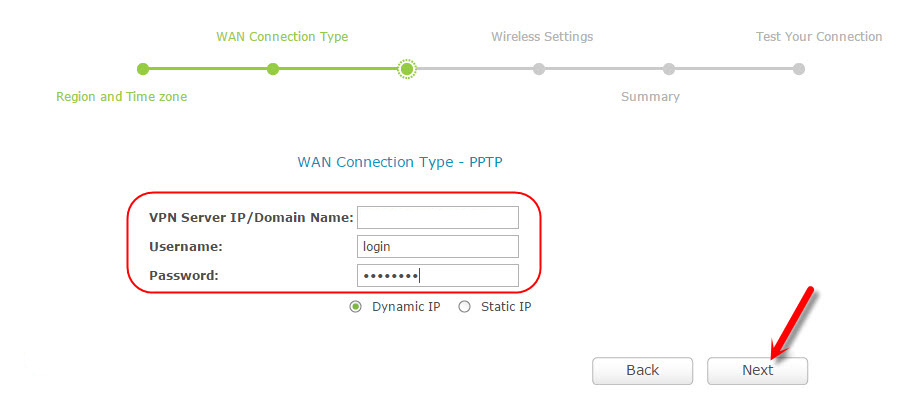
L2TP and PPTP. Having chosen one of these types of connection, in addition to the username and password, you will most likely need to set static IP and DNS, and the name of the server.
The next item is Wireless Settings.
Setting up Wi-Fi and password on TP-LINK Archer C8
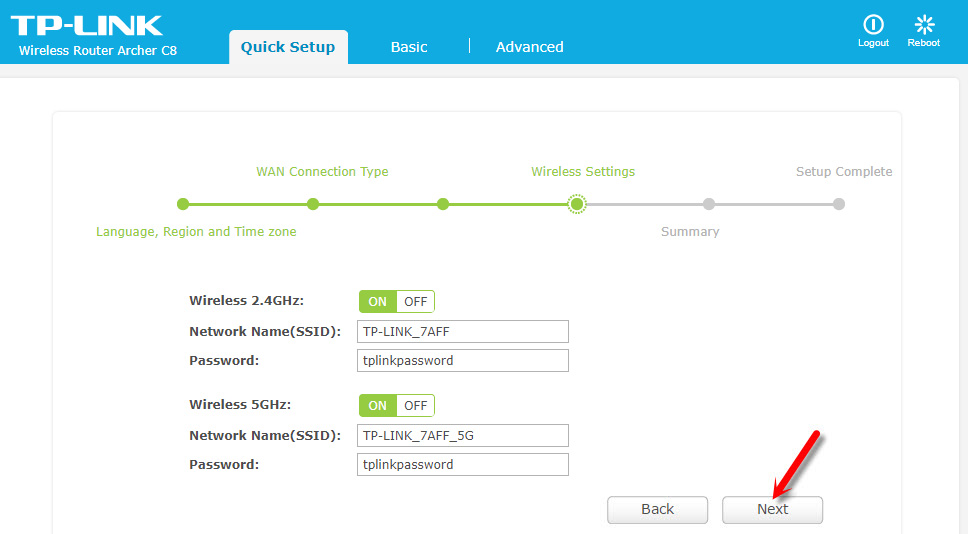
In the quick setup wizard, we only need to specify a name for Wi-Fi networks, and a password. Since the router is dual-band, each network is configured separately. You can disable one of the wireless networks, leaving only 2.4GHz, or 5GHz.
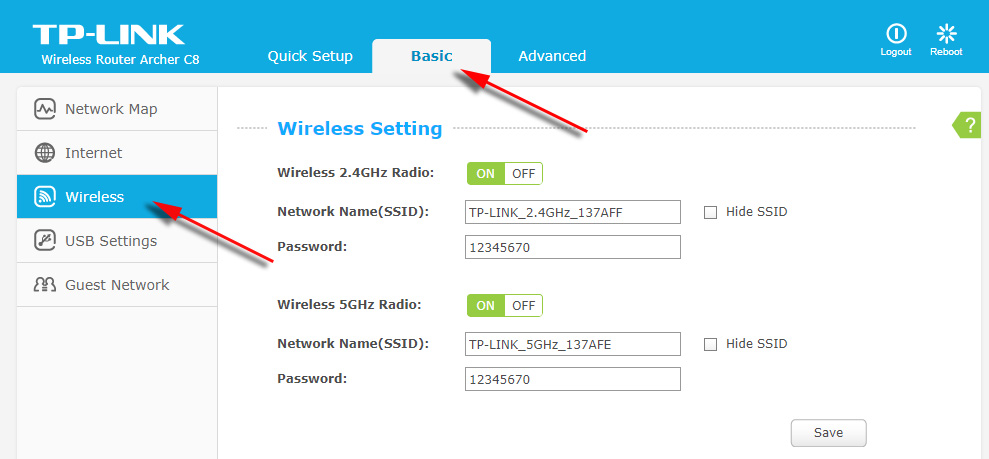
Set the SSID (network name), the password that will be used to secure your Wi-Fi network, and click on the “Next” button.
You can change these settings at any time, on the ” Basic ” – ” Wireless” tab.
In the next window of the configuration wizard we will see all the settings, click ” Save“. We see a message that everything is ready and click on the ” Finish” button.
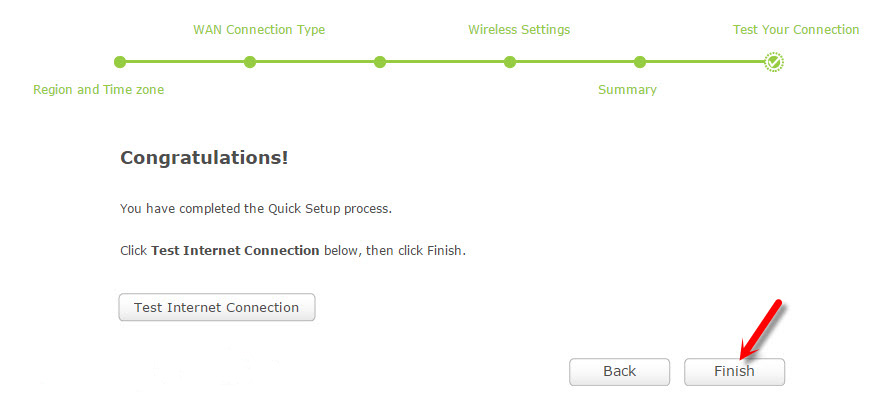
That’s it, the network map will open. You can connect your devices and use the Internet. To connect via wi-fi, use the password you specified during the setup process.
Manual configuration of the required parameters
In the control panel, you can go to the ” Basic” or “Advanced” section and get access to advanced router settings. For example, set up Wi-Fi networking on the “Basic” – “Wireless” tab. Or, set the parameters for the drive that is connected to the router’s USB port.
And if you need to change broader parameters, I would even say professional, for example, the channel of the Wi-Fi network, mode of operation, then open the parameters on the tab “Advanced”. This is how this section with additional settings looks like on TP-LINK Archer C9:
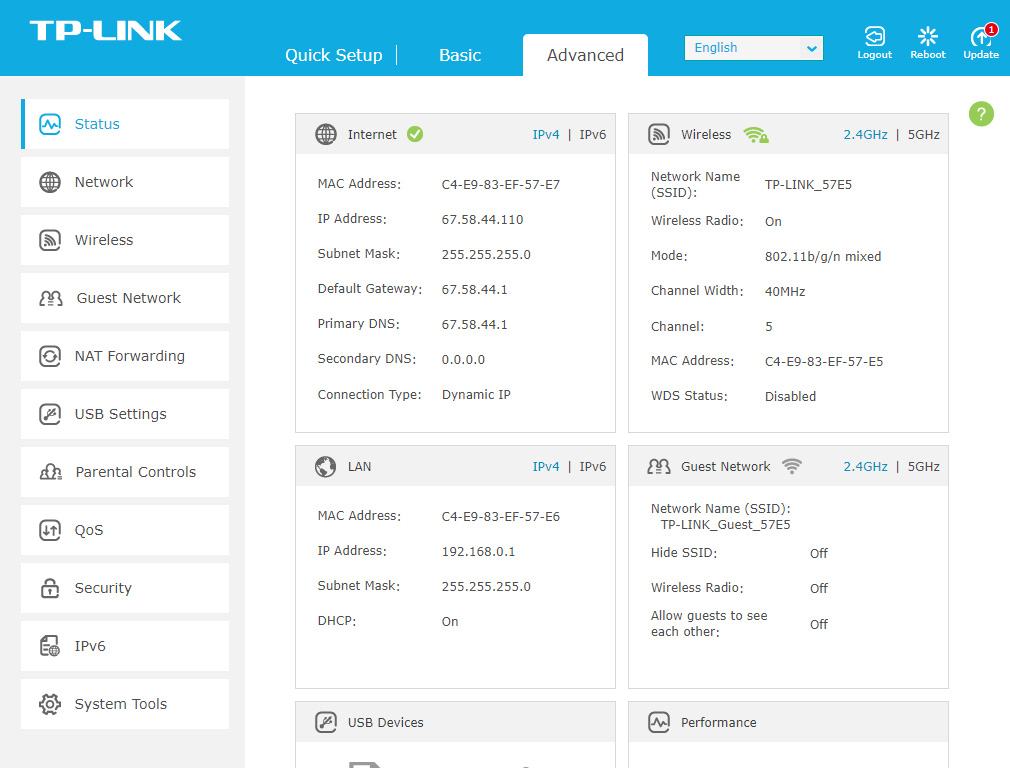
The settings there are very different: local network, wi-fi, USB settings, parental control, protection, etc.
Protecting the web-interface of TP-LINK Archer router
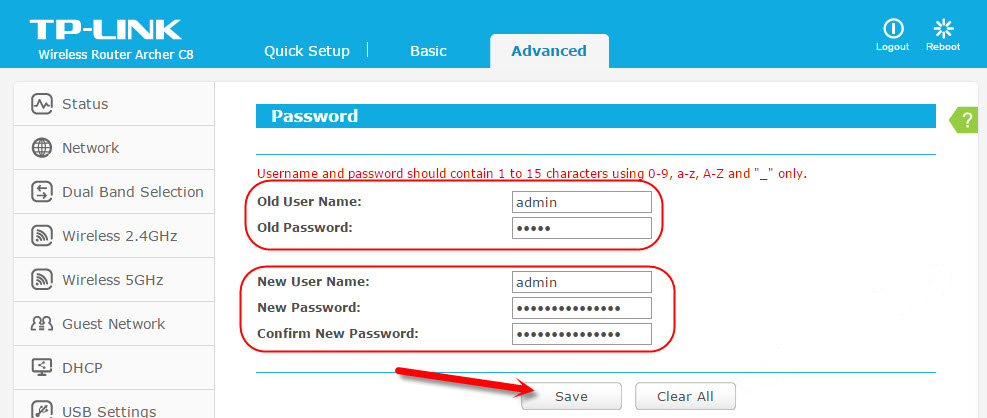
To enter the router settings, you need to enter your username and password. We already know that the factory admin and admin. So, it is better to change the password. To do this, go to the ” Advanced” section and select System Tools – Password on the left.
First enter the name and password that are currently set, then set a new username and password twice. Click “Save”.
Just make a note of the password you are setting. If you forget it, you will have to reset the settings. TP-LINK Archer C9 has much more settings on this tab. There’s even password recovery via email, controlling access to the control panel for specific devices, and even remote management of router settings. I think that in the next hardware version (or in the firmware), such functions will appear on Archer C8 as well.
By the way, I’ve already written an instruction on how to update the firmware on TP-LINK Archer C8.
Afterword
I configured my TP-LINK Archer C8 in about three minutes. Everything is very simple and clear. The most popular mistake that you may encounter while setting up any router is when the Internet doesn’t work after the setup. Wi-Fi is there, but the Internet doesn’t work. I wrote a separate article on solving this problem.
If you have any problems in the process of configuration, then describe them in the comments, we will deal with them. And leave your reviews and impressions of these routers in the comments, it will be interesting to read.
 Instructions for setting up mobile router tp-link M5250
  192.168.0.254: Admin/Admin, Entrance, Setting, TP-Link Page sores not open
 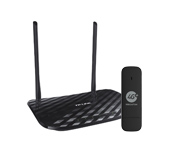 Router TP-Link Archer C2 and 3G/4G USB Modem
 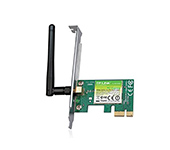 TP-Link TL-WN781ND-Setting and Installing the Driver