
Setting Wi-Fi Router TP-Link TL-WR1045ND and TL-WR1043ND
In this instruction we will configure two routers at once: TP-LINK TL-WR1045ND and TP-LINK TL-WR1043ND. I have a model TL-WR1043ND, I’ve been using this router for about a week now, and I decided to prepare a detailed instruction on how to connect and configure it.
But, as the TL-WR1043ND and TL-WR1045ND models are practically the same, I decided to make the instruction for two routers at once. Externally these routers are identical, the control panel is the same. Just TP-LINK TL-WR1045ND is a bit newer, more expensive and better in terms of performance.
Also, it supports 3G modems, compared to the TL-WR1043ND. For some reason, most online stores don’t mention that this router can give out internet from 3G USB modems. But, the official site has this information. I decided to check it, did a reset, and just plugged my Huawei EC 306-2 modem into the USB port, and the Internet worked immediately. I didn’t configure anything at all. If you are planning to configure TP-LINK TL-WR1045ND to work with 3G modem, you can also check the article: How to connect 3G/4G USB modem to TP-LINK Wi-Fi router.
In most cases, these two routers are bought to connect to the wired Internet. Therefore, let’s look at setting up the connection to the ISP, set up the Wi-Fi network, set the password, protect the router settings, and if necessary, configure IPTV. These are the most necessary settings, which are almost always enough, and after which, you can easily use the Internet via Wi-Fi router.
I will show you how to configure the router through the browser.
How to connect TP-LINK TL-WR1045ND (TL-WR1043ND) and enter the settings?
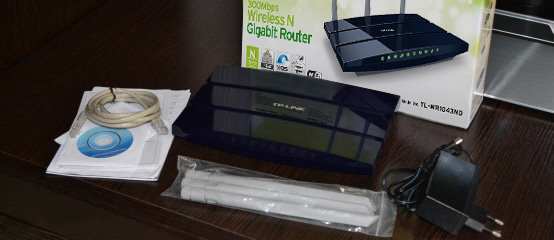
With the connection, everything is very simple. First, screw on the three antennas. Then, connect the power supply and plug it into the socket. If the power indicators do not light up, then turn on the power with the button on the back panel.
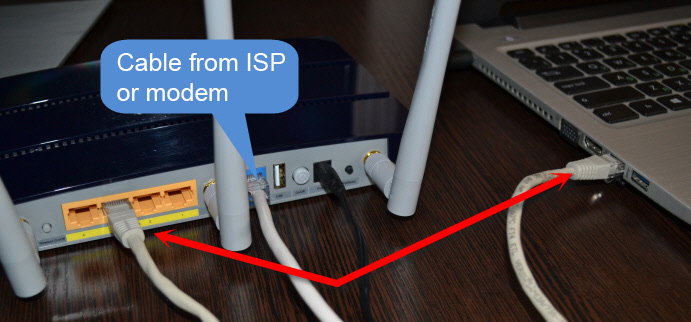
Next, use the cable that comes with the kit to connect the router to the computer. Connect the cable to the yellow LAN connector on the router, and on the computer to the network card. Then, plug the cable from your ISP or modem into the WAN connector on the router.
If there is no possibility to connect by cable, you can connect to the Wi-Fi network of the router, and configure wirelessly. The factory name of the network, and the password for connection (PIN), is indicated at the bottom of the router on the sticker. There you can also find the address, factory password and user name to enter TP-LINK TL-WR1043ND router settings.
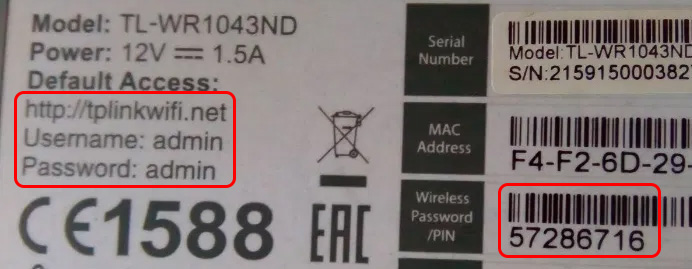
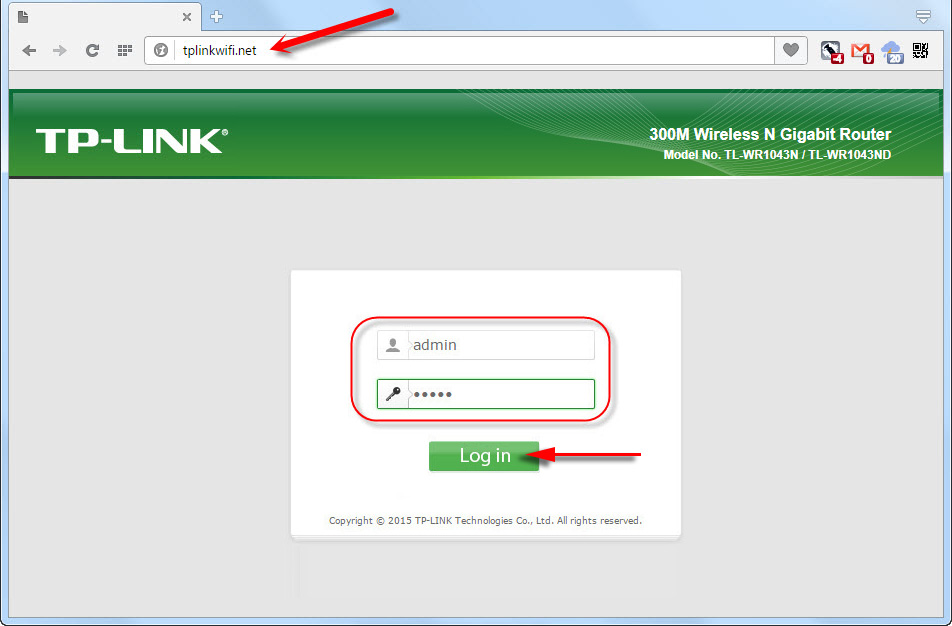
Open any browser and go to the address tplinkwi-fi.net (IP-address 192.168.0.1 also works). Enter your username and password and you will get into the router’s web-interface.
If you can’t enter the settings, you have already tried to configure your router, or it was previously configured for another provider, it is advisable to do a factory reset, so that the old settings would not interfere with us. To do this, press and hold the “WPS/Reset” button for 10 seconds.
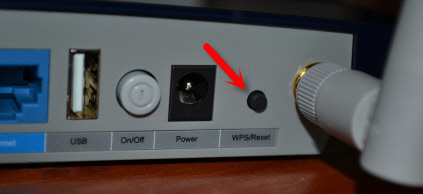
All indicators on the front panel will light up and the router will be rebooted.
If you still can’t get into the settings, see the article: what to do if you can’t enter the router settings on 192.168.0.1 or 192.168.1.1.
Internet connection settings (Dynamic IP, PPPoE, L2TP).
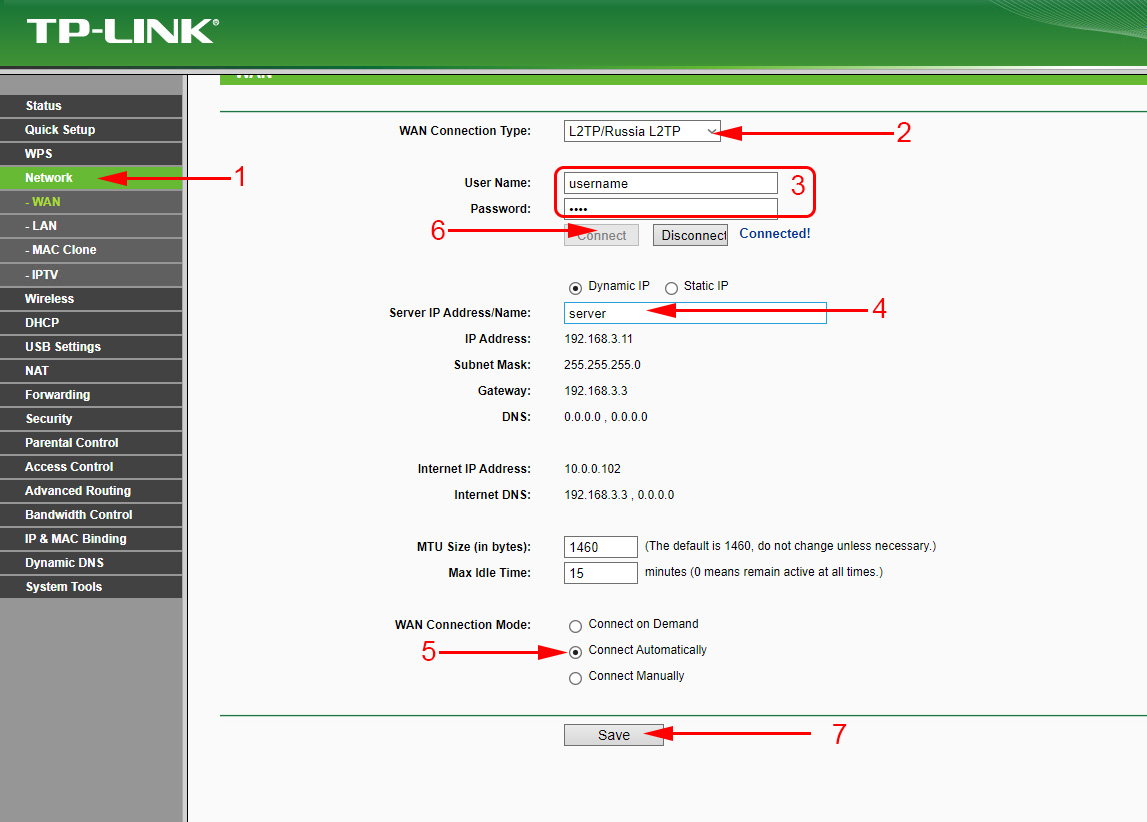
These are the most important settings. You need to find out what type of Internet connection your ISP uses. Know all the necessary connection details if you need them. Most likely you have Dynamic IP, PPPoE, PPTP, or L2TP. Set these parameters on the Network – WAN tab.
Depending on your connection, open the desired spoiler and see the configuration instructions.
This is the easiest type of connection to set up. Select it in the “WAN Connection Type” drop-down menu, and click on the “Save” button.
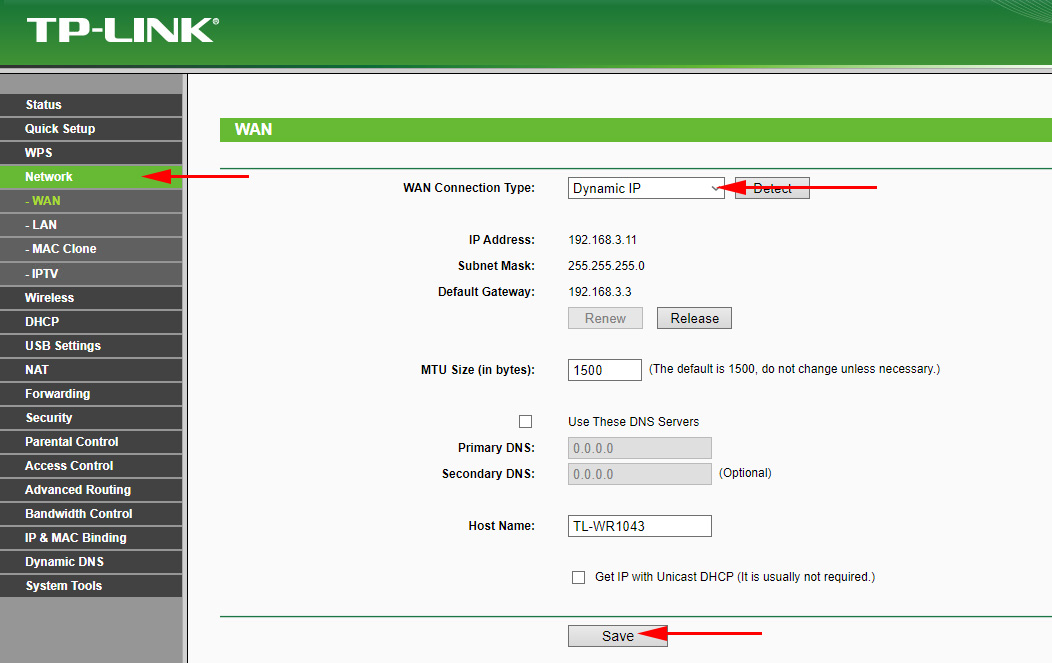
The same connection type should be selected if you connected the router to a modem.
Immediately after saving the settings, the Internet through the router should already work.
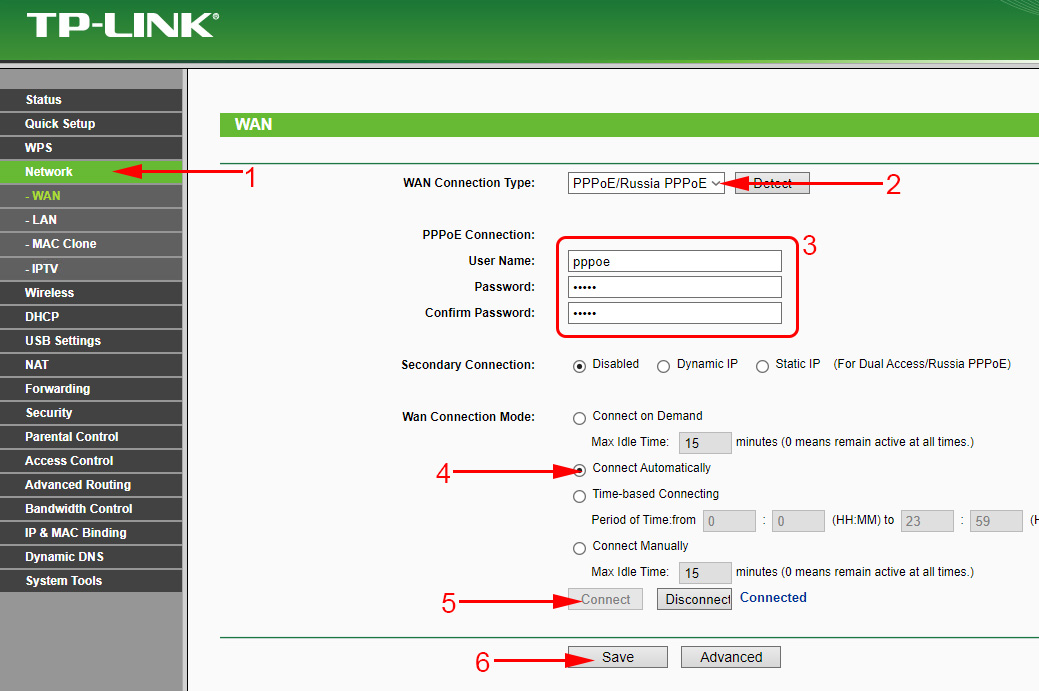
Configuring PPPoE on TP-LINK TL-WR1043ND
Choose the PPPoE connection type, set the user name and password (given by the provider), then check if the automatic connection is set, click on the “Connect” button, and if the connection with the provider is established, save the settings.
Setting up L2TP and PPTP connection
Here everything is the same as in the case with PPPoE. Choose your L2TP or PPTP connection in the drop-down menu. Specify username, password, and IP address (server name ). Set automatic connection, and try to establish a connection with the provider. If the connection is established and the Internet works, save the settings.
If the Internet through the router is already working, you can continue the configuration. But, the most important thing, we have already done. If you had a high-speed connection on your computer before installing the router, you don’t need it anymore. It does not need to be started and can be deleted. The router itself will set up this connection, we just set it up.
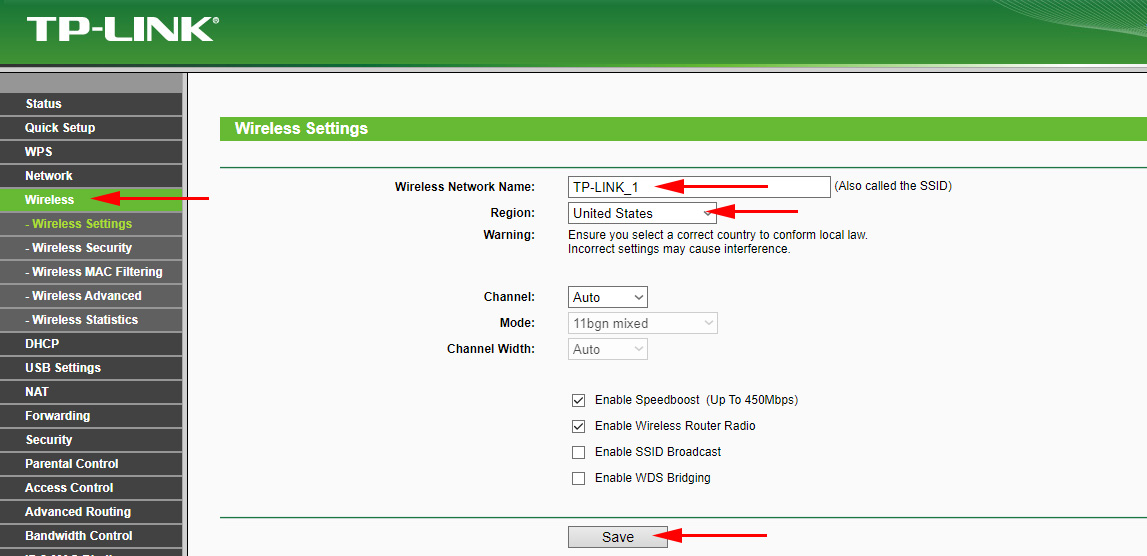
Setting up Wi-Fi and setting the password on TP-LINK TL-WR1045ND and TP-LINK TL-WR1043ND
Go to the Wireless tab. Here you should change the Wi-Fi network name (SSID) and specify the region. Click the “Save” button to save the settings.
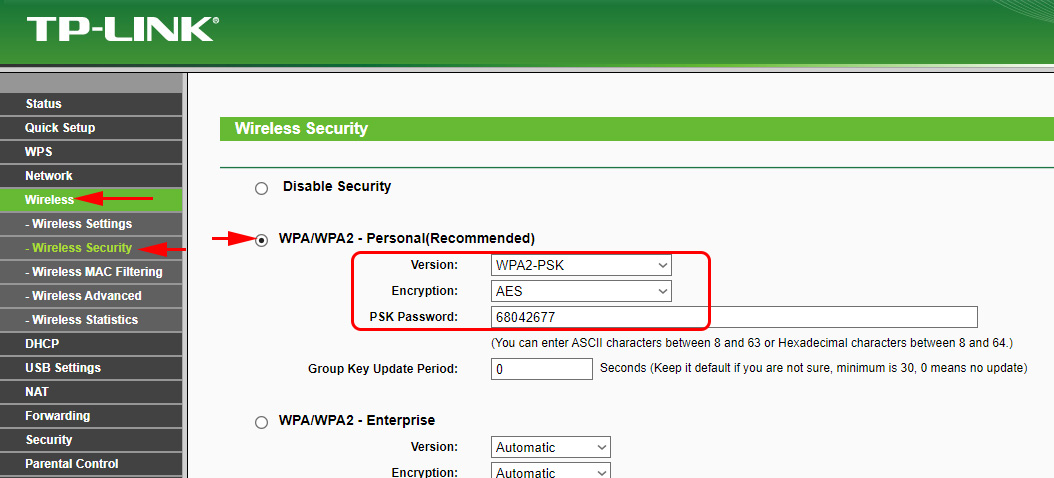
Setting a password for the Wi-Fi network
Go to the “Wireless Security” tab. Select the “WPA/WPA2 – Personal (recommended)” item, set the version and encryption parameters as shown in the screenshot below, and in the “PSK Password” field make up and write down the password that will be used to protect your Wi-Fi network. The password should be at least 8 characters long.
Don’t forget to save the settings. And you need to reboot the router. This can be done from the control panel, on the System Tools tab – Reboot by clicking on the “Reboot” button.
After rebooting, the router will broadcast the wireless network with the new name you set in the settings. To connect, you need to use the set password.
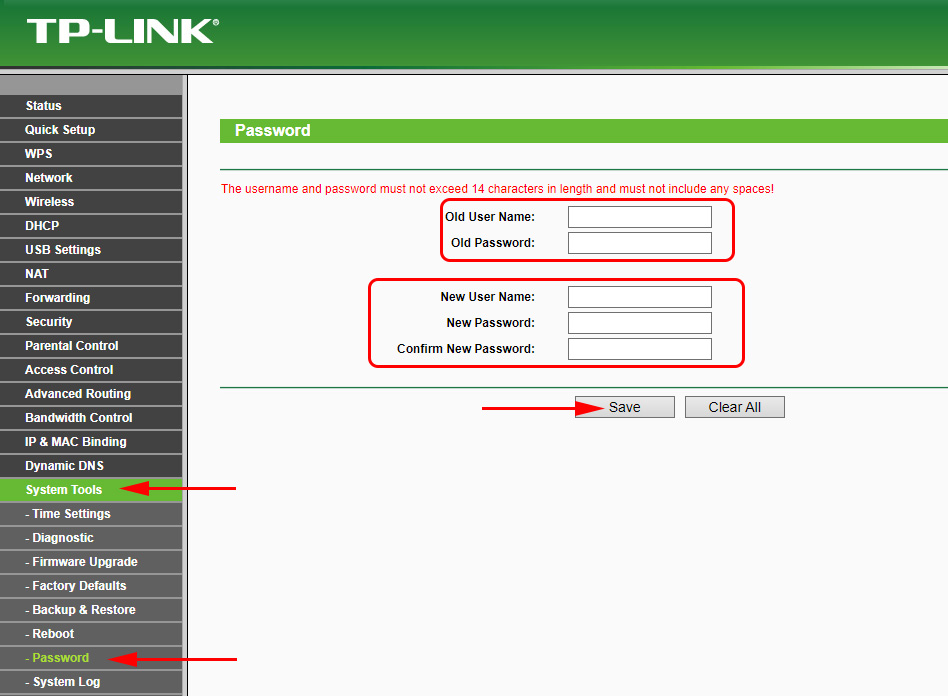
Change admin password. Protecting router settings
When entering the web-interface of the router, we specify the password and user name. The factory admin and admin. So, it is better to change this password so that nobody could get access to the settings.
You can do it on the tab “System Tools” – “Password”.
First, specify a valid username and password, and then make up a new password. You can leave the user name admin.
Configuring IPTV on TL-WR1045ND and TL-WR1043ND routers
If your provider offers IPTV services, you can configure it on the “Network” – “IPTV” tab.
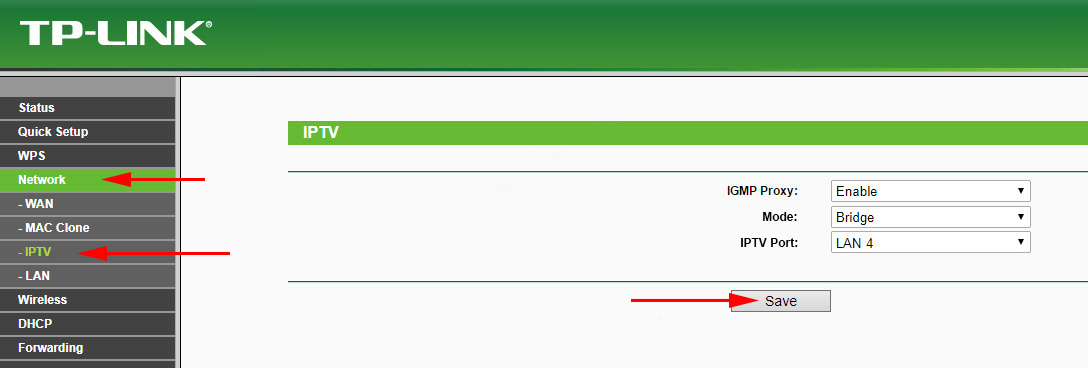
It is enough to choose the mode of operation. If you have a set-top box, choose “Bridge”, specify LAN port, save the settings and connect STB to the selected LAN port.
If you need to broadcast IPTV over Wi-Fi and cable, for example, for viewing on a computer or tablet, select 802.1Q Tag VLAN, and enable IGMP Proxy.
 Two-Band Access Point TP-Link Eap320. Wi-Fi Business Solution
  tplinkrepeater.net and tplinkextender.net - Admin Password, Entrance to the Repiter Settings
  Detailed Instructions for setting up the tp-Link Archer C6 Router
  The TP-Link Archer C24 Review is an inexpensive Two-Band Router with Support for the Repiter Mode and Access Points