
Setting up the tp-link AC1900 Touch P5 Router
If you’re already a happy owner of a TP-Link Touch P5 router, you might find the instructions below useful for setting it up. And if you’re just choosing a router and somehow came to this page, check out the small review and reviews of the TP-Link Touch P5. Maybe you’ll choose the Touch P5, and come back to this page to see information on setting it up.
To be honest, I’ve been wondering for a long time whether to write this article. Whether it would be useful for owners of this router. After all, TP-Link AC1900 Touch P5 is very easy to configure. And it can be configured in one of the ways:
- Through the familiar to everyone control panel, which you can enter from a computer, smartphone, tablet, or other device.
- And of course through the menu, which is displayed on the router itself, thanks to the touch screen. In this case, we do not need a computer or a mobile device.
In both cases, you can use the Quick Setup Wizard, with the help of which you can configure your router in a few steps. In this article I won’t go into any special settings or anything like that. I’ll just show you how to connect TP-Link AC1900 Touch P5 and set the necessary parameters for the router to work properly. Let’s configure the Internet connection, and wireless network.
Connecting TP-Link Touch P5 router
If you are going to configure the router via the touch screen, you only need to plug in the power adapter, turn on the router, and plug the cable from the Internet provider into the WAN port “Internet”.
Similarly, if you will be configuring the Touch P5 from some device, but with a wi-fi connection. Only after starting the router, you will need to connect the device from which you will be configuring to the router’s Wi-Fi network. It will have a factory name and password. This information is indicated at the bottom of the router on the sticker, or on the screen (if you close the Quick Setup menu).
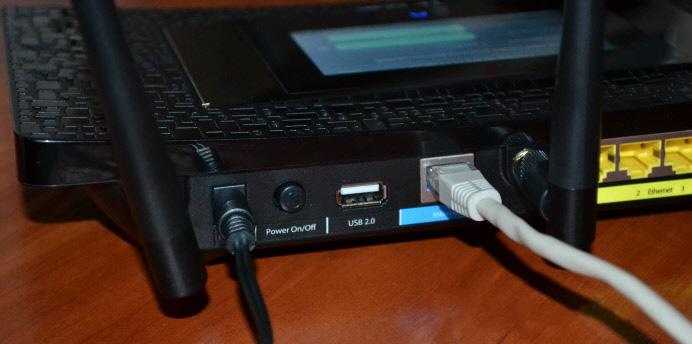
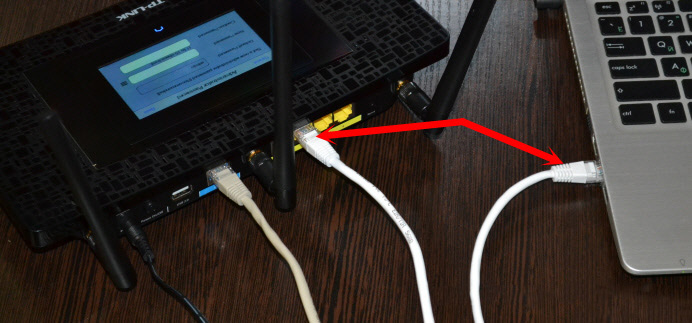
Well, to configure from a PC or laptop, I advise you to connect the router with a network cable.
First I will show you how to configure the router in an unusual way for us, using the touch screen, and then quickly consider the configuration through the control panel (through the browser).
Configuring TP-Link AC1900 Touch P5 using the touch screen
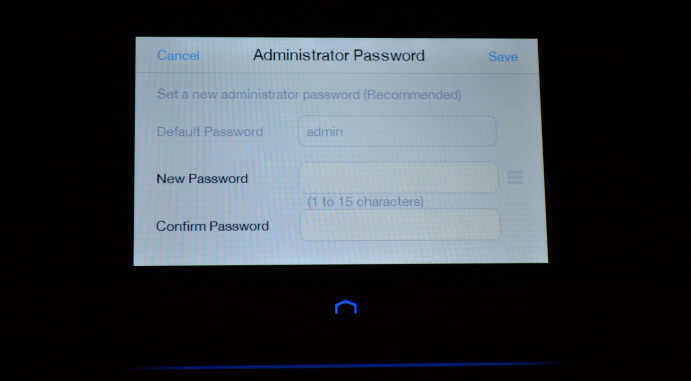
Immediately after turning on the router, you should be prompted to change the standard admin password, which is used to access the settings. I strongly recommend not to ignore this suggestion and change the password. Just specify the new password twice and press the “Save” button.
In the future, you will need to specify this password to access the router settings. Both through the touch screen menu and through the control panel.
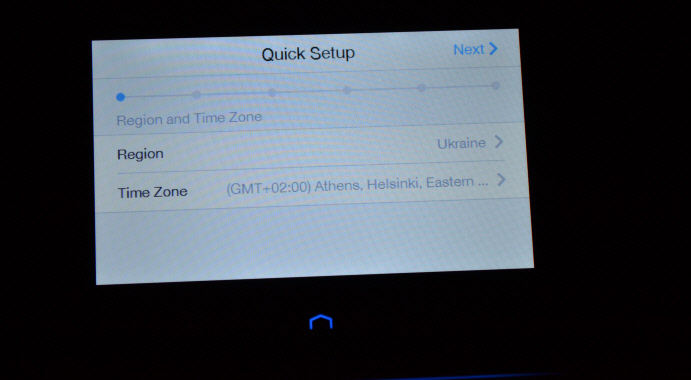
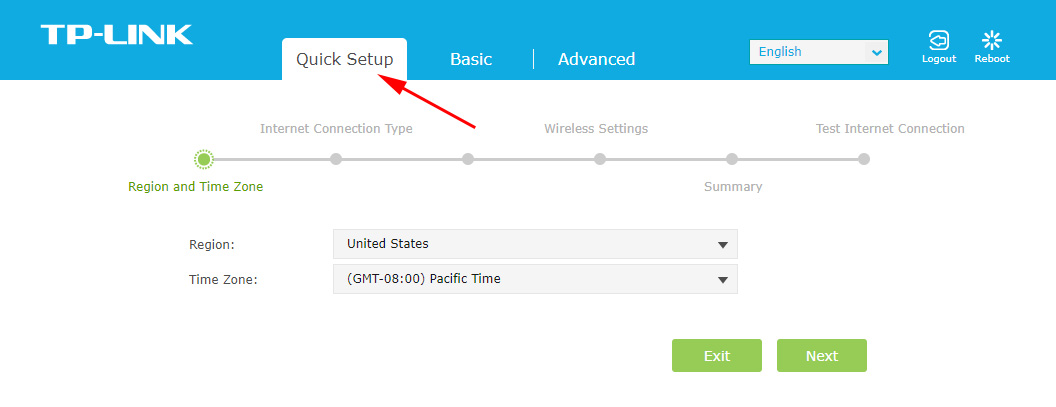
A quick setup wizard should start. And on the first step you need to specify your region and time zone. Specify, and click “Next”.
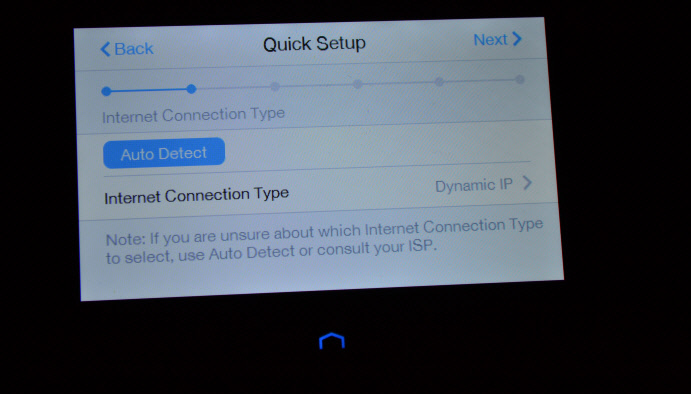
Next we have to configure the Internet connection. This is a very important point, here carefully.
If you know your connection type and the parameters you need to connect to the Internet, then select the connection type (Dynamic IP, PPPoE, PPTP), and specify the necessary parameters (user name, password, server). You can check all these data with your provider. For example, I have Dynamic IP. I don’t need to specify anything there.
There is also a button “Auto Detect”, clicking on which the router itself will try to determine the type of connection.
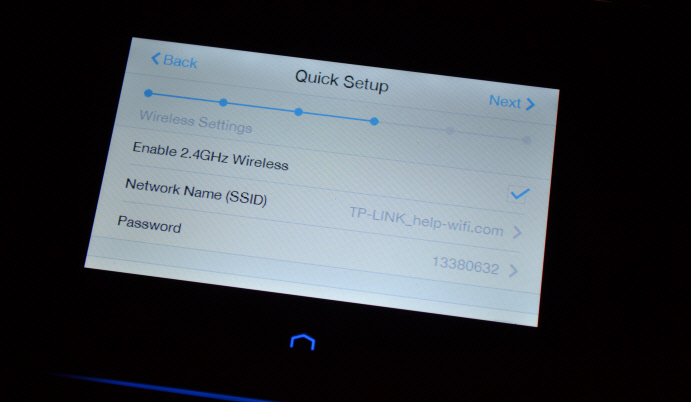
After configuring the connection to the Internet, Touch P5 will offer you to configure the Wi-Fi network and password. If necessary, you can disable the broadcasting of the Wi-Fi network in one of the bands. If you don’t need the network at 5GHz, for example, or 2.45GHz. There, by clicking on the name of the network, you can change it (for each band). There you can also change the password of the wireless network. Click “Next”, and continue the configuration.
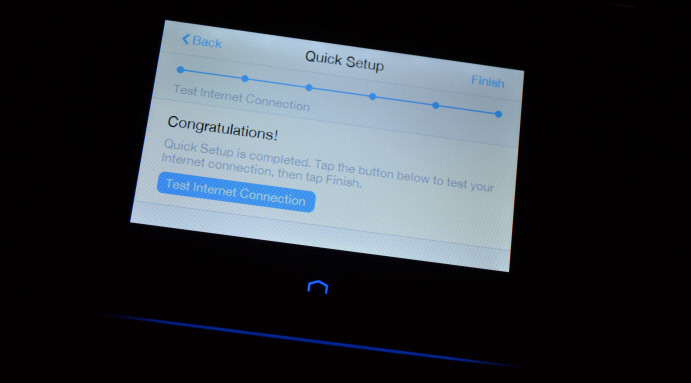
Next, the router will show us all the information we have set. To save it, press the “Save” button. And wait a bit.
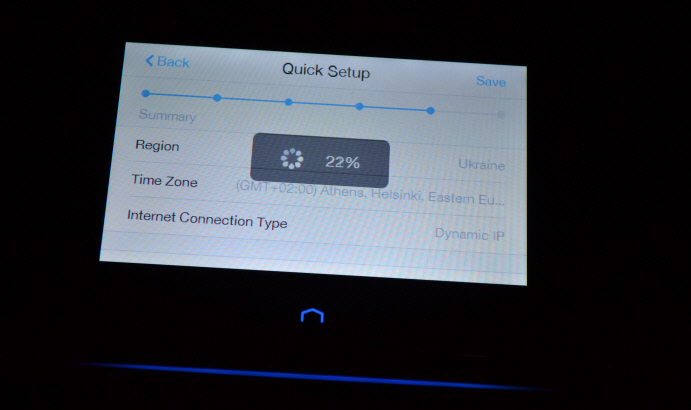
A message will appear that the parameters have been saved. You can run an Internet connection test, or click “Finish” and start using the router.
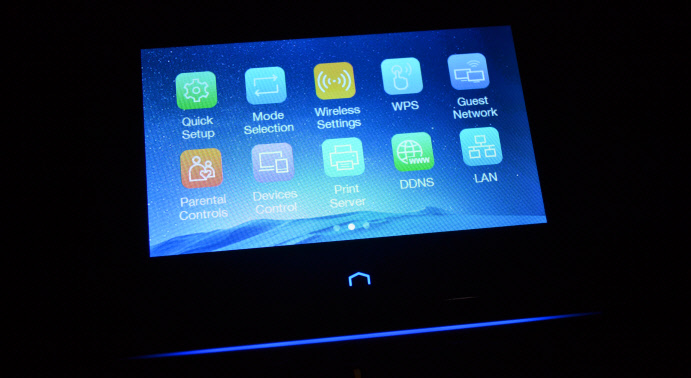
You can change the necessary settings in the menu at any time. Or you can run the quick setup wizard again. But pay attention that to access the sections with settings, you will need to specify the administrator password. The default password is admin, but we changed it at the beginning of customization.
That’s how simple and unusual it is. A touch screen on the router is cool.
Configuring the router through the control panel (tplinkwi-fi.net).
You may need access to all the settings of the TP-Link AC1900 Touch P5 router, in which case you need to enter its control panel. Well, if you failed to configure the router through the menu on the touch screen, then you can again perform the configuration through the web-interface.
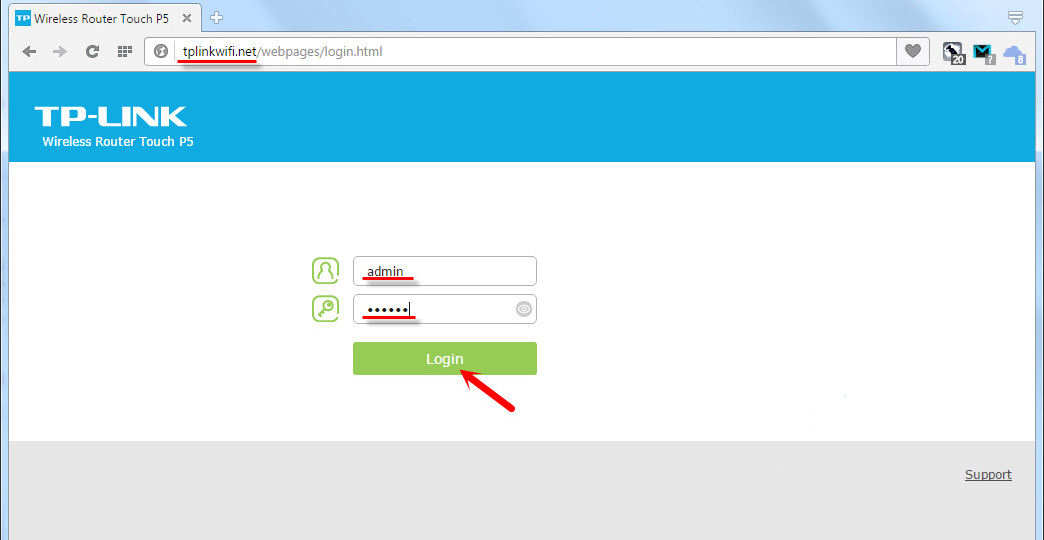
To enter the settings, you need to have a device (computer, smartphone) connected to the router via wi-fi or network cable. How to do this, I wrote at the beginning of this article. Next, open any browser and go to the address tplinkwi-fi.net (or 192.168.0.1).
The authorization page will appear, where you need to specify login and password to access the router settings. The factory ones are admin and admin. You may have already changed your password.
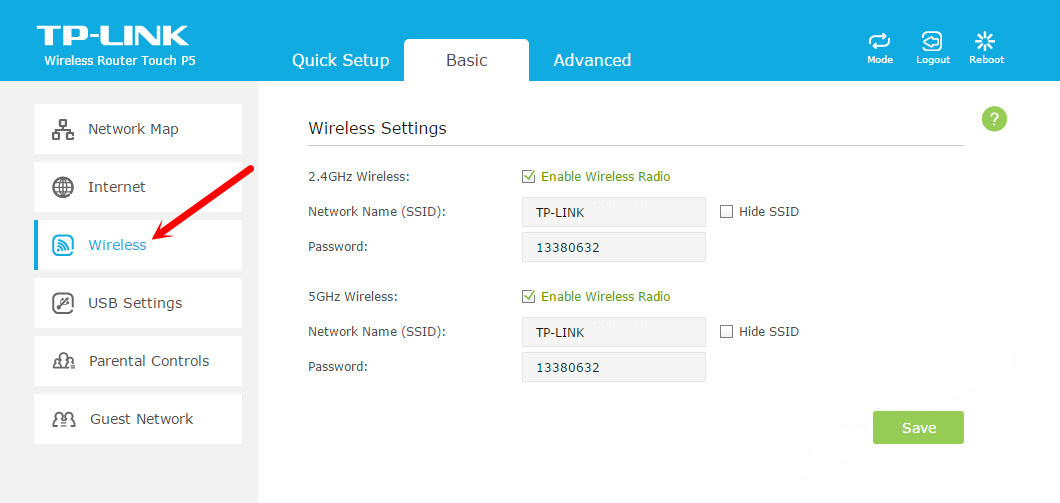
The new TP-Link control panel is very simple and clear. Even despite the English language. The most necessary settings are Internet connection settings and Wi-Fi network settings.
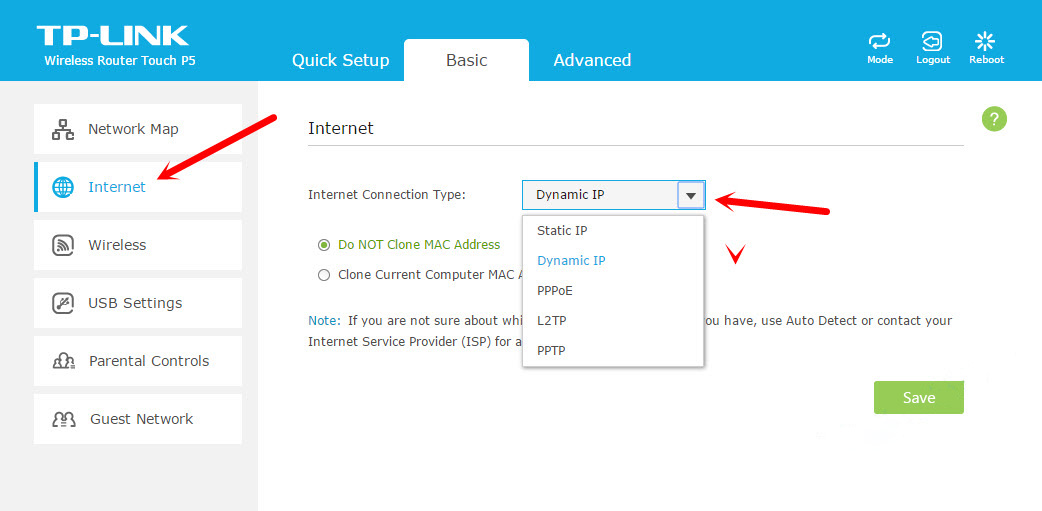
In order to set the parameters for connecting the router to the Internet, open the “Internet” tab. There you will be able to choose the type of connection used by your Internet provider, and set all the necessary parameters. The main thing is to make the internet through the router work.
You can configure Wi-Fi network in two ranges, as well as change the password for Wi-Fi on the “Wireless” tab. Everything is also very simple there. There are two networks in two bands (5 GHz and 2.4 GHz). You can disable the network you don’t need, change its name and password.
You can also run the Quick Setup Wizard, and perform a step-by-step configuration of the router.
And on the “Advanced” tab there is a huge number of different settings, which may be useful to you in the process of using the router.
That’s all, if you have any questions, leave them in the comments below.
 Router Firmware TP-Link Archer C8
  TP-Link Archer C1200: Review, Characteristics
  TP-Link M5250 and TP-Link M5350 Roter Firmware
  TP-Link Archer C20 and Archer C20i Roter Firmware