
Sumart Sockets TP-Link HS110 and HS100
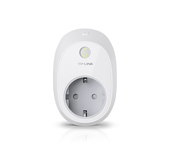
TP-Link has recently introduced new devices. TP-Link HS110 and HS100 smart sockets. I will give more details about these outlets in a separate article, and today we will install and configure them. If you have already become a happy owner of HS100 or HS110 sockets, you may find this instruction useful. Or maybe you will just be interested to see what these devices are, how they are set up and work. The devices are new and unusual. I’ve been testing these outlets for a few days now, and I have a lot to tell and show you.
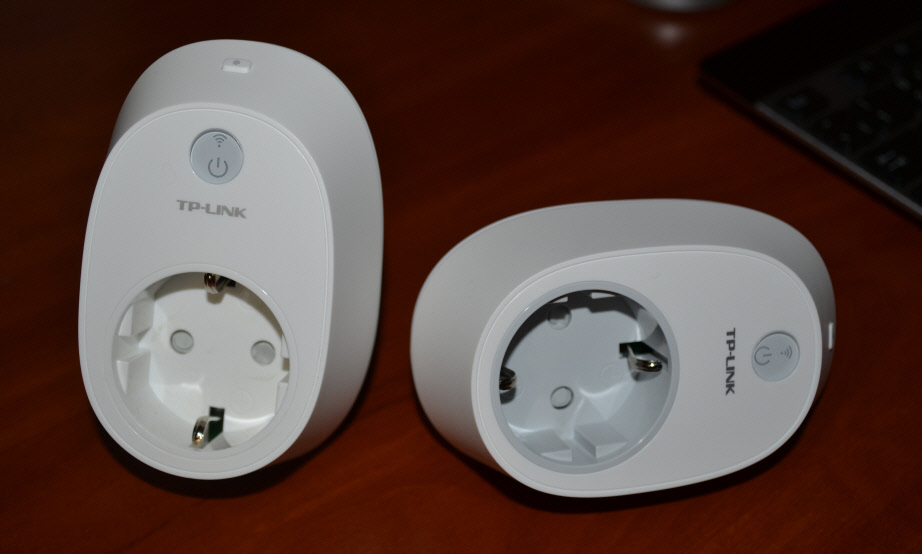
The TP-Link HS100 and TP-Link HS110 models are almost identical. Only the older model (HS110) is able to monitor power consumption. Statistics of electricity consumption for all time and in real time.
The devices themselves are designed for remote control of electrical appliances. We plug the smart socket into an ordinary socket:), and connect some electrical appliance to it: a heater, a lamp, a fan, whatever. And through the Kasa application from your phone you can remotely control this electrical appliance (turn it on and off). Also in the program you can set on/off timer, and view statistics on electricity consumption (if you have HS110 model).
One more important point: you can control the smart socket not only when you are at home. The outlet is connected to your router. And you can access the outlet from anywhere with your phone. The main thing is to have internet on your phone.
Connecting and configuring the TP-Link HS110 and TP-Link HS100
As for customization, as it turned out, everything is simple there. I’ve never set up smart outlets, so I didn’t immediately understand what’s what. I’ll make it as a step-by-step instruction. It will be more convenient and understandable.
1
The first thing you need to do is to install the Kasa app on your smartphone or tablet. It is available for iOS and Android in the App Store and Google Play. Just type “tp-link kasa” in the peep, and install the app. Through this app, you can control smart outlets, and other devices from TP-Link.
After you run the Kasa app for the first time, it will prompt you to log into your TP-Link account, or register a new one. You can skip this step by clicking on “Skip”. But in that case, you’ll only be able to control your devices when you’re connected to your home Wi-Fi network (which is where your wall outlet is connected to). So, I advise you to click on “Create Account”, and sign up for the cloud service to manage your devices from anywhere.
You just need to provide your e-mail, and password. And then confirm the registration in the letter that will come to the specified mail. You will be immediately authorized in the application.
2
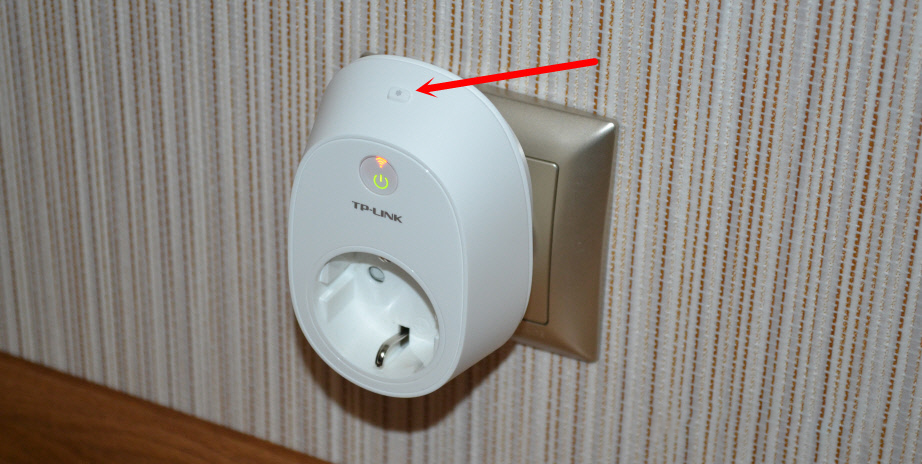
Next, plug the smart socket into a regular socket. Press and hold the button with the gear icon for 5 seconds. The indicator light will start flashing orange.
3
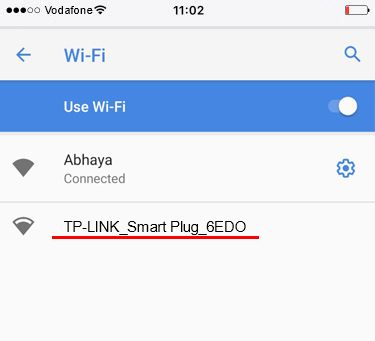
On the smartphone, connect to the Wi-Fi network that the outlet will start broadcasting. The network is unprotected, without a password.
4
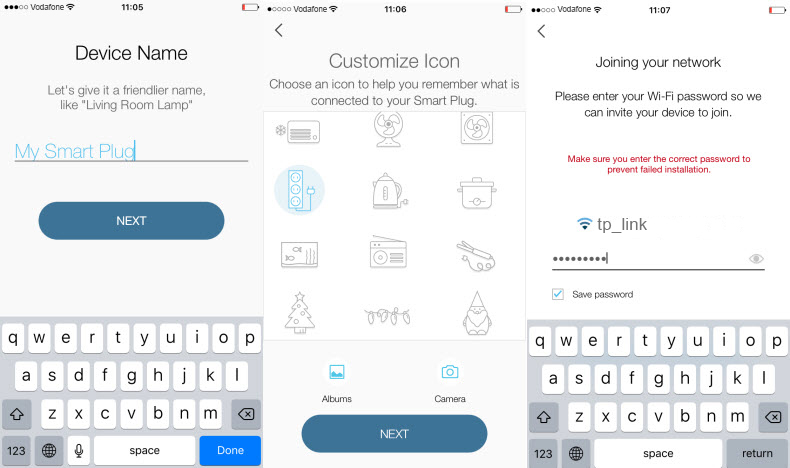
Go to the Kasa app and click on the “Add device” button. Next, select the type of device we want to add. In our case it is “SMART PLUG”. Press “Next”, “Next”, and again “Next”.

Give a name to your outlet. Choose an icon. You can even take a photo or choose from an album. Next you need to select your Wi-Fi network, and specify its password, so that the outlet can connect to your Wi-Fi network.
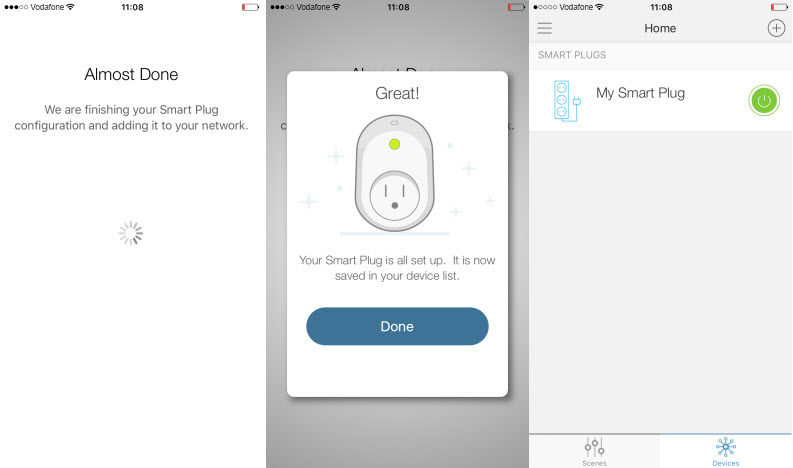
Wait a little bit, and everything is ready. You will see your outlet in the list of devices.
If you have several outlets, then add them one by one, according to the same scheme. Once the setup is complete, the smart outlet will stop broadcasting the Wi-Fi network.
Controlling TP-Link smart outlets
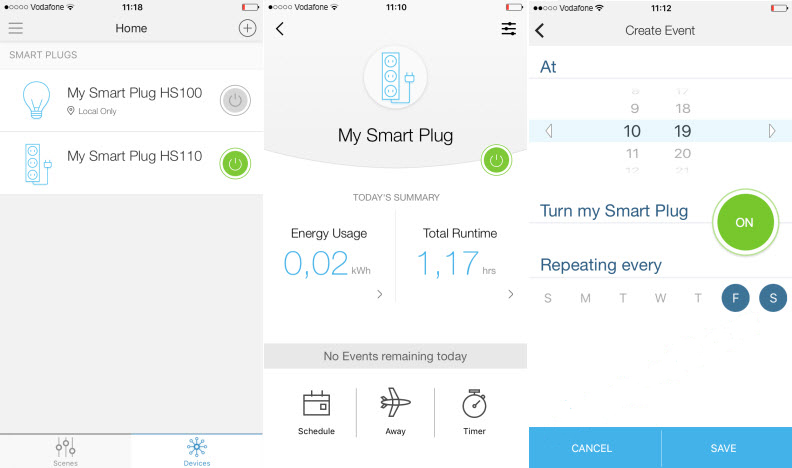
Control is entirely through the Kasa app. Immediately on the screen with the added outlets, you can manage, turn them on and off.
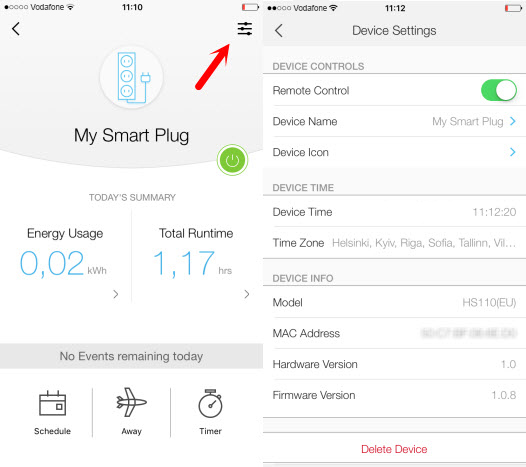
To open more detailed information on an outlet, just tap on it. There you will already be able to set up a schedule, set a timer, watch power consumption (if you have a TP-Link HS110), etc.
Going into the settings, you can delete the outlet, change its icon, name, time zone, see the MAC address, model, and firmware version.
Main functions:
- Turning the smart outlet on and off by tapping a button in the app itself.
- Setting a timer that will turn off the device after a set time.
- Setting up a schedule to turn on and off the device connected to the outlet.
- Create a schedule of device operation from TP-Link smart socket.
- View power consumption statistics (only for HS110 model).
I think that everyone can understand the settings. Everything is step-by-step and clear. If you have any questions, leave them in the comments and we’ll figure it out together.
Some more useful information
1
You can turn off the power by pressing the button on the socket itself. The button that is near the logo. When you press it, only the wi-fi icon will be lit, which means that the outlet is connected to the network and you can turn it on remotely via the app.
2
Resetting the settings on the HS110 and HS100 sockets can be done with the small button with the gear icon. Turn on the socket, and press this button for 10 seconds. The indicator light will tell you when a factory reset has occurred.
3
If you want to connect some powerful device to the Wi-Fi Smart Plug, it’s a good idea to first study the maximum load that the connected device can produce and the TP-Link Smart Plug’s maximum load and power specifications. These specifications are the same for both outlets:
- Maximum load 16A
- Maximum power 3.68 kW
4
The smart socket does not have a control panel like routers or repeaters. All control is via an app. Also, through the application from a mobile device you can check for new firmware, and if it is available, then start the software update.
 TP-Link TL-WN781ND-Setting and Installing the Driver
  Review TP-Link Deco E3-HomeMade Mesh Wi-Fi System at the Price of a Convention Router
  TP-Link Archer C20 and Archer C20i Roter Firmware
  tplinkrepeater.net and tplinkextender.net - Admin Password, Entrance to the Repiter Settings