
Setting up the router tp-link Archer C1200. DETAILED LEADERSHIP
I recently did a review of the TP-Link Archer C1200 router. You can read the review here. There I told you what you should buy this router for, what it is good for, and what it has disadvantages. But you are most likely not interested in it, as you have probably already bought Archer C1200 and all you need is to set it up quickly and start using it. If I guessed right, you’ve come to the right place, because now I’m going to demonstrate in detail the process of configuring TP-Link Archer C1200 router.
We’ll plug it in, and most likely try to configure it using the Quick Setup Wizard through the control panel. Of course, you can set the necessary parameters for the router in different sections of the web-interface. But if there is a simple wizard that allows you to configure the router step by step, it’s foolish not to use it. And if something doesn’t work out, I’ll show you where in the router settings you can change the most important and necessary parameters.
If you are already familiar with TP-Link routers and have configured them, then the control panel of Archer C1200 model will most likely be unfamiliar to you. Since the old models had a control panel in green colors. And now, almost all new models of TP-Link network devices get a new control panel. More modern. And as a rule, the new web-interface is multilingual. But my router had only English language. Perhaps other localizations will appear with the release of a new firmware version. But it is not terrible, because according to my instructions you can configure even a router from Xiaomi in Chinese 🙂 .
How to connect TP-Link Archer C1200 router and enter the settings?
To configure the router, we need to enter its control panel. This can be done from almost any device: a PC, laptop, smartphone, tablet. If possible, I advise you to configure it from a PC or laptop. At least because it is more convenient. And it is better to connect to the router via a network cable (you can also use wi-fi). Also, connect to the WAN port immediately to the Internet (the cable that your Internet provider has installed in your house).
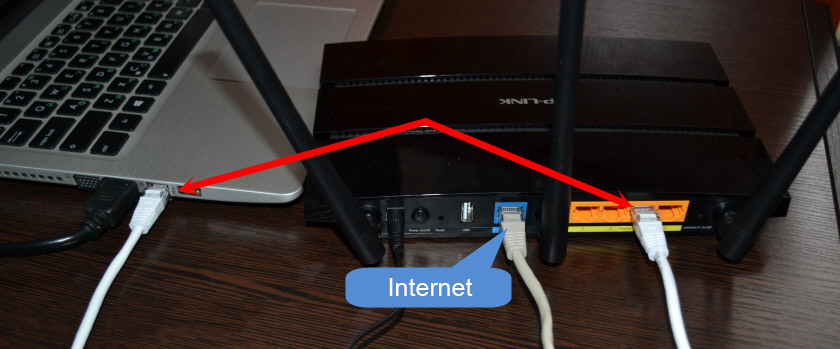
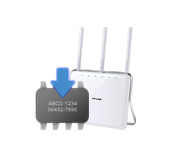
You can also connect to the Wi-Fi network, which will have the factory name. The password (PIN) for connecting to this network can be found at the bottom of the router, on the sticker. Since the router is dual-band, it will immediately broadcast the network in two bands 2.4GHz and 5GHz. If you are going to configure it from a tablet or smartphone, you can do it through a regular browser or with the help of TP-LINK Tether branded application.
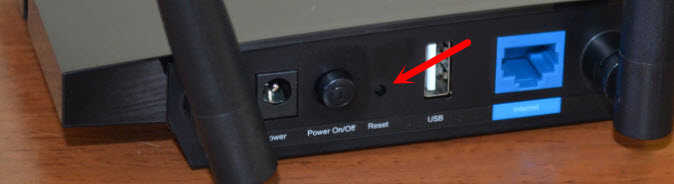
If you or someone else has already configured the router, do a reset. Press the Reset button recessed in the case for 10 seconds.
Go to tplinkwi-fi.net or 192.168.0.1.
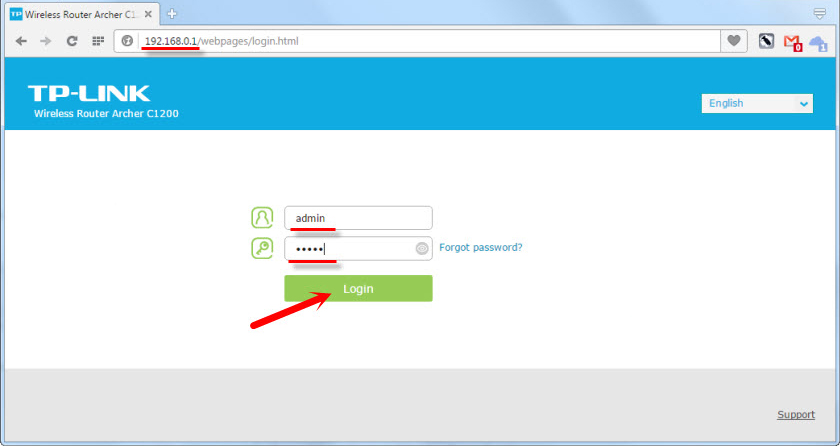
Once you are connected to the router (note that the internet may not work, this is normal), you can go to the control panel. To do this, open any browser (I have Opera) and go to tplinkwi-fi.net, or 192.168.0.1. Just in case, here is a link to the detailed instructions: /tp-link/how-to-go-to-the-tp-link-router-settings/
The router will ask for login and password. The factory ones are: admin and admin (indicated on the sticker at the bottom of the router, as well as other factory information).
The router will immediately prompt you to change the factory login and password for entering the settings (which we just entered). Change them. You can keep the same login, but make up a new password and enter it twice.
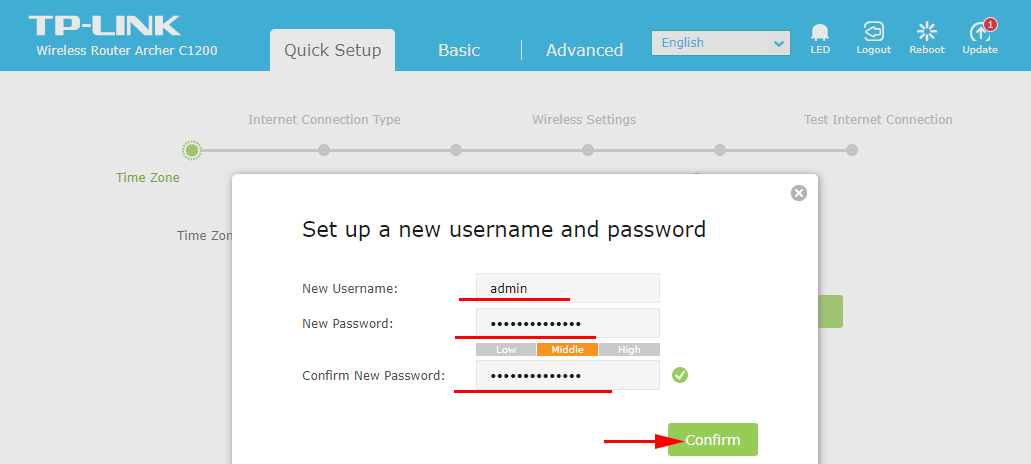
Just don’t forget the password you set. You will need it when you log in to the control panel again.
After that, the page with the settings of the Archer C1200 router will open. The Quick Setup wizard will be opened right away. You can also try to change the language of the web-interface. Maybe you will have other options besides English.
If you can’t get into the settings, see this article .
Configuring the connection to your ISP and Wi-Fi network
These are the settings that can be performed with the help of the Quick Setup Wizard. And this is enough for normal operation of the router. If it did not open immediately after entering the web-interface, go to the “Quick Setup” tab.
1
In the first step we need to select our time zone.

2
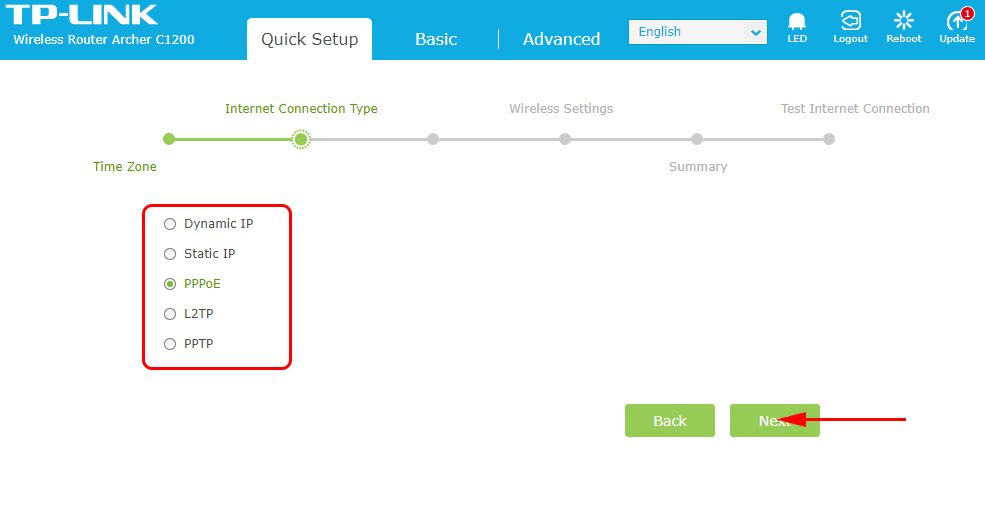
Next is the Internet connection settings. This is a very important point. If we set the wrong settings, the router will not be able to connect to the Internet, and will not distribute it to your devices.
You need to choose your type of Internet connection. It can be:
- Dynamic IP – the simplest type of connection, when using which you do not need to set any parameters. And the Internet via TP-Link Archer C1200 should work immediately after connecting the cable to the WAN port. If there is no binding by MAC-address.
- Static IP is very rare.
- PPPoE is a popular type of connection used by Vodafone, TTK, Dom.ru, and other providers. In the process of setting up, it is necessary to specify the user name and password.
- PPTP and L2TP – it is also necessary to specify the user name, password and server address.
Select the connection type and click “Next”.
I chose PPPoE for this example. Now set the parameters that the ISP gives you and continue.
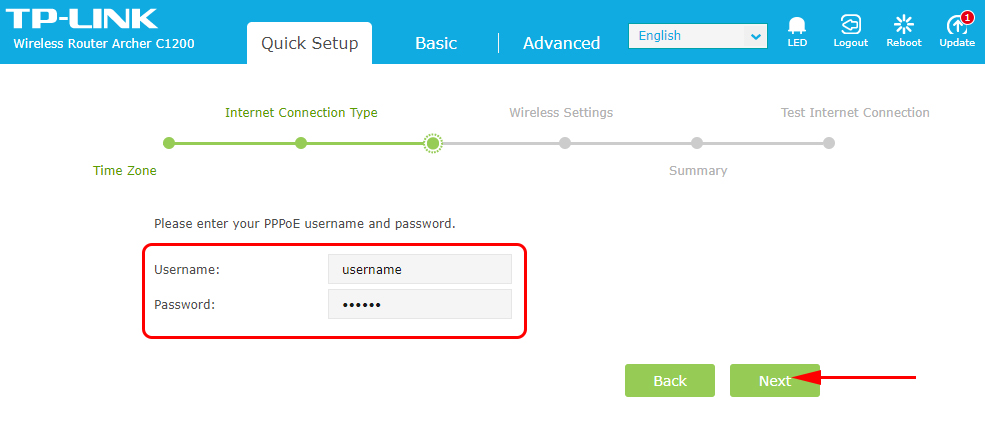
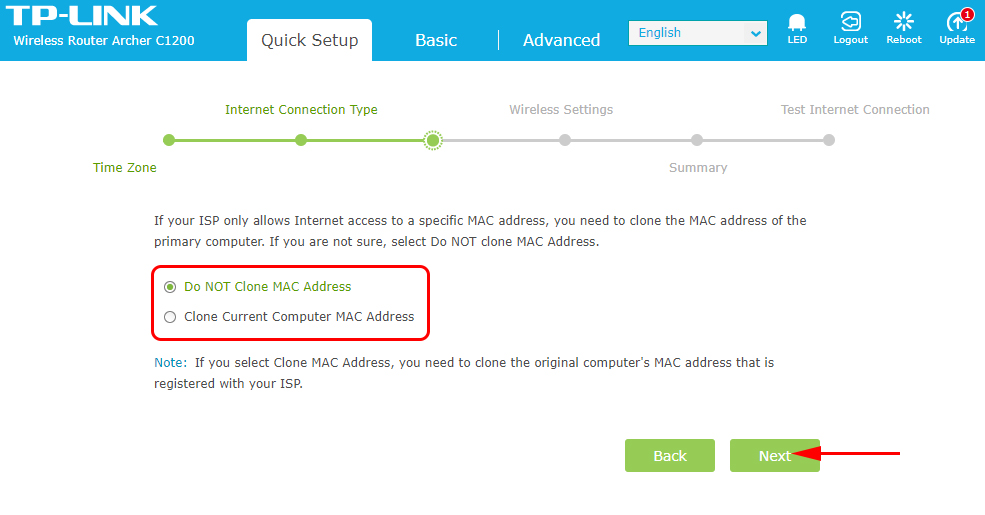
I have shown this for the sake of example. My ISP uses the “Dynamic IP” connection type. When I select it, the next screen will ask the router if there is a MAC address binding, and it will prompt me to clone the MAC address from the computer the router is currently connected to. My ISP does not do MAC address binding.
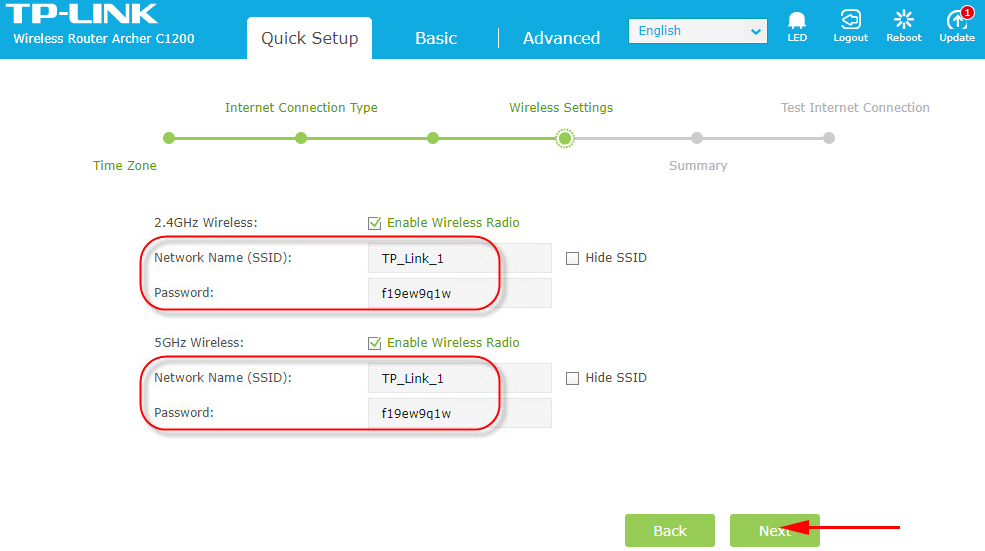
3
The next step is to configure the Wi-Fi network. Here we need to change the Wi-Fi network name for each band, and change the Wi-Fi network password. You can make the password the same for both bands. If necessary, you can disable Wi-Fi network broadcasting on one of the bands by simply unchecking the corresponding checkbox.
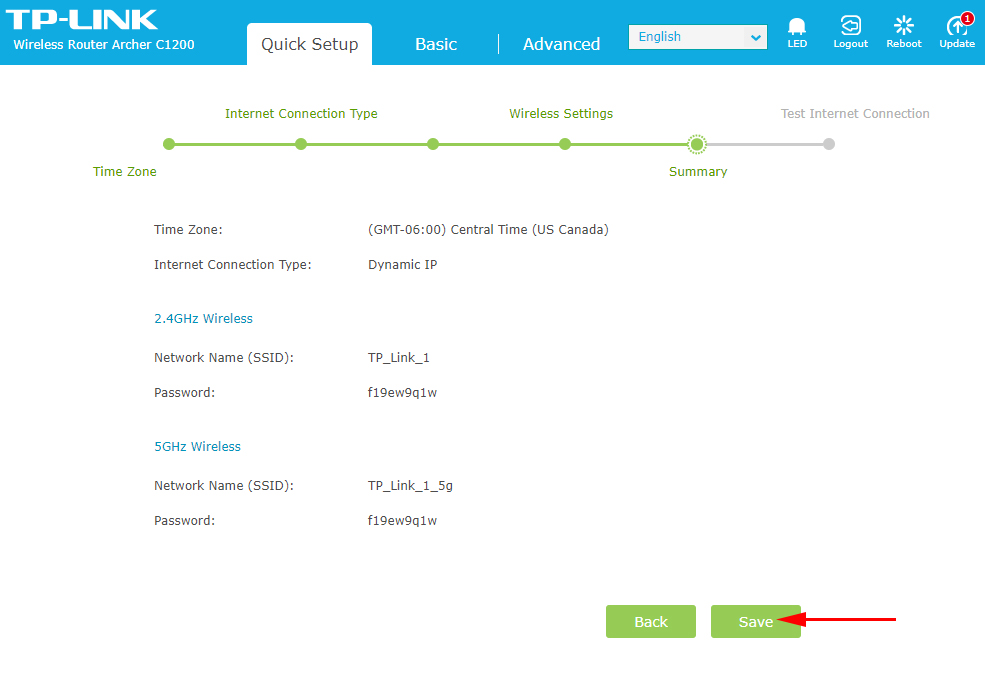
4
Check all set parameters and press the “Save” button to save the settings.
You will see a bar with the status of saving settings. Waiting.
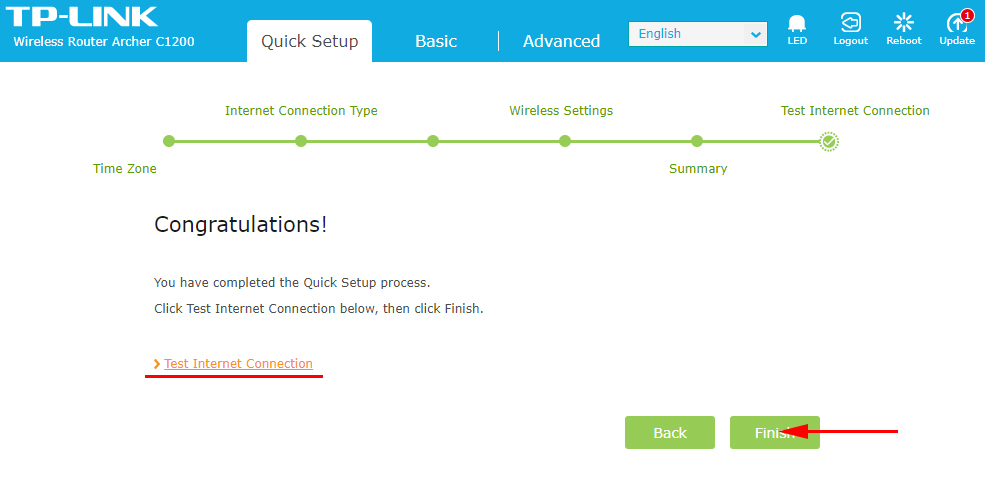
In the next window you can click on the link “Test Internet Connection”. If all is well, the router is connected to the Internet, then click on the “Finish” button.
If there is no connection to the Internet, then most likely you have chosen the wrong type of connection, or incorrectly set the parameters for connection. The WAN indicator on the router will be orange (it should be green).
Go back, or run “Quick Setup” again, and repeat the setup.
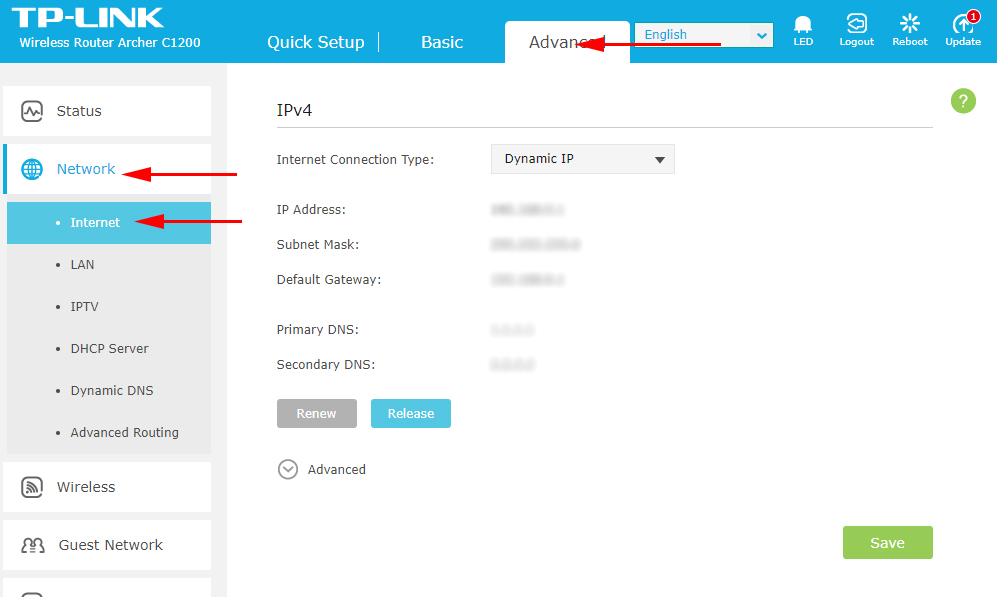
Where are the internet and wi-fi settings?
All basic settings can be set in the “Basic” section. The Advanced section contains a large number of advanced settings.
For example, Internet settings:
And advanced Wi-Fi network settings (where you can change the password, channel, mode, channel width, etc.):
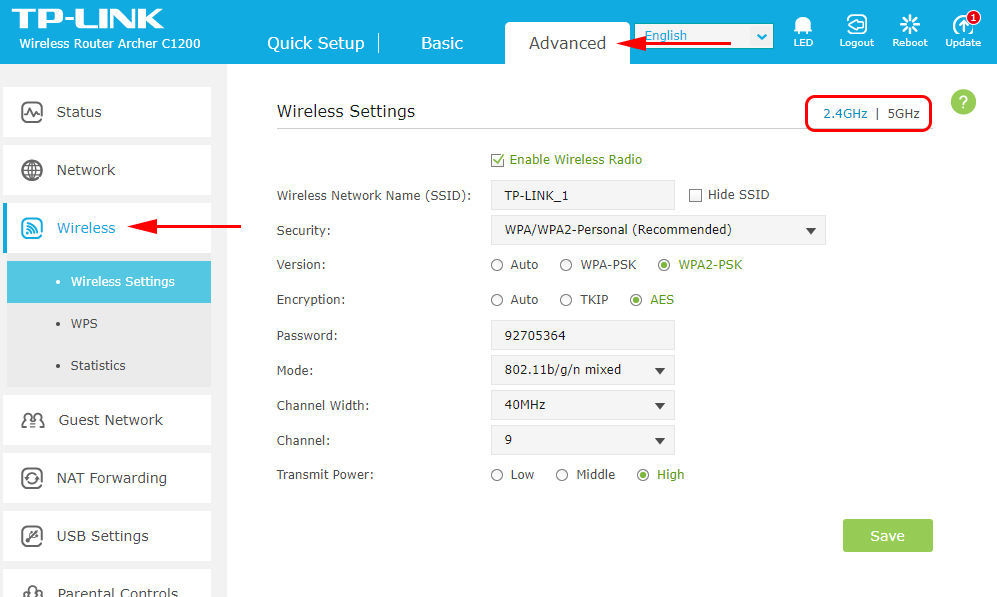
We have a separate instruction on changing the Wi-Fi network password: /tp-link/how-to-change-or-put-a-wi-fi-password-on-tp-link/
If you still have any questions or encounter any problem, then ask in the comments. I’ll be happy to answer and try to help!
 Router Firmware TP-Link Archer C8
  Installing and Setting Up the TP-Link Tl-Wa850re
  TP-Link TL-WN781ND-Setting and Installing the Driver
  Tplinkwifi.net does not open. Does not come in and fails to account the site