
TP-Link Archer C25: Review, Setting
Today we are going to get acquainted with TP-Link Archer C25 AC900 router. This is an inexpensive, dual-band router with good performance. Looked on the Internet, and for some reason I found almost no reviews, or instructions on how to configure the TP-Link Archer C25 router. There is a lot of information about TP-Link Archer C60 router, which we have already reviewed. These models are very similar, especially in appearance.

I decided not to make a separate instruction about setting up Archer C25. So, if you have already bought this router and don’t know how to configure it, just scroll down the page below. There I will briefly tell and show you what to do and how to do it. Also, you can leave your feedback in the comments. I will leave my review of TP-Link Archer C25 at the end of this article. But first, a small review and configuration instructions.
Review
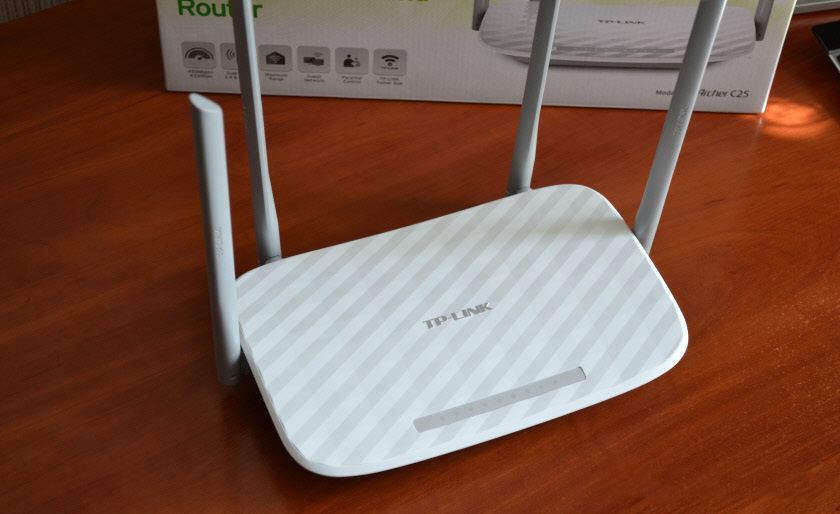
I won’t dwell on the technical specifications. You can look them up in any online store or on the official website. Speed over wi-fi: up to 450 Mbps at 2.4 GHz, and up to 433 Mbps at 5 GHz. The maximum speed of LAN/WAN ports is 100 Mbps. The ports here are not gigabit ports. There are 4 non-removable antennas installed on the router. Three antennas broadcast signal at 2.4 GHz (3 dBi power), and 1 at 5 GHz (5 dBi power).
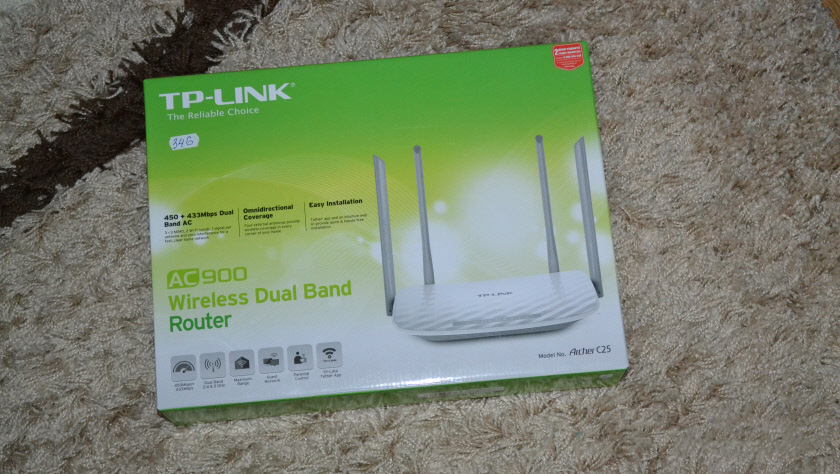
The router comes in a large box. All because of the non-removable antennas, as the router itself is not big.
The top panel is made of white-gray glossy plastic with an interesting structure. On the front panel there is the TP-Link logo and indicators of the router, which are lit in green. Antennas as well as the rest of the case are made of gray plastic.
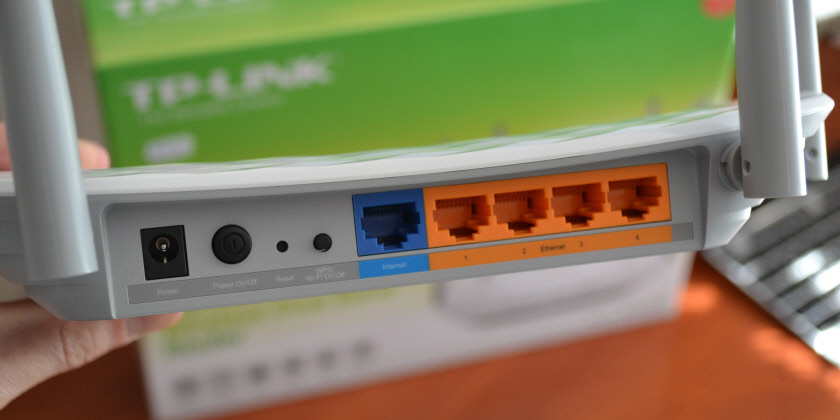
All ports and buttons are located at the back. There is a button to disable and enable Wi-Fi network.
Unfortunately, there is no wall mount, as well as rubber feet. But, the antennas are foldable, so if you need to hang the router on the wall you can think of something.
Setting up the TP-Link Archer C25 Wi-Fi router
To enter the router’s control panel and make the necessary settings, we need to first connect the router to the Internet, power, and the device itself, from which we will configure the router.
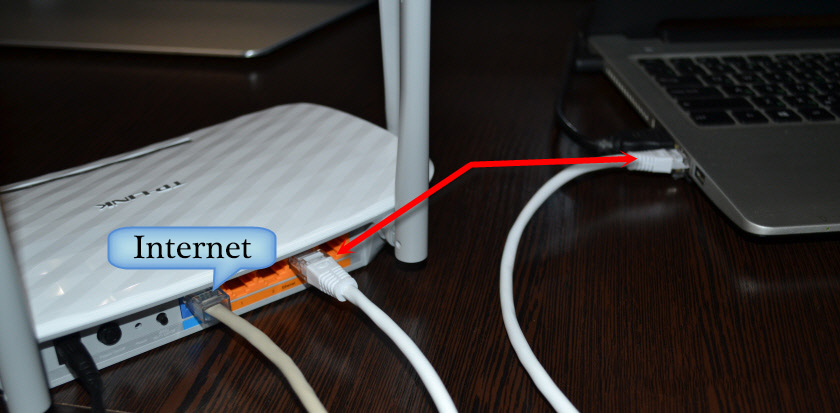
If you want to configure the router from a cell phone or tablet, it is best to do it through the TP-LINK Tether app . Before that, you need to connect your device to the Wi-Fi network, using the password, which is indicated on the sticker on the bottom of the router.
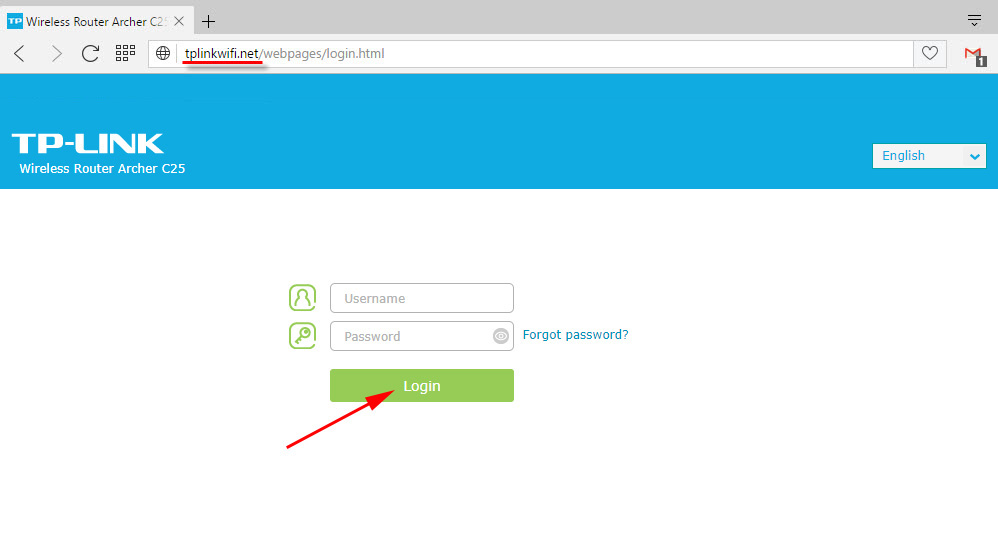
To enter the settings, open any browser and go to the address tplinkwi-fi.net (192.168.0.1). Specify username and password (factory: admin and admin) and get into the control panel.
Perhaps you will need the instruction: how to enter the settings of TP-Link router?
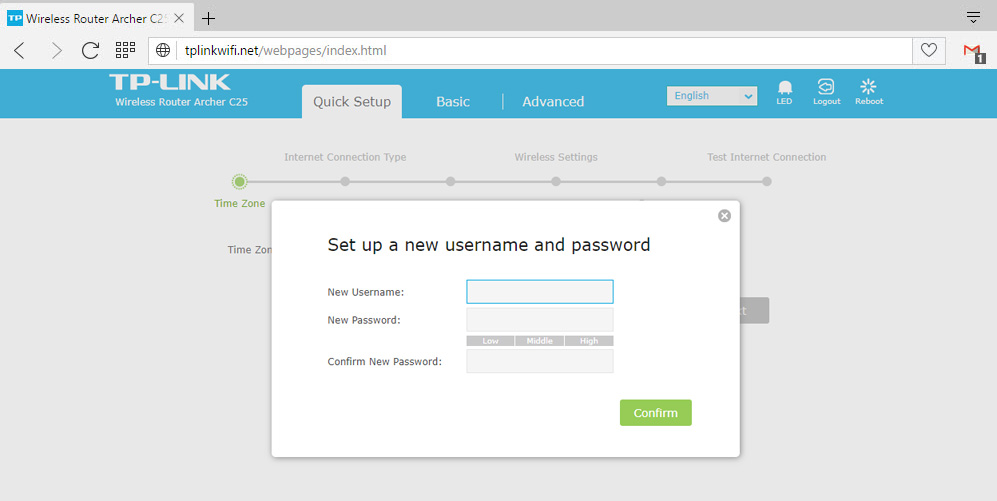
The router will immediately offer to change the factory password admin (which protects the router settings). I advise you to do it.
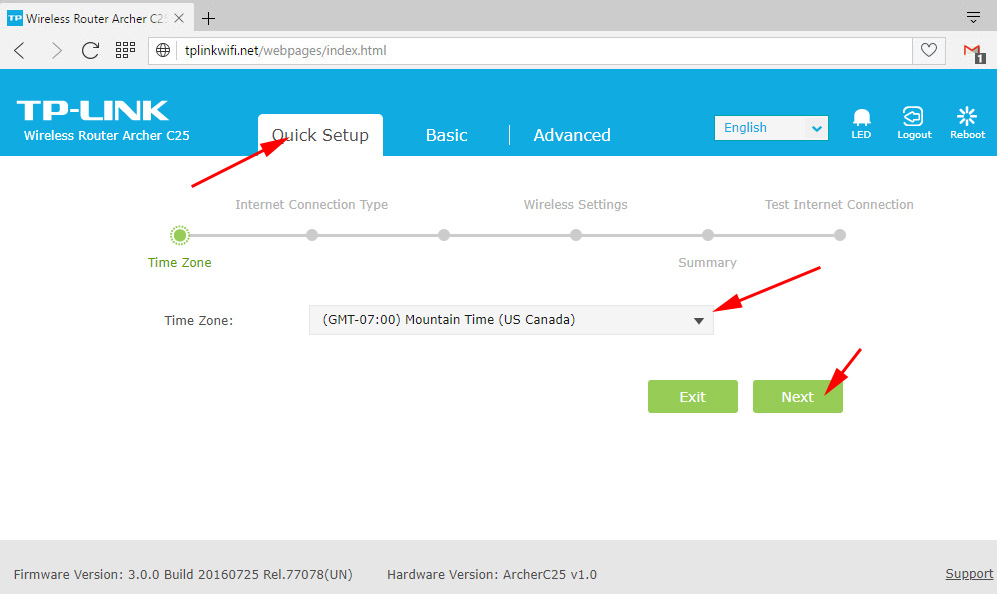
We need to configure the Internet connection (to the Internet provider), if the Internet through the router does not work, and the Internet indicator is lit orange. And we need to configure the Wi-Fi network. Change the name and password. This can be done in the appropriate sections: “Basic Setup” – “Internet” and “Basic Setup” – “Wireless Mode”. But I will use the quick setup wizard. Which will be opened right after logging into the control panel. You can also open it by clicking on the “Quick Setup” tab at the top.
In the first window you need to specify your time zone.
Next is a very important point. You need to select the type of connection that your Internet provider uses. For example, I have a Dynamic IP address. I select it and click “Next”. In my case, I don’t need to make any additional settings.
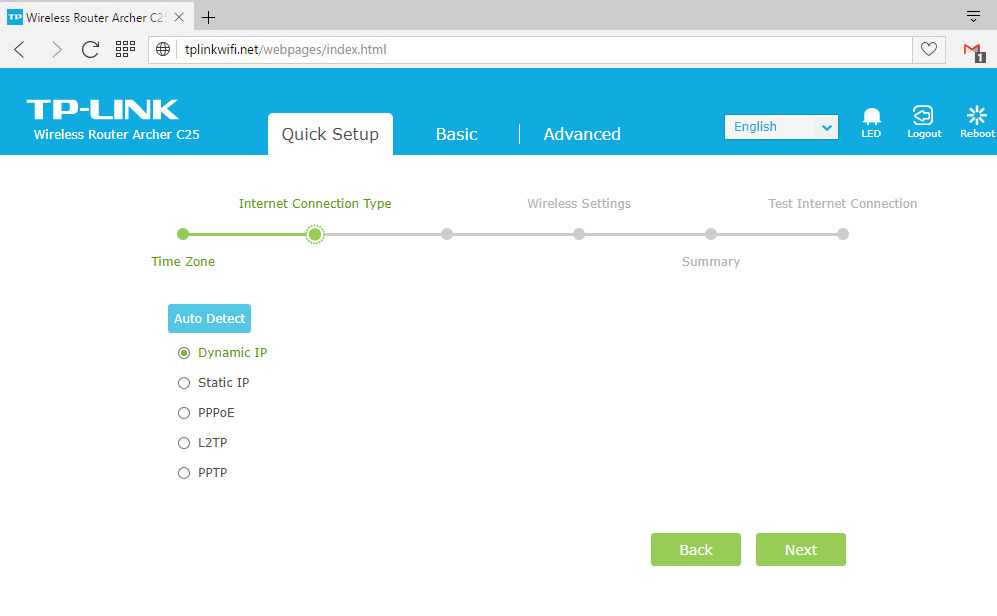
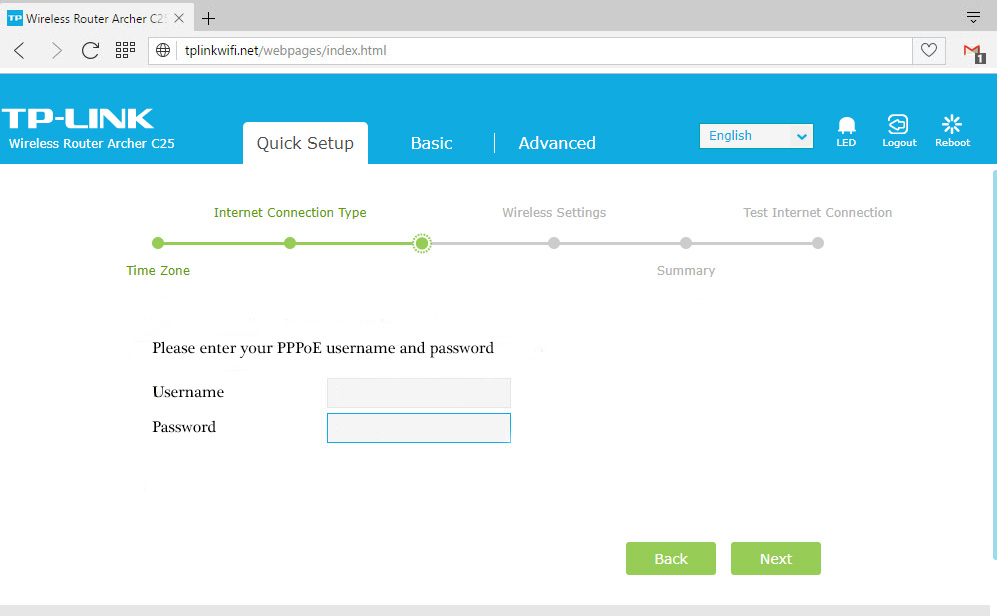
If you have for example PPPoE, L2TP, PPTP, then you will need to set some parameters that your ISP gives you. Username, password, server address.
It is very important to set the correct parameters for connecting to the Internet. Otherwise, the router will not be able to connect to the Internet, and the Internet on your devices will not work. And the Internet indicator will be lit orange. It should be green.
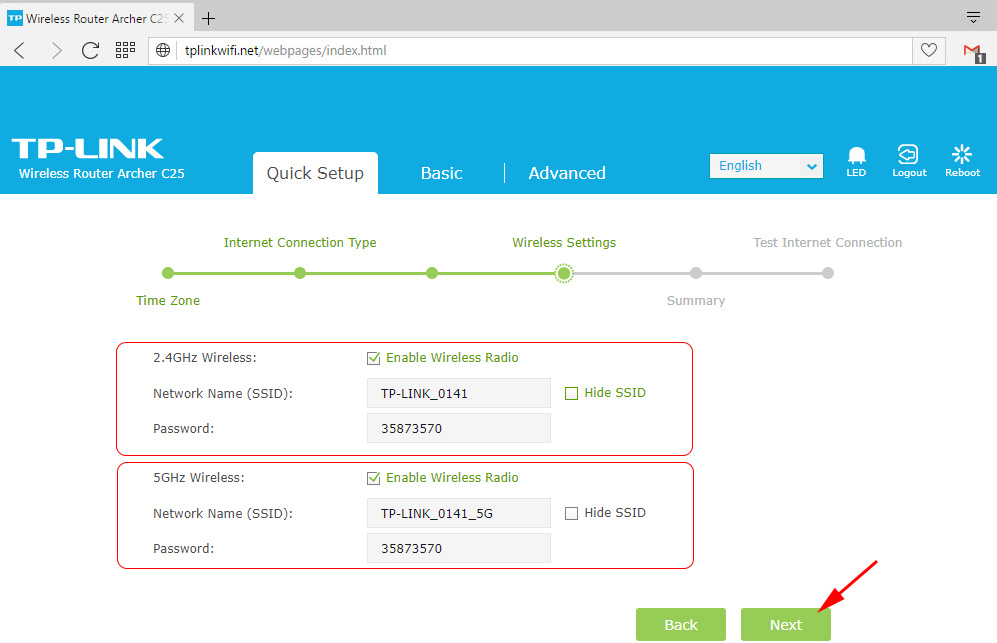
Next we have Wi-Fi network configuration. To be more precise, we have a dual-band router, which broadcasts the network on two frequencies: 2.4 GHz and 5 GHz.
Change the name of each network and its password. This password will be used to connect to the wi-fi. If necessary, you can disable one of the networks. Just uncheck the “Enable wireless broadcasting” checkbox next to the unnecessary network.
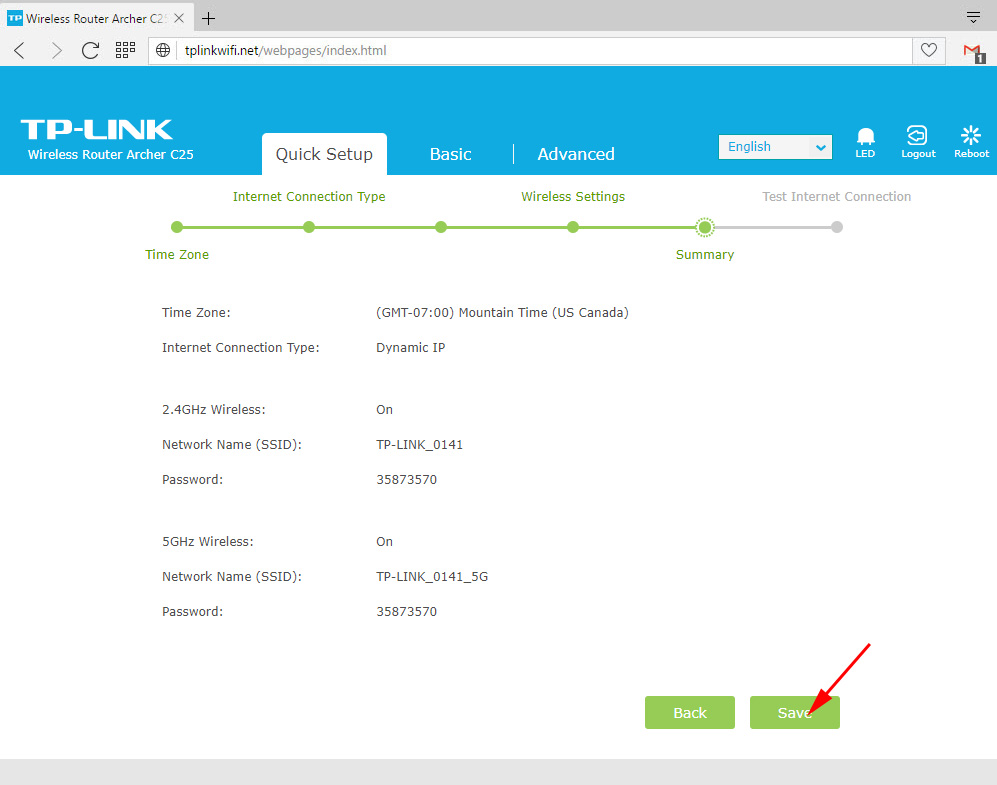
Check the information, it is desirable to write down the wi-fi password, and save the settings.
Everything is ready!
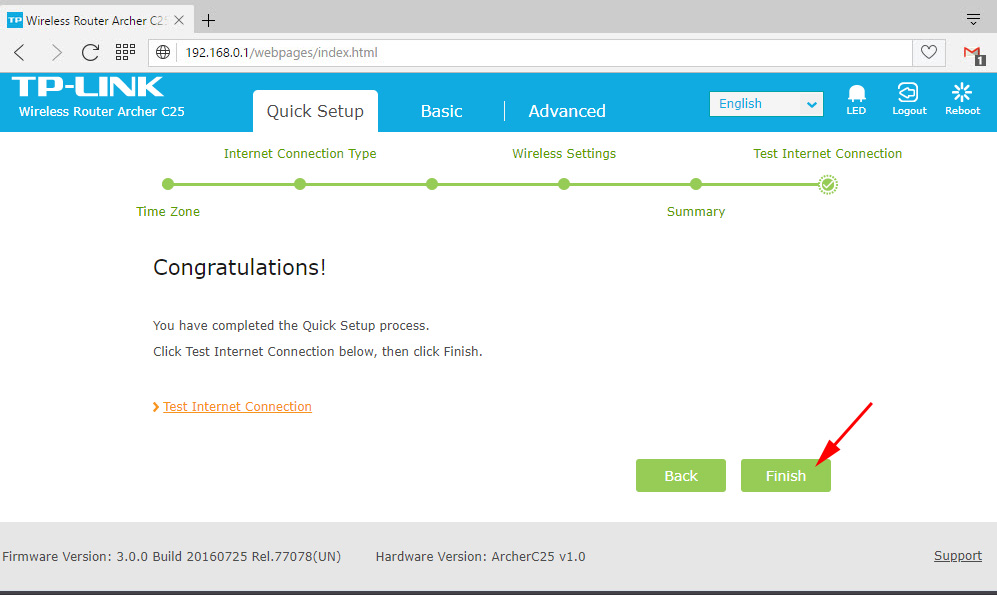
The configuration is complete.
If you need more detailed instructions, then see the instructions on the example of configuring TP-Link Archer C60. Everything is described in detail there.
Reviews
For some reason, there are not many reviews about TP-Link Archer C25 on the Internet. The model is good, the control panel is simple and functional. In the process of configuration and operation, I did not notice any problems. However, I have no experience in long-term use of this router, so I rely on your reviews. Which you can leave in the comments below.
You might also like this article about choosing a Wi-Fi router with 802.11ac (5 GHz).
If you have any questions about the article, feel free to ask them. I will answer and try to help you!
 Review TP-Link Deco E3-HomeMade Mesh Wi-Fi System at the Price of a Convention Router
  How to Complete a Full Reset on the TP-Link Router? Restore Factory Settings
  Review and Configuration of PowerLine Adaptors TP-Link TL-PA8010P KIT, OR HOW to do ...
  TP-Link TL-WR844N-ConNENENECTION, SETTING WI-FI, FIRMware, IPTV, Operating Mode