
Windows Failed to Automatically Detect the Parameters of the Proxy of this Network

The number of different errors in Windows is certainly staggering. I have already written instructions with solutions to most of the popular errors that are related to connecting to the Internet. But as it turns out, I have not yet covered the error “Windows failed to automatically detect proxy settings for this network”. That’s why I decided to prepare a small tutorial with several solutions that will help you get rid of this problem in Windows 10, Windows 8 and Windows 7.
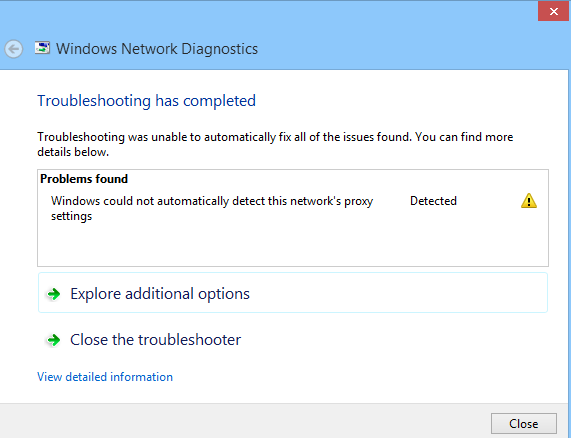
You can see the error itself with the text “Windows failed to automatically detect proxy settings for this network” by running troubleshooting when you have problems with your Internet connection. When the connection disappears and a yellow exclamation mark appears near the icon. There are also cases when this error appears while the Internet via wi-fi or cable is working normally. It looks like this:
There are several proven solutions that work in all versions of Windows. I will tell you about them now.
But first:
- Reboot your computer, or laptop (do exactly a reboot). If the Internet is connected via cable, unplug the cable and plug it back in.
- If the internet is connected through a router, and you observe an error with automatic proxy detection, reboot the router. Simply turn off the power for about a minute or so, and turn it back on.
Perhaps simply rebooting the devices will solve the problem. If not, follow the instructions.
Resolving the proxy detection error in Windows 7 and Windows 8
First, I suggest you do a network reset and then check your proxy settings.
1
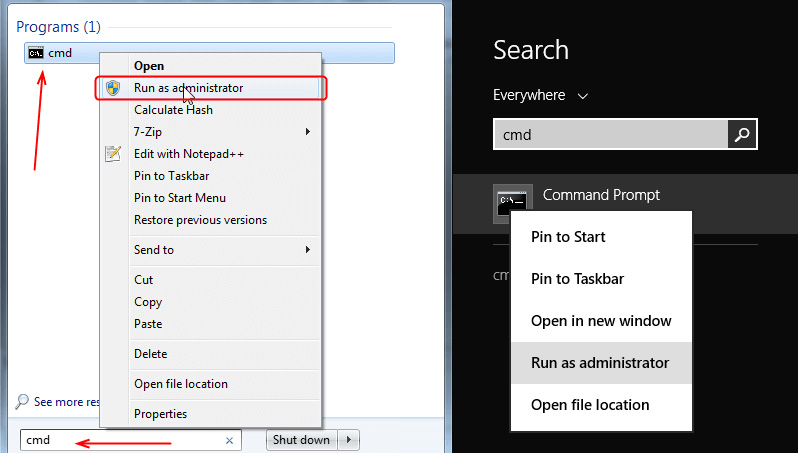
Reset network settings. We need to run a command prompt as administrator. To do this, in the Start menu, in the search bar, write cmd. In the search results, right click on the command prompt and select “Run as administrator”. In Windows 8, you can find and run it through search.
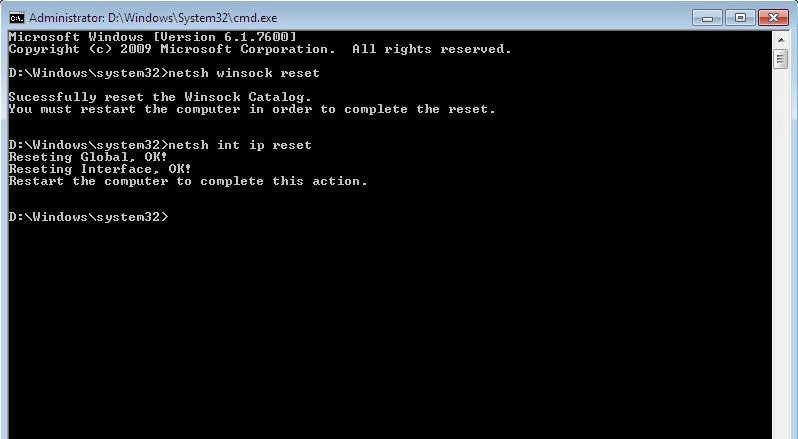
Next, copy, and one by one execute commands like these:
It should work like this:
Reboot your computer, or laptop and see if the problem is solved. If that didn’t help, there is one more way.
2
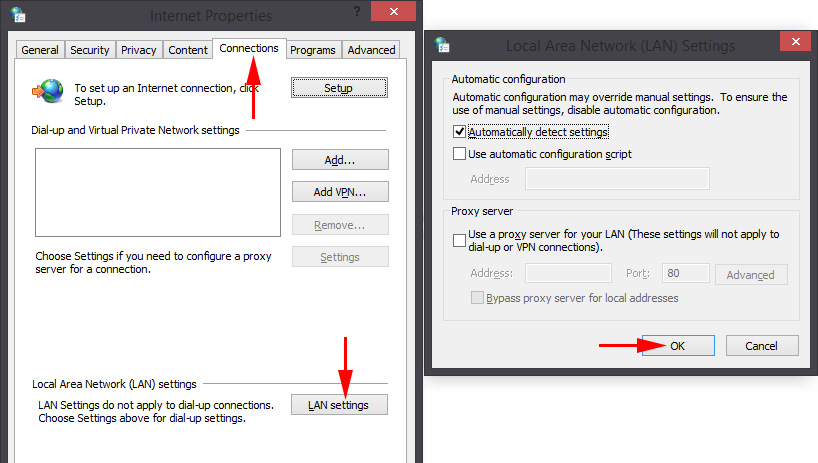
Check the proxy server settings. To do this, go to Control Panel, switch the display of icons to “Large Icons” and run “Educator Properties”. In Windows 8, you can still find these settings by searching for “Browser Properties” (proxy server settings).
In the new window, click on “Network Settings”, and make sure all the checkboxes except “Auto Detect Settings” are unchecked. That’s it:
I think if you run Windows Network Diagnostics after that, the error will not appear.
Problem with automatic detection of proxy settings in Windows 10
To solve this error in Windows 10, you can use the same tips I wrote above. But since the interface and settings in Windows 10 have changed a bit, you can perform all these steps in a different way.
1
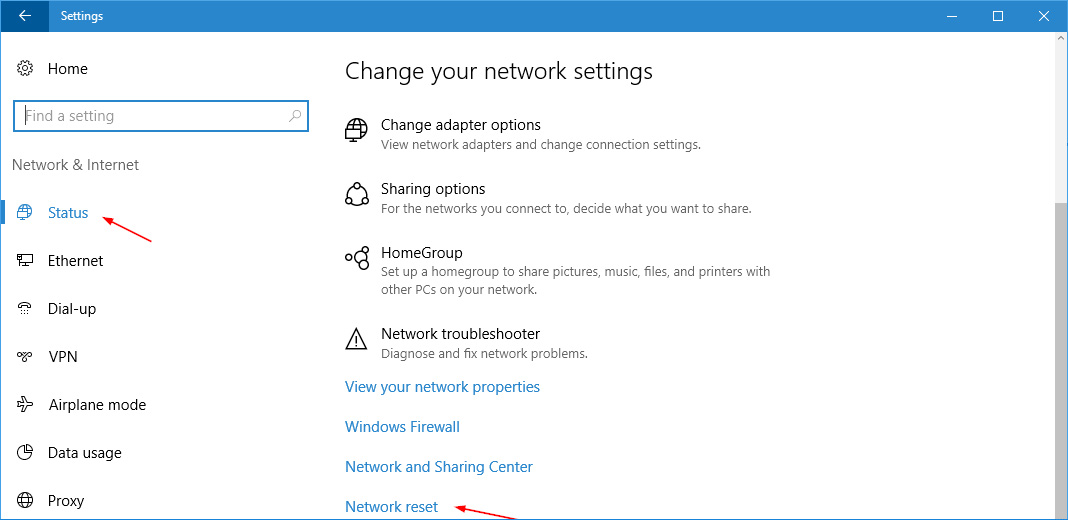
Reset the network through settings. Go to Start and open Settings (the icon in the form of a gear). Next, go to the “Network and Internet” section and on the “Status” tab, click on “Reset Network”.
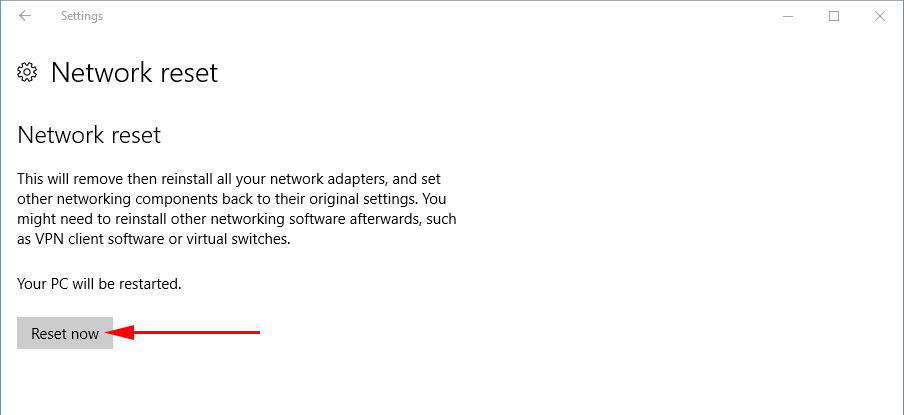
Next, simply click on “Reset Now”.
I wrote more about this in a separate article: /solving-problems-and-errors/resetting-network-settings-in-windows-10/
2
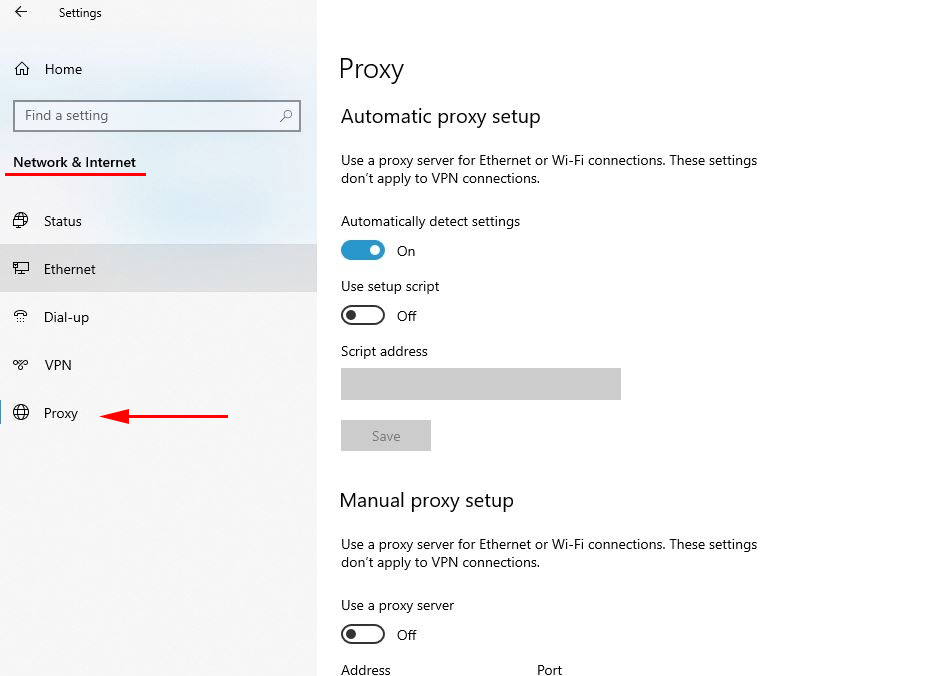
To check if there are no unnecessary settings in the proxy server properties, you should again go to the settings, to the “Network and Internet” section, to the “Proxy” tab. Check that everything is disabled there, except for one item. As on the screenshot:
If you managed to solve this problem, be sure to write in the comments what method helped you. All the best!
 The Wi-Fi Was Missing On a Laptop In Windows. No Wi-Fi Adapter in the Device Manager
  How to Roll Back The Wi-Fi Adapter in Windows 10?
  AFTER ReinStalling Windows 7, The Internet Dees Not Work (Wi-Fi)
  The Browser Does Not Open the Pages, and the IS of the Internet and Skype Works