
TP-Link TL-WN781ND-Setting and Installing the Driver
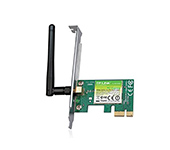
There are not many wi-fi adapters with PCI Express x1 interface on the market. One of such adapters is TP-Link TL-WN781ND. It is a rather popular and inexpensive model. It is a good option for desktop computers. In addition, such adapters do not occupy USB-port, which are often not enough. All you need is a free PCI Express x1 port on the motherboard of your computer.
But for some reason I like USB adapters better. They are somehow more simple. No problem to transfer to another computer, laptop, or use an extension cord to raise the adapter higher for better reception. Since the system units are usually mounted on the floor, and if the router is far away, there can be poor reception. I wrote about choosing adapters for PCs in this article.
Features TP-Link TL-WN781ND: Wi-Fi speed up to 150 Mbps, one external antenna, there is support for QSS. Also support Ad-Hoc function. With TL-WN781ND you can not only receive wi-fi, but also give it out. You can use your computer as a router.
The package includes the PCI Express adapter itself, antenna, documentation and a disk with drivers and utility.
Installing and configuring TP-Link TL-WN781ND
We only need to connect the Wi-Fi adapter to the motherboard, screw on the antenna, and install the driver. If Windows itself will not install it. A lot depends on what system you have installed. In Windows 10, the driver for TL-WN781ND is likely to be installed automatically.
So, turn off the computer, unplug the power from the system unit and open it up.
The PCI Express x1 port looks like this:
Hopefully you have such a port. If not, and you have already bought an adapter, you will have to change it.
Plug the adapter into this port.
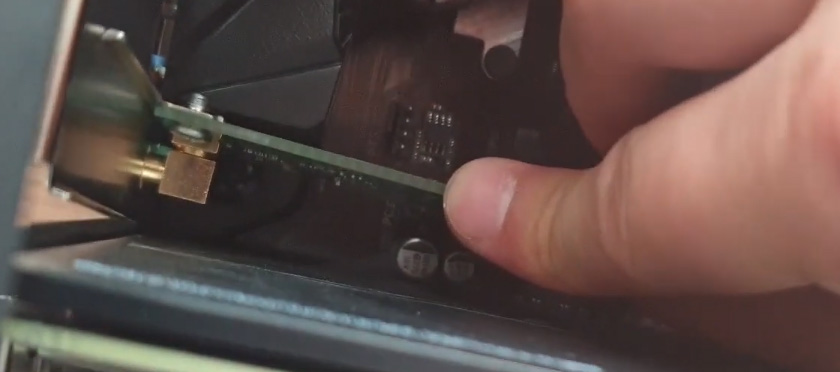
Fasten it and screw the antenna on the outer side.
That’s it. You can close the system unit, plug it in and turn it on.
If you have Windows 10, you will most likely be able to connect to wi-fi right away. Because the system will automatically install the driver. And if everything works well, there will be no problems with speed, then there is no need to install the driver manually.
Pay attention to the connection icon, which is on the notification panel. If there is a network indicator there with an asterisk, it means that the computer sees the networks available for connection. If there is a wireless network icon with a red cross, then the problem is most likely not in the driver. Either there are no networks available or there is a problem with the WLAN auto-configuration service. Check it according to the instructions. Also check if the antenna on TP-Link TL-WN781ND is well screwed on.
Well, if the system failed to install drivers automatically, you will have to help it.
Driver for TP-Link TL-WN781ND
The easiest option is to install the driver and utility (you don’t have to install it) from the disk that comes with it. But it is not always possible. And there may be an outdated driver on the disk. Therefore, it is better to download it from the TP-Link website.
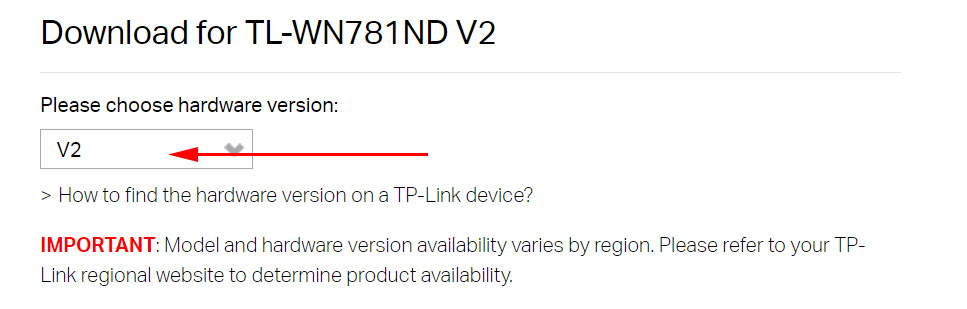
First, find out the hardware version of your adapter. It is indicated on the sticker on the box itself. I have ver:2.0

Download the driver from the official site: https://www.tp-link.com/en/support/download/tl-wn781nd/#Driver.
Select your hardware version.
Next, download the driver, which is suitable for the Windows installed on your computer. There in the table there is all the information on each driver.
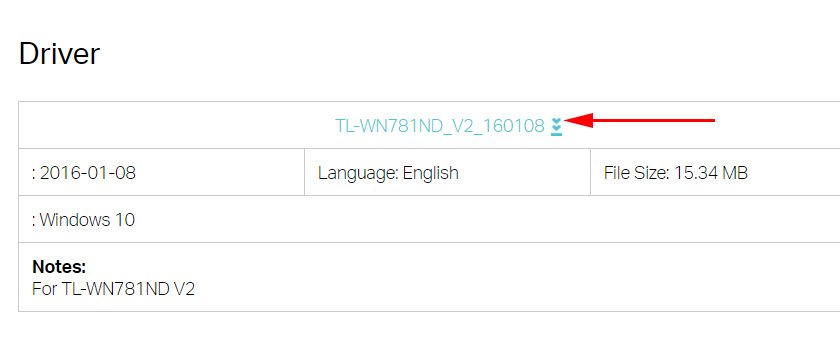
Open the downloaded archive and run the Setup.exe installation file. And follow the installation instructions. Restart the computer and connect to wi-fi.
Once installed, everything should work. If the driver is installed, but there are no available Wi-Fi networks, TP-Link TL-WN781ND does not work and does not see wireless networks, then the first thing to check is whether the antenna is fixed on the adapter and the WLAN auto-setup service on the computer. I gave a link to the instructions above in this article.
 Two-Band Access Point TP-Link Eap320. Wi-Fi Business Solution
  TP-Link Archer T2uh Ac600-Review, Driver Installation, Setting
  Review TP-Link Archer Mr400-Two-Band Wi-Fi Router with A Built-in LTE Modem
  How to Connect TP-Link TL-WR740N (TL-WR741ND)