
Properties of Wi-Fi Network In Windows 10, Automatic Connection, Network Profile, IP Parameters and Limit Connection

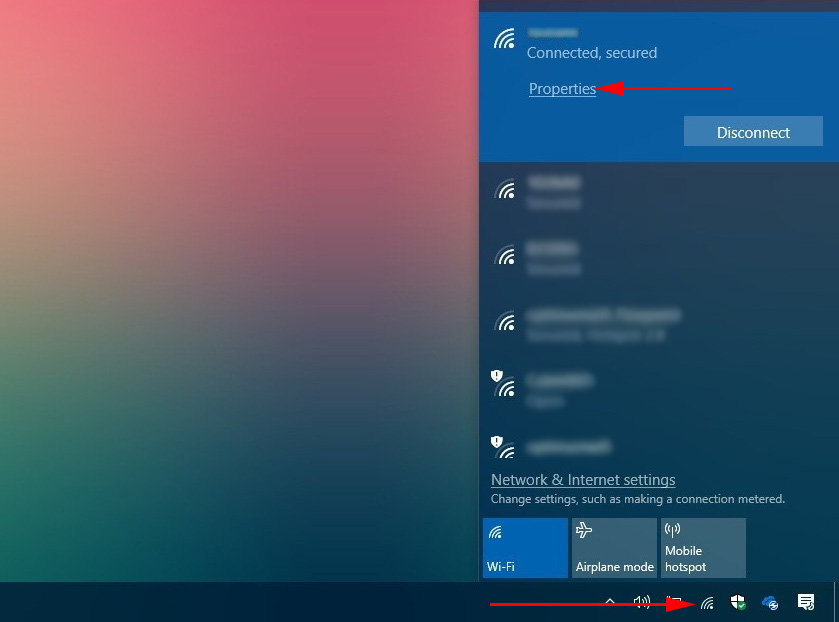
On the computer, you can view the properties of a specific Wi-Fi network to which we are connected, and change some settings that will apply only to a specific network. For example, disable automatic connection when the computer is within range of that network, change the network profile, manually set the IP address, or set the network as a limit connection.
In Windows 10, you can set all of these Wi-Fi network settings on a single page by simply opening the properties of the wireless network you want to use.
To open the settings, just click on the “Properties” button in the list of networks.
Let’s consider all the settings separately.
Connect automatically within range
Everything is elementary. One On/Off switch. When the function is enabled, the computer will automatically connect to this network. When disabled, you’ll have to connect manually. Without re-entering the password.
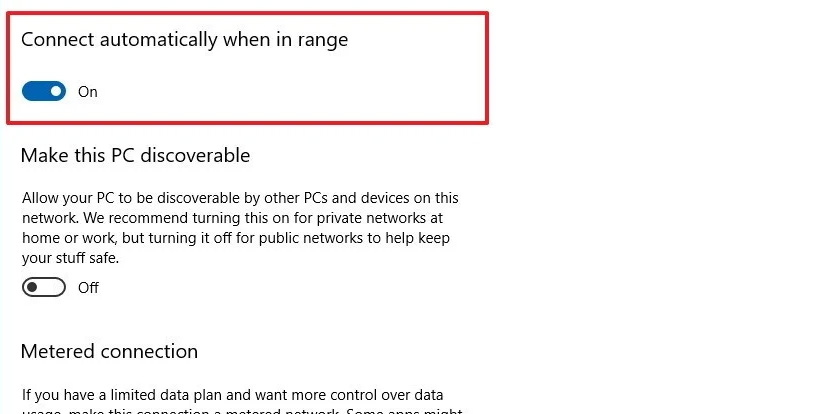
For convenience, leave the switch in the On position. Especially if this is your Wi-Fi network.
Network profile. Public and private Wi-Fi networks in Windows 10
Here you can choose which network you are connected to. There are two options: public and private. What’s the difference? If you are connected to a network you trust (at home, at work), you can select the “Private” profile. Then the computer will be detected in the local network. For example, it will be visible to other devices. You will be able to share files, etc. By customizing the settings of the shared access (link to the settings under the profile description).
And if you select “Public”, your computer will be hidden in the local network.
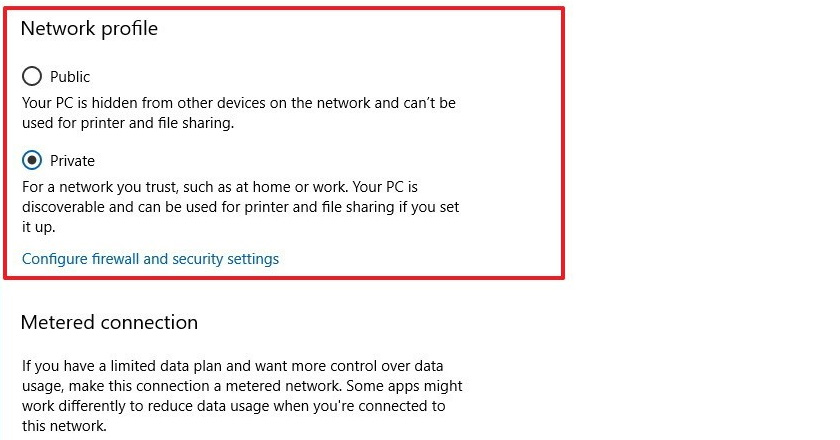
When you connect to public Wi-Fi networks, always set the network profile to “Public”.
Limit connections
In Windows 10, you can set up a Wi-Fi network as a limit connection.
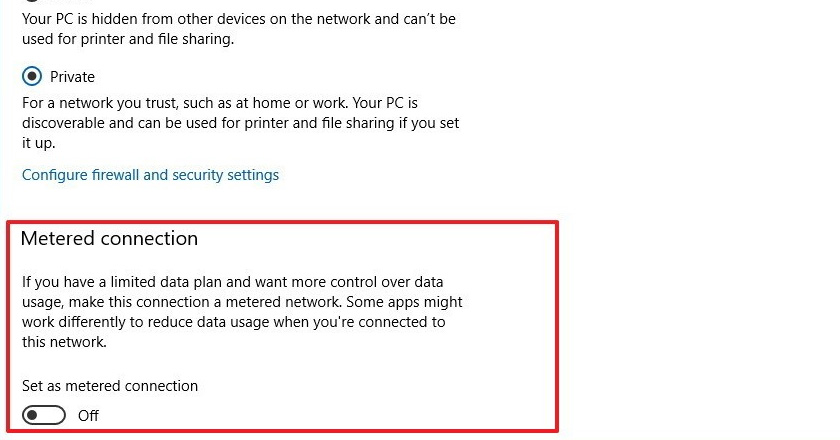
There are times when we connect to Wi-Fi networks with limited traffic. For example, when we give out Wi-Fi from a phone, or through a 3G/4G mobile router. There are different cases. So, to make Windows 10 more economically spend traffic, you can in the Wi-Fi network settings switch “Set as limit connection” to On.
Through a limited connection, for example, Windows 10 will download the most necessary and small updates. Not all of them, and when it needs them.
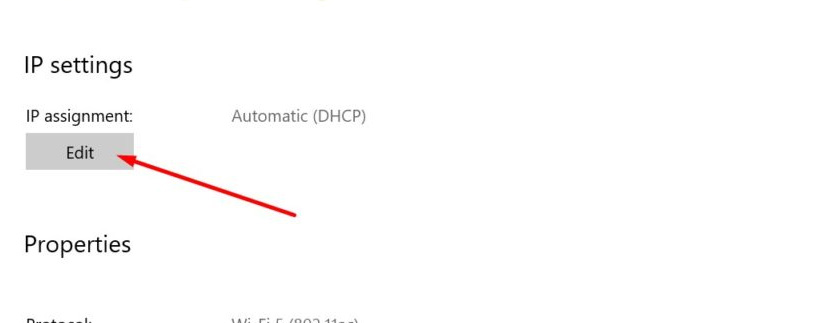
Specific Wi-Fi network IP settings
You can manually set IP and DNS settings for a specific Wi-Fi network. By default, your computer automatically gets these addresses when you connect. But, if necessary, you can specify them manually.
Click on the “Edit” button.
Next, select “Manual” and enable the protocol for which we will set the addresses: IPv4 or IPv6.
Enter the necessary addresses and save the settings. I, for example, specified static DNS from Google.
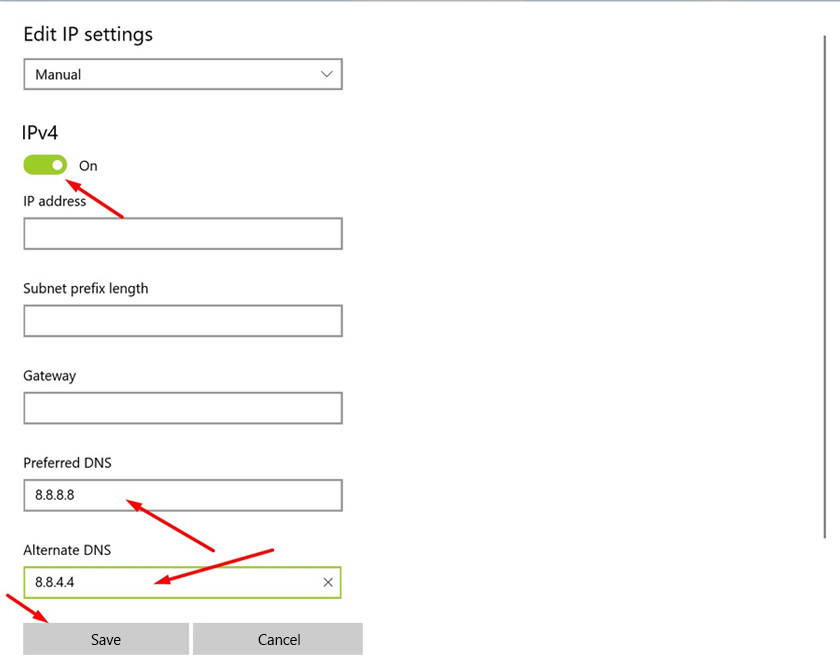
Be careful. If you misspell the addresses, the computer will not be able to connect to wi-fi. If necessary, set it back to “Automatic (DHCP)”.
Properties
The last item is Properties. There are no settings there. You can just see information about the wi-fi network and wireless adapter.
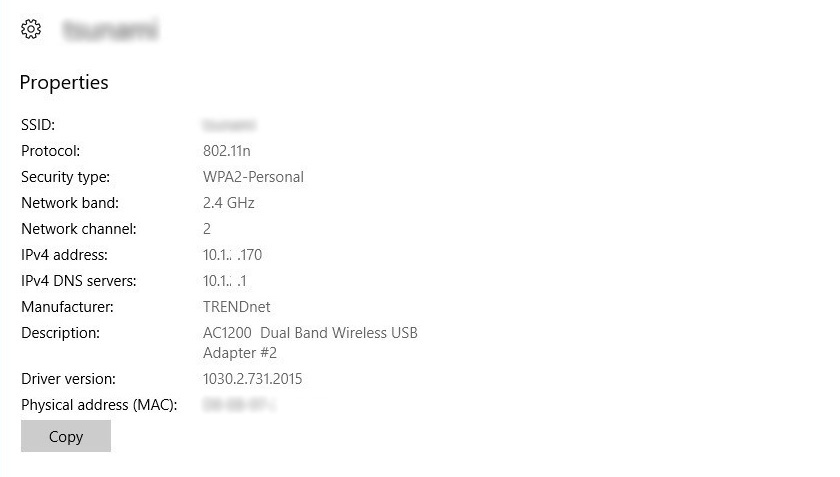
SSID (network name), protocol (by which we are connected to the network), security type, network range, channel, IP address, DNS.
Also the manufacturer of the Wi-Fi module, description (where the model is specified), version of the installed driver and MAC-address.
You can copy all this information with a click of a button.
 How to Forget the Wi-Fi Network on Windows 10?
  Wi-Fi Sense in Windows 10. What is This Function and How Will It Turn It Off?
  How to Connect to Wi-Fi Without a Password in Windows 10? Through The Wps Button On the Router
  Wi-Fi Driver for DNS Laptop. Download from the Official Site and Installation