
How to Connect to Wi-Fi Without a Password in Windows 10? Through The Wps Button On the Router
Not everyone knows that you can quickly connect your PC, or laptop on Windows 10 to a Wi-Fi network without entering a password. Just by pressing a single button on your router. And in this article, I will show you how to connect to wireless networks using WPS in Windows 10.
WPS (wi-fi Protected Setup) is a feature that has been designed specifically to simplify the process of connecting different clients to a Wi-Fi network. Thanks to WPS, we don’t need to enter a password. It is enough to select the necessary wireless network on the device and activate WPS on the router.
This method of connection can come in handy not only when you are too lazy to enter the Wi-Fi network password, but also when you have forgotten it. Or you never knew the password, but you have access to the router. It’s also possible to quickly connect your computer to a Wi-Fi network somewhere in the guest.
The WPS feature itself can be disabled in the router’s settings (more on that in the link above). But it is enabled by default. That is, everything will work unless someone has specifically disabled WPS. Sometimes this feature is advised to be disabled if you have various problems while connecting to a wireless network, or for security reasons.
WPS in Windows 10: connecting to Wi-Fi without entering a password
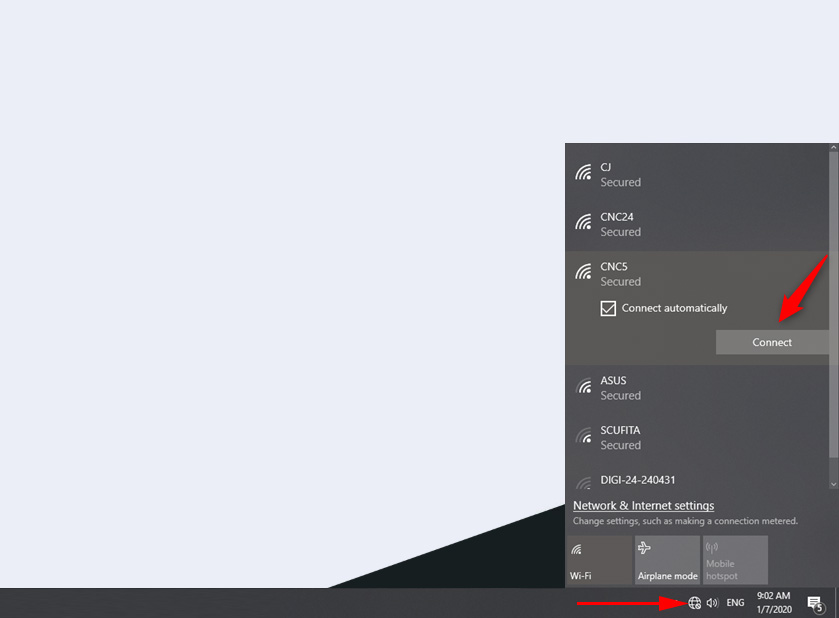
To open the list of all available Wi-Fi networks that your computer has detected, you need to click on the wireless network icon in the notification panel (tray).
Next, simply click on the wireless network we need and click on the “Connect” button.
The usual password input field will appear, and below it should be the inscription “You can also connect by pressing the button on the router.” This means that the WPS function on the router is enabled. If it is disabled, there will be no such inscription.

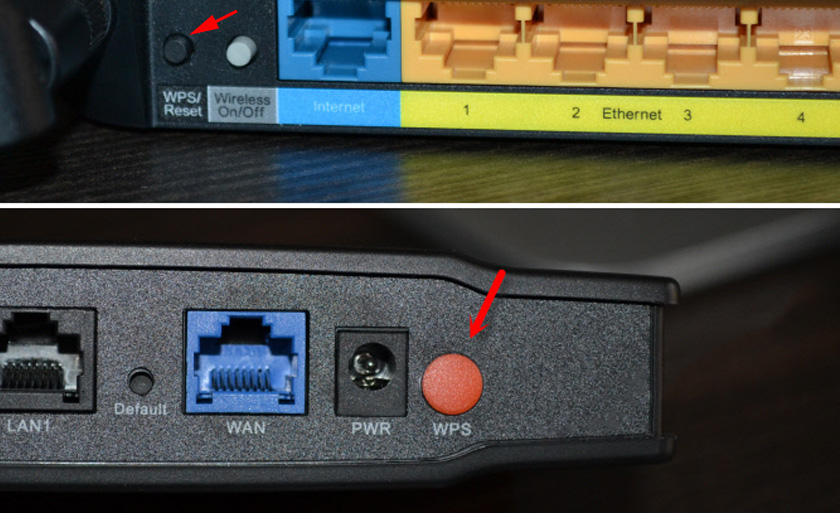
Go to the router, find the WPS button and press it. Here, depending on the router model, there may be many nuances. For example:
- The button is not always signed as WPS. It may just be an icon.
- A brief press may be enough to activate the feature. In some cases you need to hold the button down for 2-3 seconds. Just not longer than that, or you may reset the router settings. Sometimes the WPS activation button also performs the Reset function.
- Most likely, the WPS indicator (in the form of a lock) will start to light up/blink on the router. On ASUS, for example, the power indicator flashes.
Photo for clarity:
In the connection window on Windows 10, the status “Receiving parameters from the router” should appear.
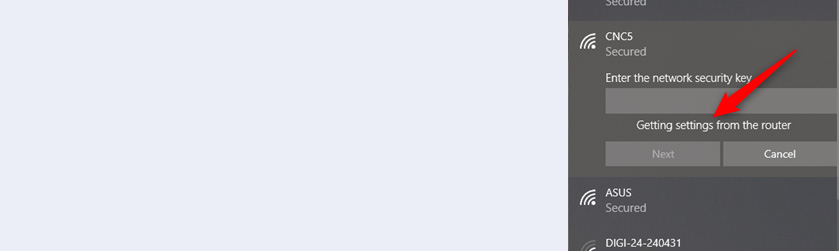
You need to wait a bit. The computer should connect to the Wi-Fi network.

Done! You don’t need to disable anything on the router. The WPS function will be automatically deactivated after some time. The indicator light will stop blinking, or lighting up.
While I was testing this connection, for some reason my laptop on Windows 10 did not want to connect to one router (everything worked with the other one ). The error “Windows failed to automatically retrieve settings. Enter security key.”

I never understood why. And I didn’t bother to look into it. In such situations it is easier to enter the password than to look for a solution. Well, you can only reboot the router and the computer.
 How to Connect to Wi-Fi In Windows 10?
  Wi-Fi adapter for laptop. How to replace the built-in Wi-Fi module?
  Wi-Fi Driver for DNS Laptop. Download from the Official Site and Installation
  How to Connect a Regular Computer (PC) To A Wi-Fi Network?