
Netis WF2411E Router Setup
I decided to demonstrate the process of configuring the Netis WF2411E router. I think this instruction will come in handy not only for the initial configuration of the router, but also for solving some possible problems at the time of setting up and using this device. Despite the fact that the control panel on Netis routers is very simple and clear, and there is a detailed configuration manual in the kit, such articles collect a lot of views, comments and help many people in solving various problems.
If you are just choosing a router for yourself and are considering this model, you will most likely be interested in reading a review on the Netis WF2411E.
I have set up the Netis WF2411E several times now. The whole process takes a few minutes. The main thing is to connect all the cables and correctly set the parameters that are necessary to connect to the Internet. Well, and of course I recommend changing the name of the Wi-Fi network and set a strong password to protect the same network. Now we will consider all this on a real example.
You can use almost any device to configure the router. But it is better, of course, to configure from a computer or laptop. If it is not available, then a phone or tablet will do.
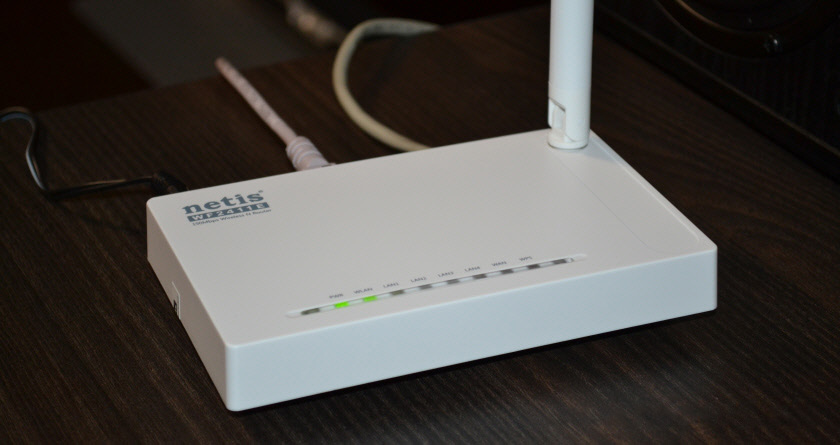
The first thing to do is to connect everything. We take our Netis WF2411E out of the box, connect the power cable to it and plug the adapter into a socket. The network cable from the Internet provider should be plugged into the WAN port. It is blue and signed.
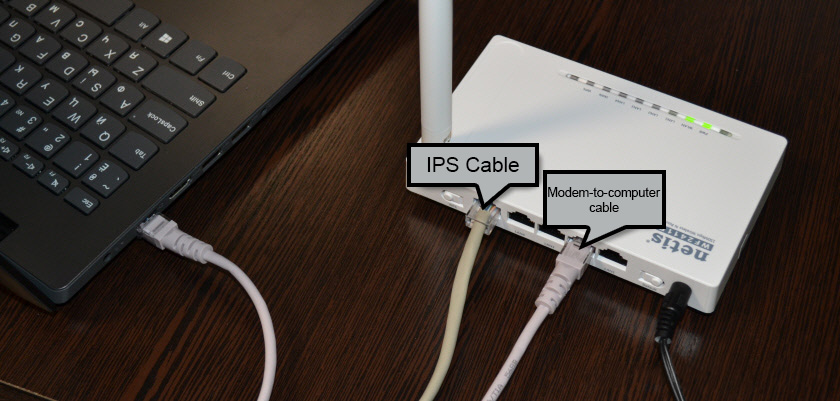
Next, connect the device from which we will perform the configuration. If it is a PC or laptop (and it has a LAN-port), it is best to connect them with a network cable.
Pay attention to the photo below, everything is shown there. Don’t confuse the WAN and LAN port.
If you can’t connect to the WF2411E with a cable, then establish a wi-fi connection. The factory wireless network name (SSID) and password are listed at the bottom of the router. The default password is password. Simply select the router’s wi-fi network on your device and connect to it.
Logging into the web-interface and quick configuration of Netis WF2411E
You can access the router’s settings through your browser. Therefore, open any browser (preferably a standard one) and go to http://netis.cc, or 192.168.1.1.
If the router has been previously configured, it is advisable to do a reset. To do this, press the “Default” button for 8-10 seconds.
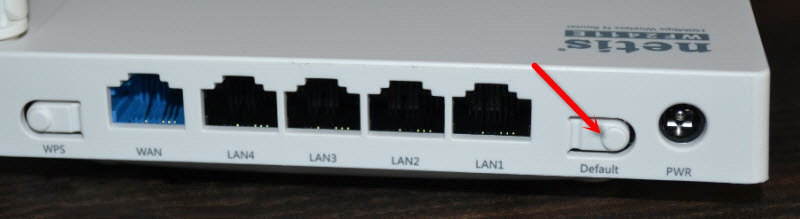
All indicators will light up and go out. The settings will be restored to the factory settings.
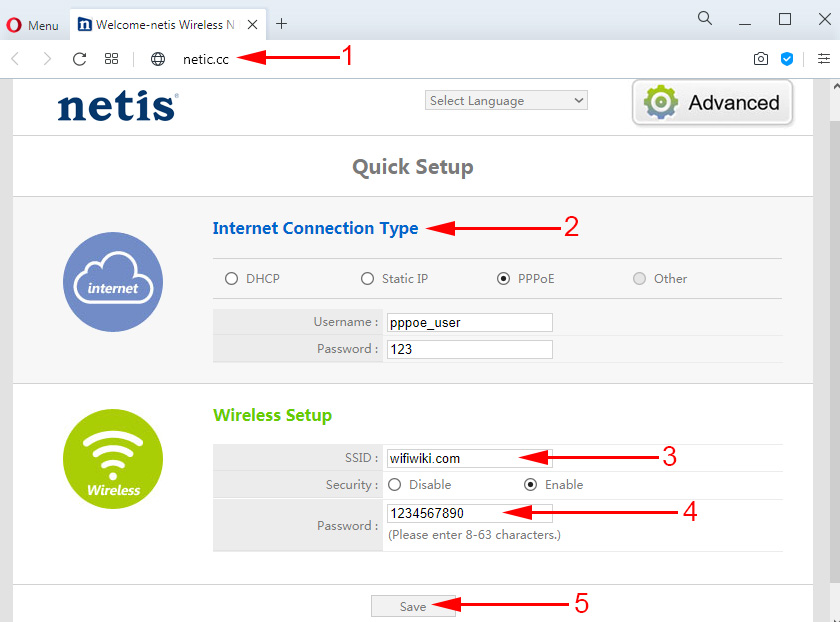
A page with the most necessary settings should appear: connecting to the Internet and setting the wireless connection. Let’s go in order:
- The address where we enter the settings.
- The type of Internet connection your ISP uses. If you don’t know, check with your provider. Without this information you will not be able to configure the router. If you have “Dynamic IP”, you do not need to set any additional parameters. Except to clone MAC-address (if it is required by the provider). And if PPPoE, or PPTP (found in the advanced settings), then you need to specify a username and password (they are issued by your provider). “Static IP” is now practically not used (there are just prescribed static addresses).
- Change the name of the Wi-Fi network.
- Set a password for the Wi-Fi network that our Netis WF2411E will distribute. Just don’t forget the password. Or better yet, write it down somewhere.
- Save the settings.
See the screenshot.
The router will report that “Saving is complete” and will be rebooted. After that the Wi-Fi network will appear with a new name (which we set in the settings). To connect to it, use the set password.
If connection to the Internet on the devices connected to the router works, then you have done everything correctly. The configuration is complete. Except that I advise you to go to the control panel once again to put a password to protect this very control panel of your router. At the end of the article I will show you how to do it.
And if the router is not connected to the Internet (ISP) and the connection on all devices is “no Internet access”, then you need to check the WAN settings. But before that, I recommend to clarify all the parameters with the support of your Internet provider.
Now I will show you how to open the advanced settings of the WF2411E router and change the most necessary parameters. Again, if you have Internet through the router works, you need to set only a password that will protect the router settings. It is better not to change other parameters without necessity.
Advanced router settings
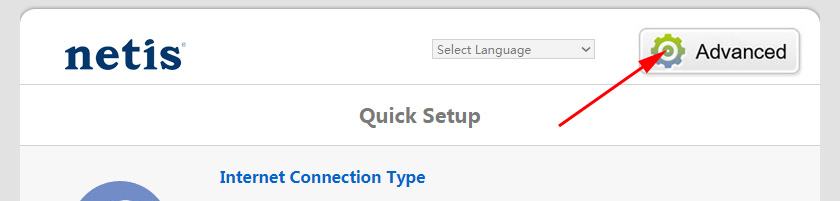
To open the advanced settings, you need to click on the “Advanced” button on the main page.
Let’s go through the main sections.
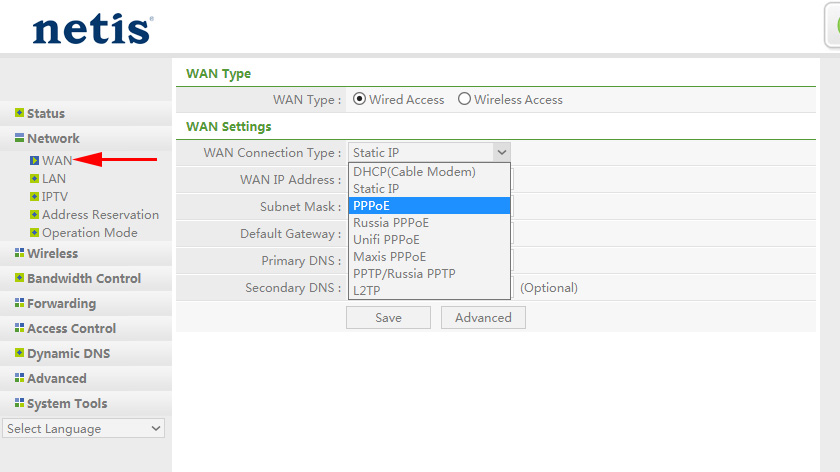
Internet connection settings are located in the “Network” – “WAN” section. There you can choose the type of connection and set the parameters that the router needs to connect to the Internet. Let me remind you that these parameters are provided by your Internet provider.
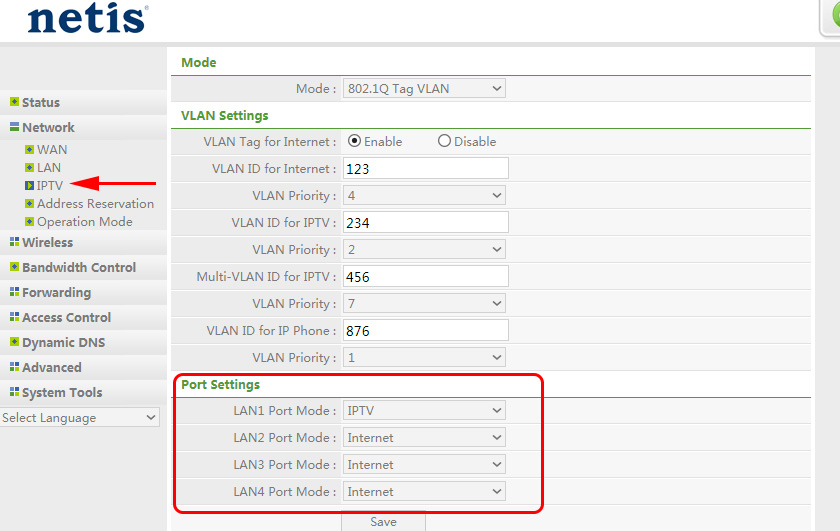
If your ISP provides digital TV service, you can configure it in the “Network” – “IPTV” section. There you can choose one of 4x LAN ports and assign it to IPTV. Or several ports. And then connect the set-top box to it.
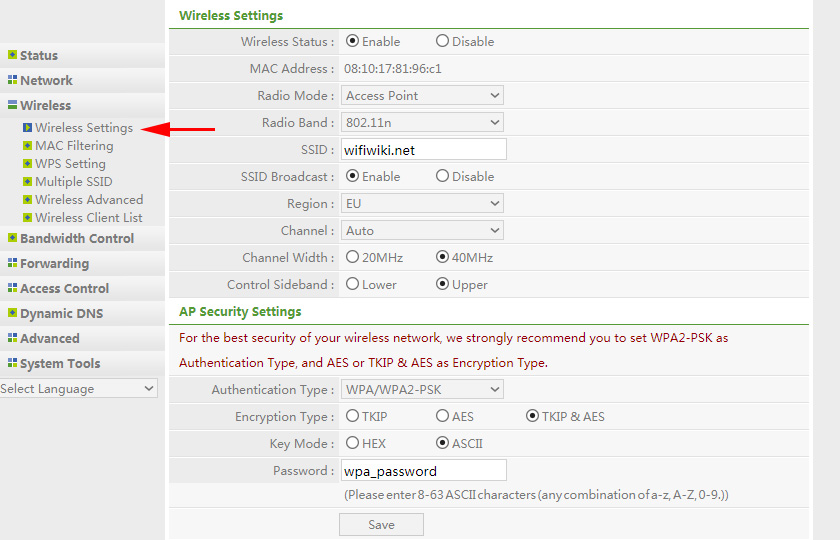
You can change the Wi-Fi network password or name (SSID) in the “Wireless Mode” – “Wi-Fi Settings” section. There you can also change the wireless network channel number and channel width. This is in case there are problems with connection of certain devices or the speed of connection via wireless network is too low. In the same section you can change the mode of the radio (by default it’s “Access Point”) and use Netis WF2411E as a repeater, for example, or a Wi-Fi receiver.
Well, and the mandatory setting in my opinion – setting a password to protect the router settings. Go to “System” – “Password”.
In the “New user name” field, write some name in English letters. You can set “admin”. And in the “New password” field think up and specify a password (it has nothing to do with the Wi-Fi network password). It is also desirable to write down this password somewhere. Confirm the password in the second field and save the settings.
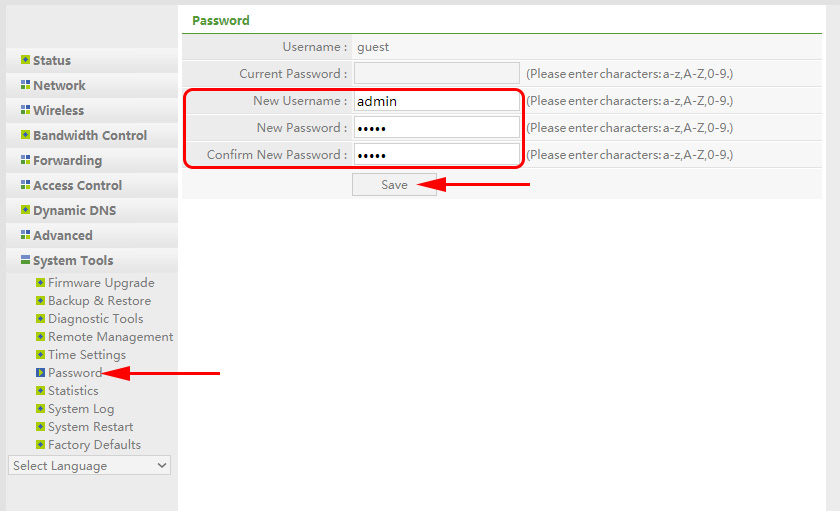
A request for this data will appear at once. And it will appear every time you or someone else wants to access the Netis WF2411E router settings.
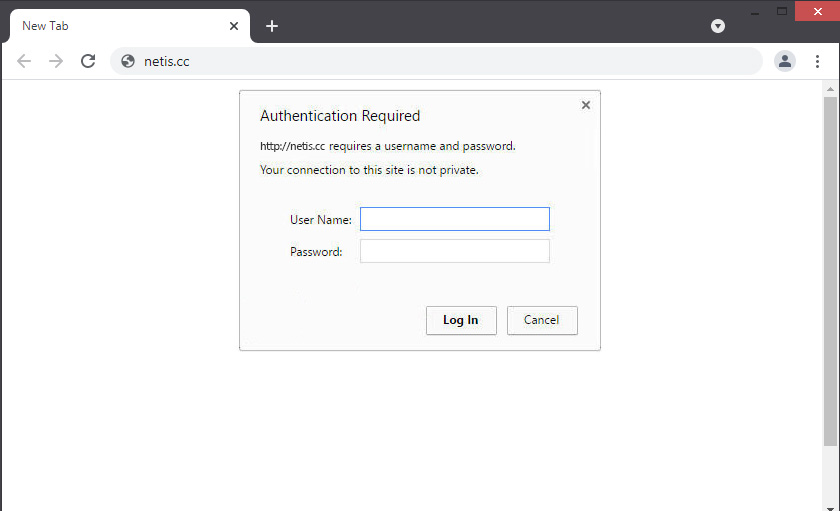
But we know the password, but someone else does not.
If you don’t succeed in something – ask in the comments. If you succeeded – write anyway. Did the instructions help you, maybe I missed something. I will be happy to add to the article.
 Setting up the settings on the netis router
  Netis E1+-review and Setting Up of the Wi-Fi Retransa Network from Netis
  How to Open A Port on A Netis Router?
  Netis Router Setting Up by the Example of Netis WF2411