
Instructions for setting up the router tp-link Archer C5400

Despite the fact that TP-Link Archer C5400 router has a very simple equation panel, it is possible to configure it from a mobile device (via a proprietary application) and it comes with a detailed manual with pictures, I still decided to prepare my own instruction on how to configure this router. If you haven’t bought Archer C5400 yet, but only choose a router and consider this model as one of the options, I recommend you to familiarize yourself with TP-Link Archer C5400 review.
Setting up any router can be divided into two stages: connecting all the cables and the actual process of setting up. I think everything is clear with the connection. Now I will show you in detail how to connect Archer C5400 correctly. But you can configure it in two ways:
- If from a computer or laptop, you can configure it through the web-interface, which is opened in a browser (like a usual website). It is this option that we will consider in the article.
- If from a smartphone or tablet, then it is best to use a proprietary application from TP-Link, which is called Tether. No, you can also configure through the browser, but through the application is much more convenient. Then you can also control the router through this app.
First of all, let’s connect our TP-Link Archer C5400. Connect the cable to the power supply, plug it into an outlet and connect it to the router. In the WAN port (Internet), connect the Internet. And in one of the 4 LAN ports , connect the cable (it is included in the kit) to a laptop or PC.
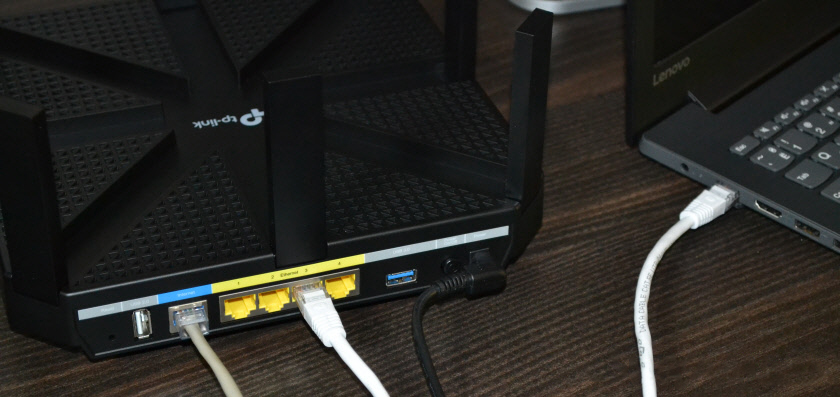
If you can’t connect the router to your PC via cable, you can connect to a Wi-Fi network. The factory network name (SSID) and the factory password (Wireless Password/PIN) can be found on the sticker at the bottom of the router.
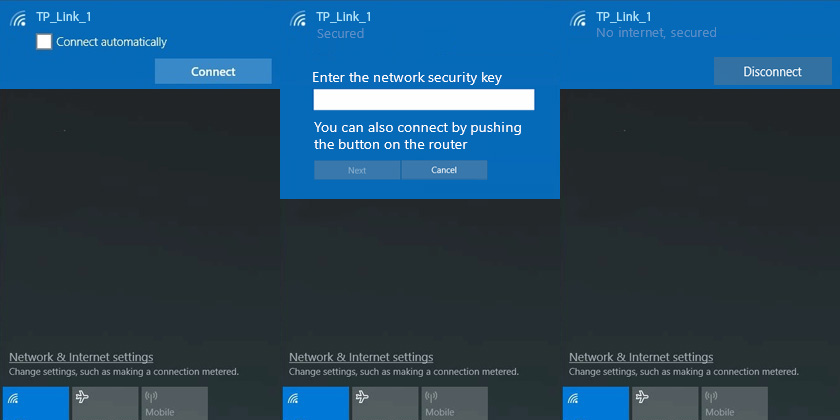
The network status may be “No Internet Connection”. This is normal because the router is not yet configured. In some cases, the Internet may work right away. Check that only one connection is active on your computer. Only to the router. Otherwise we won’t be able to enter the settings.
Configuring TP-Link Archer C5400
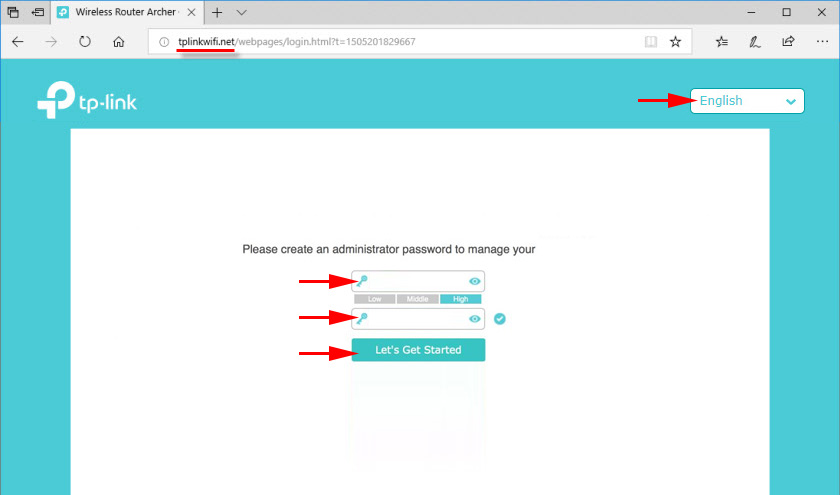
If you look at the sticker on the bottom of the router case, you can see the address http://tplinkwi-fi.net. This is the address where you can go to TP-Link router settings. I told you how to do it in the article: tplinkwi-fi.net – entering router settings. You can also enter the settings at 192.168.0.1. Just open any browser, enter this address in the address bar (not in the search bar!) and press Enter.
I recommend you to change the language of the web-interface right away. Also on the first page TP-Link Archer C5400 will offer us to set a password, which we will have to enter when entering the control panel. This password is not for Wi-Fi network (we’ll talk about it further on). This password is needed to protect the router settings. We think up a password, enter it twice and click on the “Let’s get started” button.
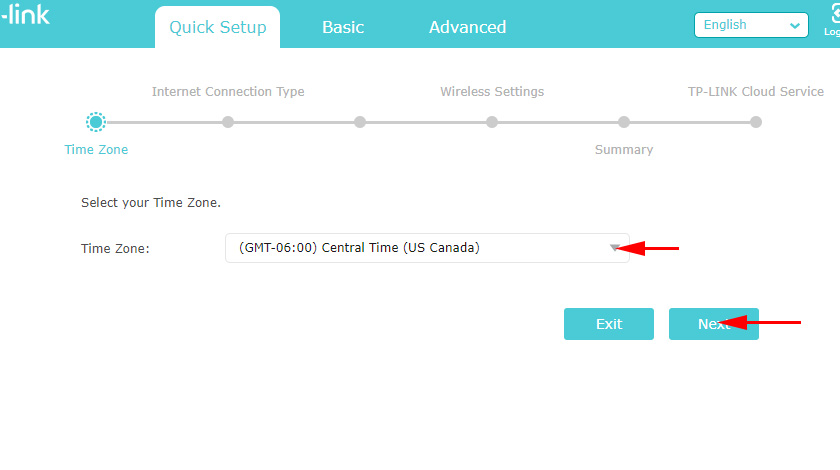
The “Quick Setup” section will open at once. At the first step you need to specify the time zone.
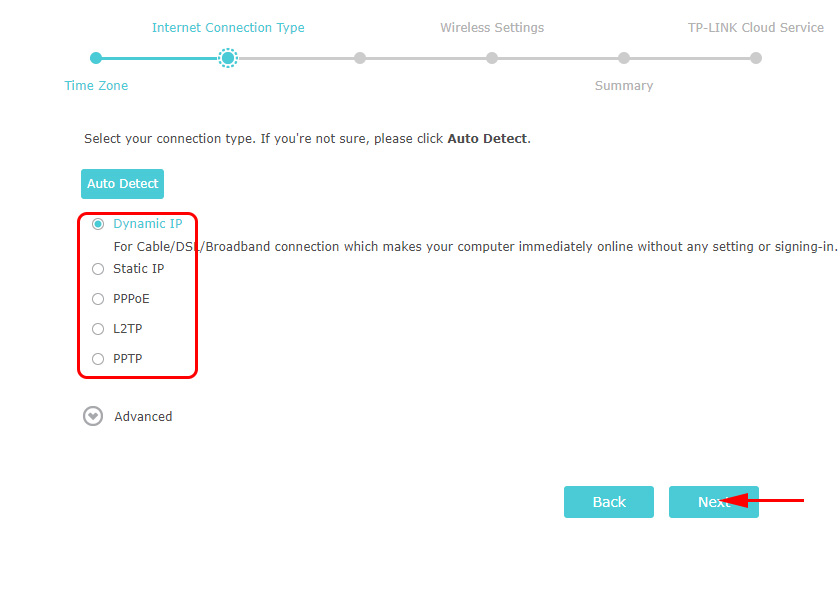
Next are very important settings! Internet connection. You need to choose the right type of Internet connection and set all the parameters that are necessary for connection.
You may not know what type of Internet connection your Internet provider uses. You can call support and ask, or click on the “Auto Detect” button. However, there is no guarantee that the type will be detected correctly.
If you have PPPoE, L2TP, PPTP, the next step is to set the user name and password (your ISP gives them to you). If you have Static IP, you need to specify the addresses. And if it ‘s Dynamic IP (as I have), you don’t need to configure anything.
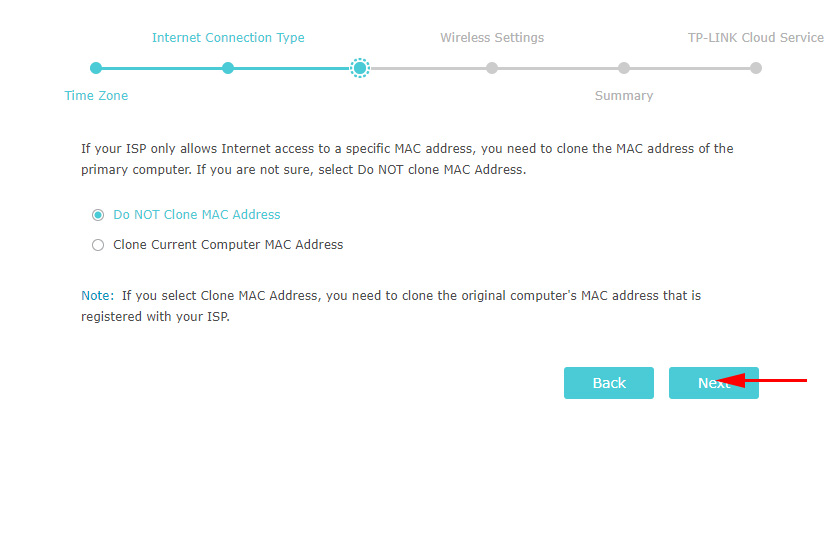
After selecting “Dynamic IP” you will be prompted to clone the MAC address. If your ISP doesn’t do MAC address binding, then leave the “Do NOT clone MAC address” option selected. If there is a binding, and the router is now connected by cable to the computer to which the Internet was bound, then set “Clone the MAC address of the current computer”.
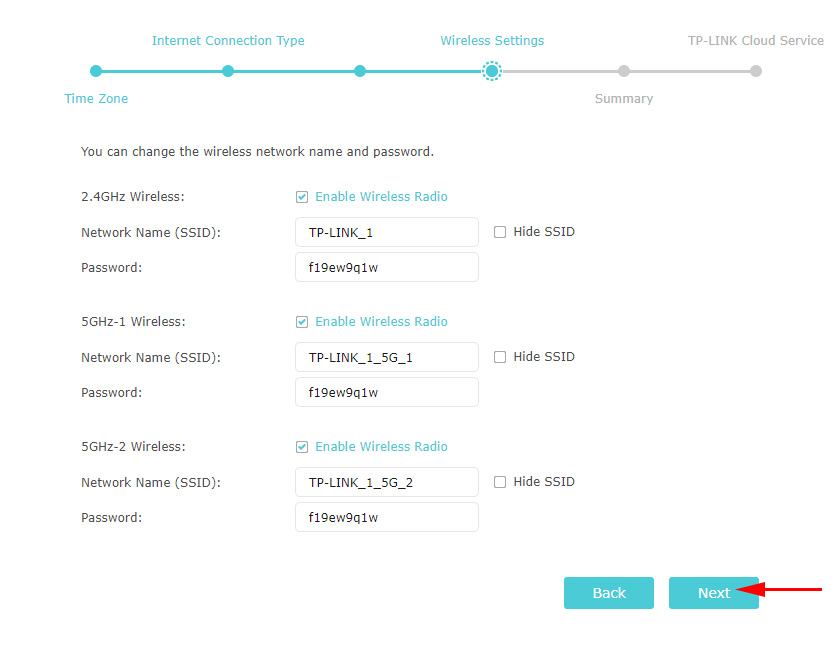
In the next window we need to set the Wi-Fi network settings. Network name and password. For each of the three networks, because our router is tri-band. If necessary, you can disable a particular Wi-Fi network if you don’t need it. For example, one network in the 5 GHz band. The password can be set the same for all Wi-Fi networks. See my settings in the screenshot below for an example.
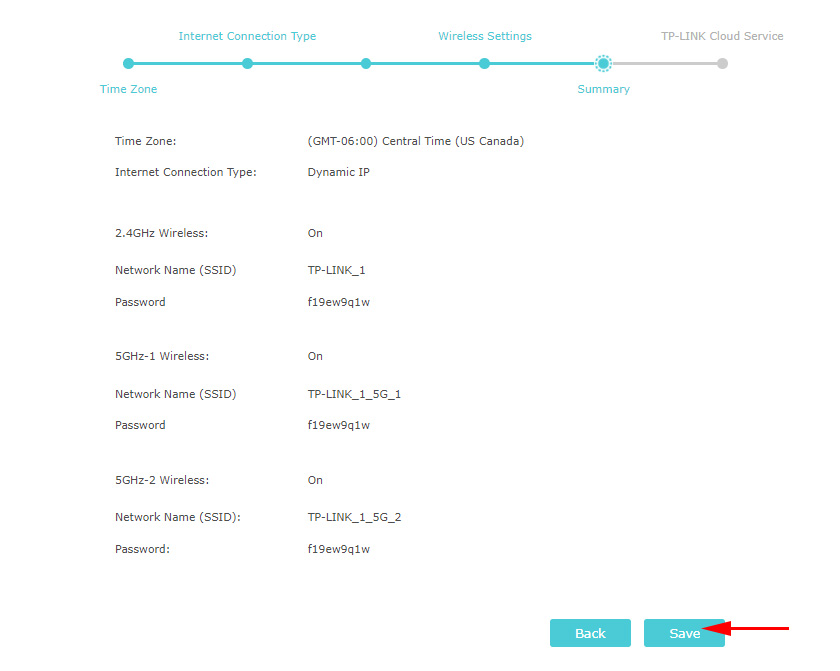
Check all the settings and click on the “Save” button.
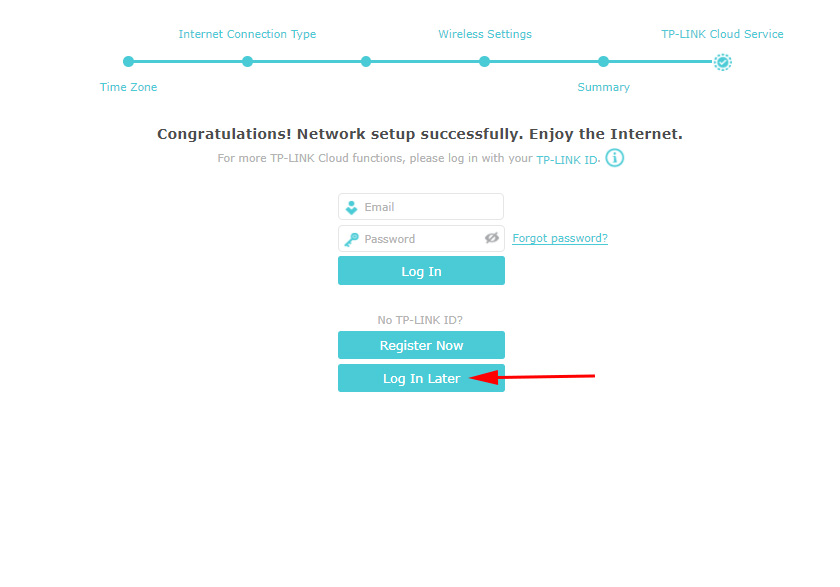
Wait a bit and you will see a window with a suggestion to authorize under TP-LINK ID. If you want, you can create an account and log in to your account. But it’s not necessary, you can just click on the “Sign in later” button.
TP-Link Archer C5400 setup is complete!

Immediately the web interface and the “Network Layout” window will open.
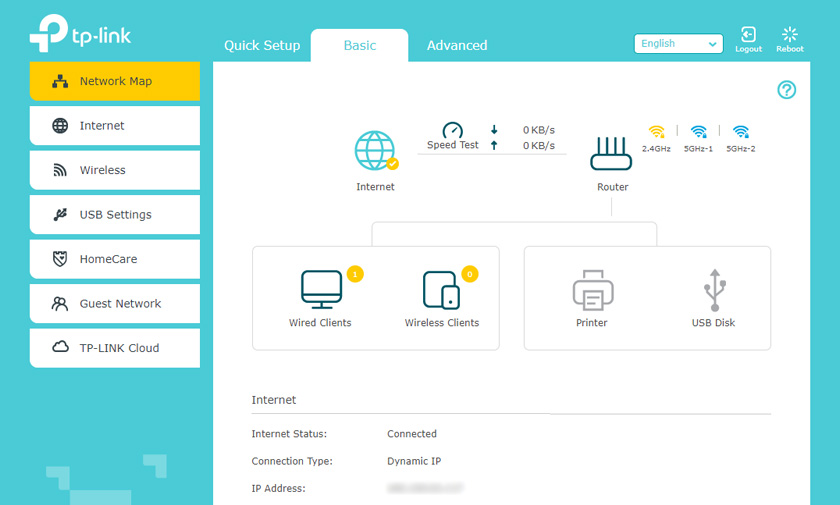
From here you can control your router. Change settings, configure different functions, view and manage connected devices and much more. The interface is very simple and pleasant. It is not difficult to understand it at all. And also, on each page there is a button in the form of a question mark (?) if you click on it you will see detailed instructions on settings on the same page. Very convenient.
If you still have any questions about TP-Link Archer C5400 settings, you can leave them in the comments. I will be sure to answer them and add to the article if necessary.
 TP-Link TL-WN781ND-Setting and Installing the Driver
  Smart Rosettes TP-Link HS110 and TP-Link HS100. What is it and How do the Work?
  The TP-Link Adapter Does Not See the Network, Does Not Connect To Wi-Fi, The Utility Window Is Inactive. Who sod the adapter work?
  Review and Configuration of PowerLine Adaptors TP-Link TL-PA8010P KIT, OR HOW to do ...