
Smart Bulbs from TP-Link: Connection, Configuration, Control
I recently got acquainted with smart bulbs from TP-Link. I want to share my impression with you and tell you what these devices are and how they work. I will show you how to connect a smart bulb and control it from your mobile device via a special application. Perhaps you are thinking about buying a smart light bulb, but you don’t fully understand how these devices work and how they differ from “non-smart” bulbs. Where they can be used and what are their pluses. Now I will try to clarify this issue a little bit.
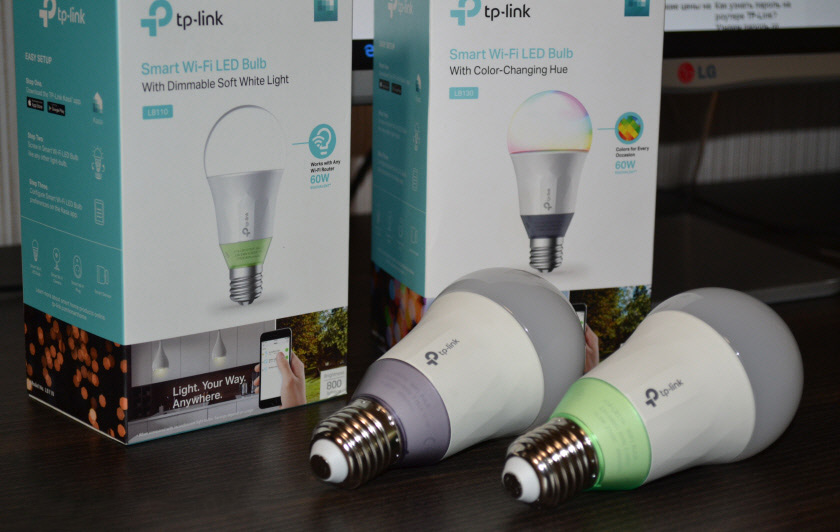
In the line of smart bulbs that are presented on our market, there are four models: LB100, LB110, LB120 and LB130.
- The TP-Link LB100 is the youngest model. It has an illumination power of 600 lumens. Power consumption is 7 watts. Color temperature 2700K.
- TP-Link LB110 – compared to the first model slightly increased luminosity (800 lumens). Power consumption is 10W. Color temperature is also 2700K. There is a function of power consumption monitoring.
- TP-Link LB120 – brightness 800 lumens. Light temperature 2700K – 6500K (in this model there is an opportunity to change the settings of light warmth). Power consumption is 11W. Circadian mode, in which the bulb automatically changes the brightness and warmth of light depending on time (to simulate natural lighting).
- TP-Link LB130 – this model has the ability to change color (2500K-9000K and full RGB spectrum). Other functions and features that are available in the younger models are also available.
They all have excellent energy efficiency, connect to your Wi-Fi network and can be controlled from a smartphone or tablet via the Kasa app. You can control them not only in the local network, but also via the Internet (via an account). If necessary, from different devices. All models have a brightness adjustment function and the ability to set up scheduled switching on and off. But depending on the model, there are differences in specifications and features.
I have two bulbs: the LB110 and the LB130.
I have been using the TP-Link LB130 bulb for a few weeks now. I set up the LB110 today and tested it in operation as well. The setup is very simple, but there are complaints about the instructions that come with it. It shows that the mobile device needs to be connected to the router’s Wi-Fi network. But first it needs to be connected to the Wi-Fi network of the bulb itself, for setup. I may have misunderstood something.
Connecting and configuring a TP-Link smart bulb
I will show on the example of TP-Link LB130. The process of setting up for all models will not differ. The only difference is in the functions that are available after customization.
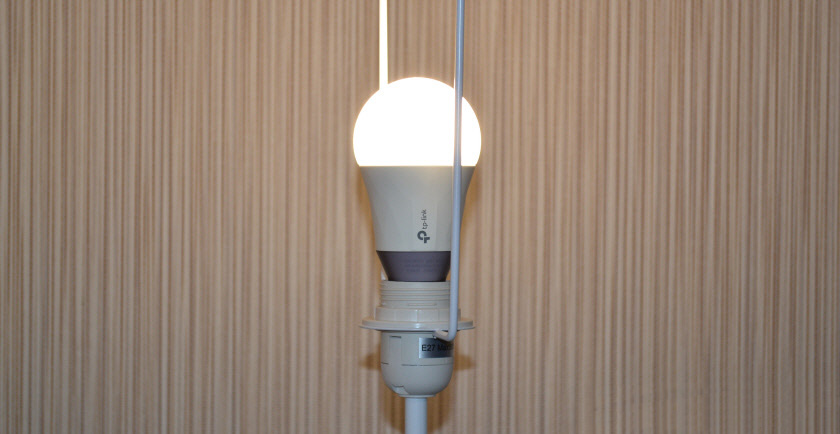
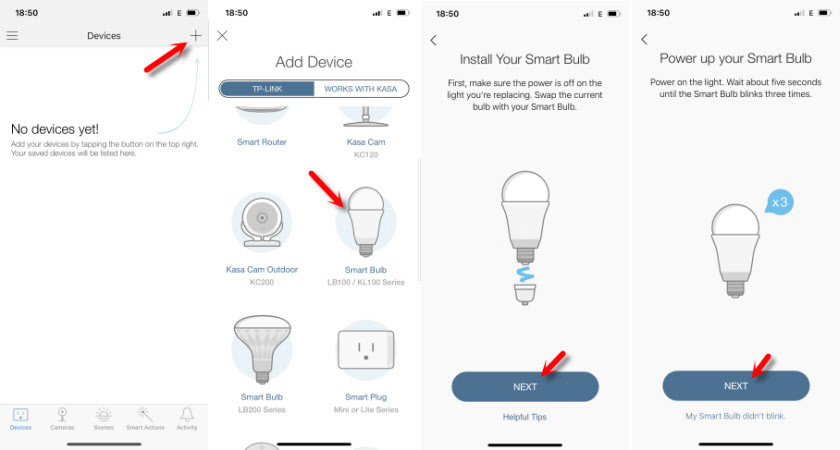
Take a bulb and screw it into our chandelier, floor lamp, sconce, etc. We turn it on using the on/off switch. The bulb needs a constant supply of power to function properly. The bulb will blink a few times and it will shine.
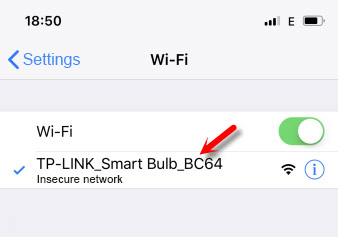
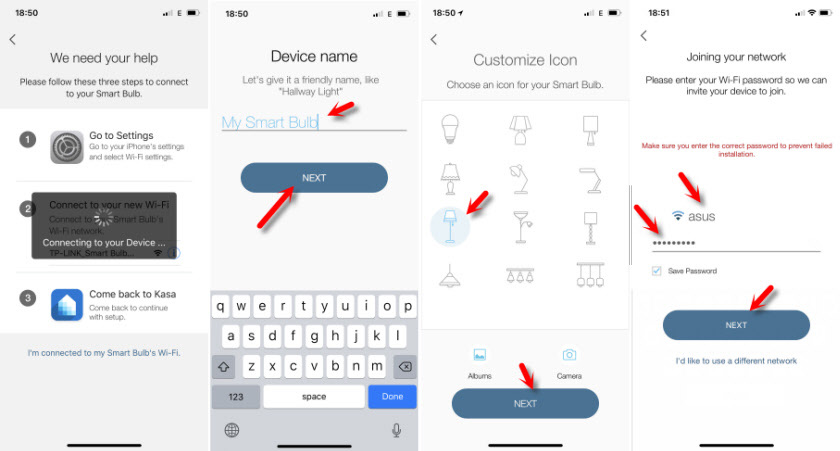
Install the Kasa app on your phone or tablet (from the App Store or Google Play). Next, open the Wi-Fi settings on your phone and connect to the smart bulb’s Wi-Fi network. The network will be something like this name: “TP-Link_Smart Bulb_”. No password.
If the bulb is turned on, but the Wi-Fi network does not give out, it is probably already configured. You need to do a factory reset. This can also be useful if you want to reconfigure the bulb, connect it to another Wi-Fi network.
To do a reset, you need to turn it off with the switch. And then turn it on and off 5 times. When you turn the light bulb on, it should blink a few times. This means that the settings have been reset to factory defaults.
Once connected, open the Kasa app. You can immediately create an account and log in to it (to control the bulbs via the Internet, even when you are not at home). Click on the “Add device” button. Choose the type of device. Instructions appear. Click “Next” and again “Next” (if the bulb is already on).
Next, it will start searching for and connecting to the light bulb. If your device is connected to the bulb’s Wi-Fi network, a field will appear where you need to set the bulb’s name and click “Next”. In the next step, select the icon. Connect the bulb to our wi-fi network. You need to specify your wi-fi password. If you need to select another Wi-Fi network, just click on it and select your network from the list (I understand that the application automatically selects the Wi-Fi network with the strongest signal).
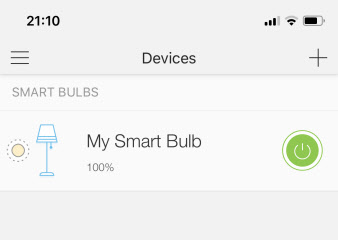
If you entered your Wi-Fi password correctly and the light bulb was able to connect to your wireless network, that’s the end of the connection process. The Kasa app will show a list of devices where the bulb will be installed.
If the list does not appear, make sure that the mobile device has automatically connected to your Wi-Fi network (from the router). Once set up, the bulb no longer gives out the Wi-Fi network.
Controlling the TP-Link smart light bulb
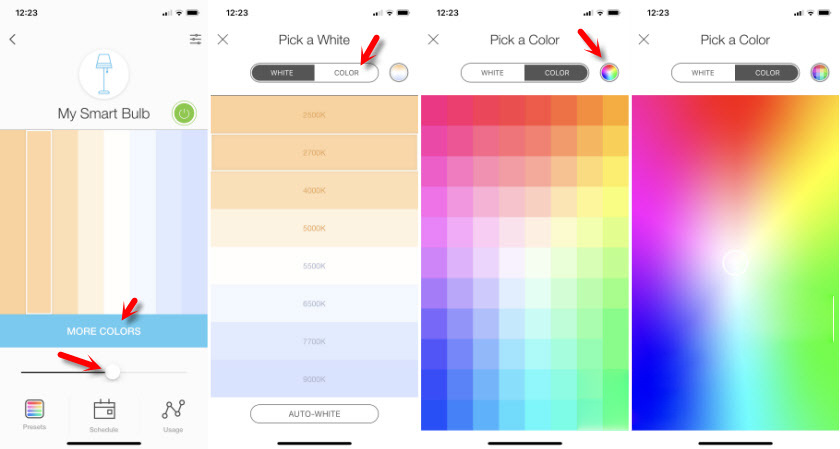
Let me remind you that I connected the LB130 model. Which means that if you have a different model, the settings in the Kasa app may be different. For example, there will be no color control. You can turn the lamp on and off, as well as change quick settings (color and brightness, circadian mode activation) from the window where the whole list of devices is displayed. There you can also open the Kasa app settings and manage your account. If you are logged in to your account in the Kasa app, the added devices are automatically attached to your account. And you can manage them over the internet, not just from home (via your local network).
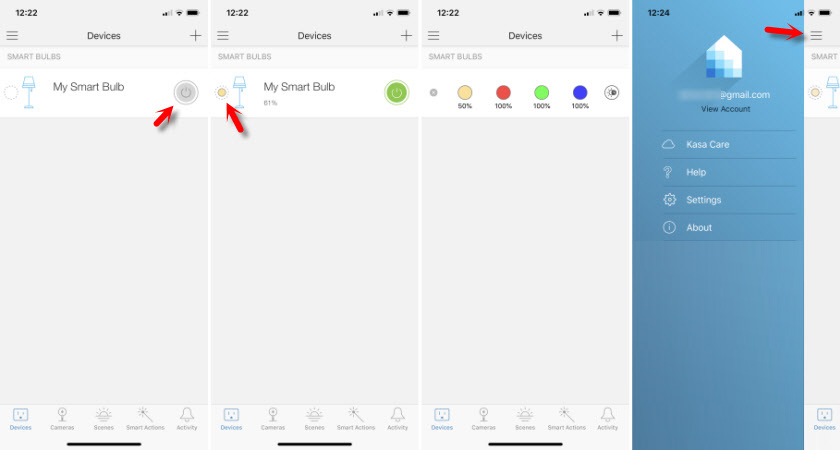
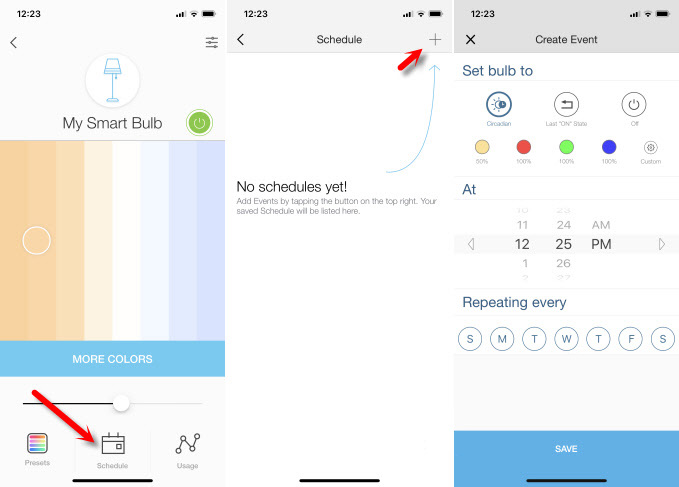
Selecting a light bulb will open advanced settings. Where you can change the brightness and color (if you have an LB130 bulb). If you click on the “AUTO-WHITE” button in the color settings, the circadian mode will be enabled, which will automatically adjust the brightness and warmth of the light depending on the time of day.
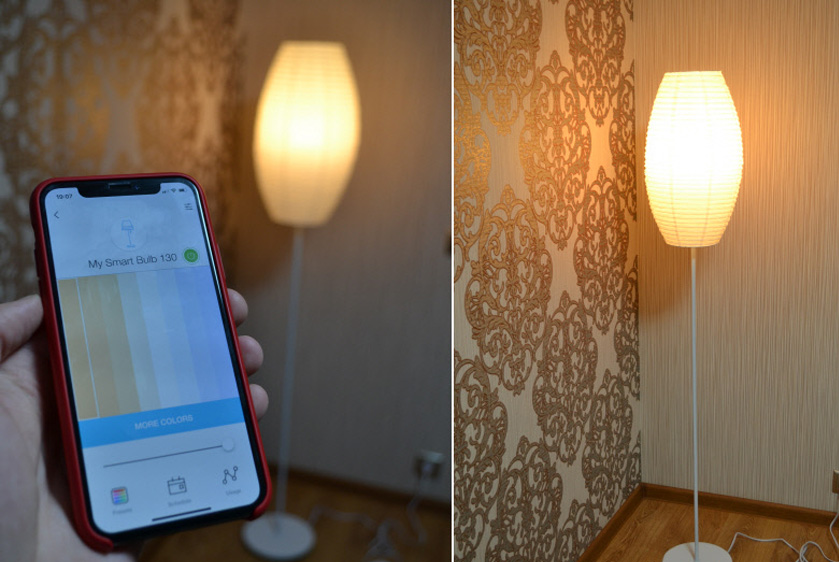
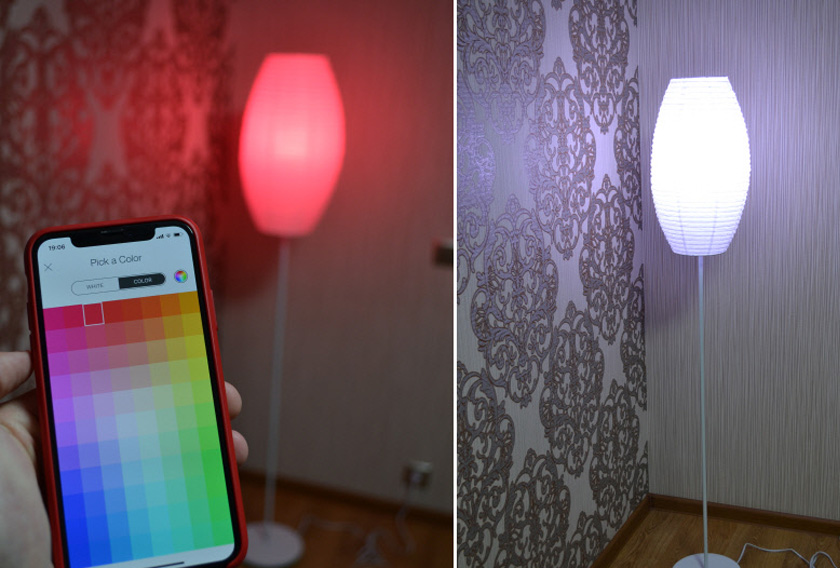
Took some pictures of it.
Also.
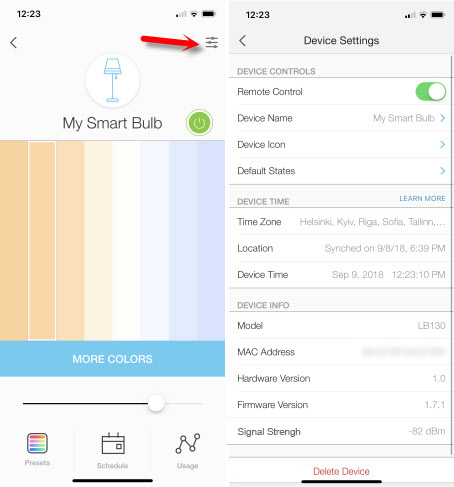
By opening the settings of a particular bulb you can change its name, icon and status. Disable remote access (via the Internet). Set the time settings and see information about the bulb. You can also delete it there.
By opening the “Schedule” tab you can create a schedule, according to which our smart bulb will shine.
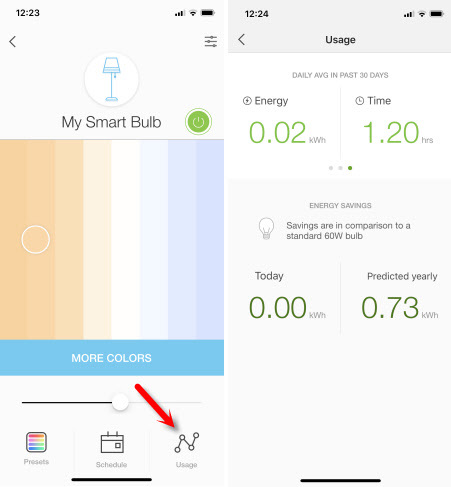
And on the tab “Usage” you can see the statistics on electricity consumption.
The bulb works stably. I have it connected to the power supply all the time (as it should be), I control it only from my phone. In principle, it can be used as a regular light bulb, turn on/off through the switch. Cool device, I really liked it. And if I never found a use for the smart socket, I use the smart bulb every day. I turn it on as additional lighting. By changing the color and brightness you can create a special atmosphere in the room.
 Roter Firmware TP-Link TL-WR1043ND and TP-Link TL-WR1045ND
  TP-Link Archer C1200: Review, Characteristics
  How to Connect and Configure a Wi-Fi Router TP-Link Archer C2300?
  Review and Configuration of PowerLine Adaptors TP-Link TL-PA8010P KIT, OR HOW to do ...