
Setting Wi-Fi Router TP-Link TL-WR820N
I decided to prepare a detailed guide on connecting and configuring TP-Link TL-WR820N router. This router has only recently appeared on the market (at the time of writing this article). If you read my review of TP-Link TL-WR820N, you probably noticed that I liked the router. It’s a great solution in the price/quality ratio. I’m sure that this model will be popular. And that means that my instruction will be popular and useful for many people. I hope that in the comments owners of this router will leave reviews, share useful information about this device, and ask questions.
In the set with the router, of course, there is a manual for quick setup. It shows how to connect the router and go into the settings. It also gives answers to frequently asked questions. But the whole process of setting up is not shown there. Maybe it’s not necessary, because after entering the page with TL-WR820N settings, we are immediately greeted by a simple and clear Quick Setup wizard, with the help of which you can configure the router in just a few steps. But my instructions are based on real events, so they are more informative. Also this router has a new control panel, and this may cause additional inconvenience even for those users who have configured TP-Link routers before. Despite the fact that the new web-interface is very simple and clear.
How to connect TP-Link TL-WR820N?
Connect the power supply to the router and plug it in. The Wi-Fi indicator on the router should light up green and the WAN (Internet) indicator should blink orange. The reason why the WAN indicator flashes orange immediately is because there is no cable connected to the WAN port. Connect the Internet (cable from your ISP or modem) to the WAN port. Just be careful not to mix up the ports.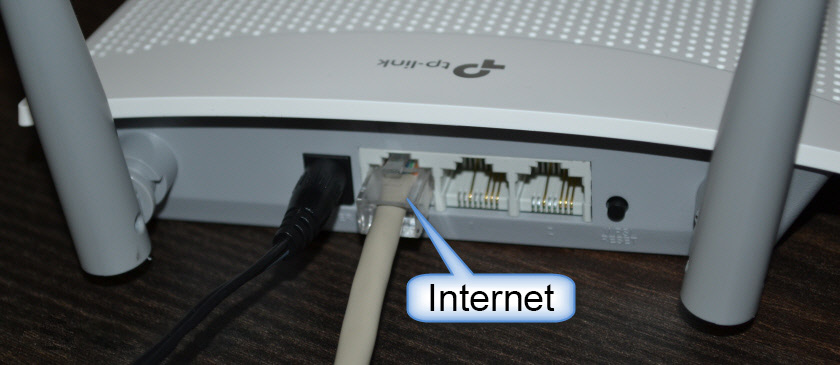 Further, depending on your ISP there can be two variants of WAN indicator behavior:
- It will be lit in orange color. This means that the router can see the cable, but you still need to configure the Internet connection. The Internet will not work through TL-WR820N for the time being. But we will be able to enter the router settings.
- In 10-30 seconds the WAN indicator will turn green. This means that the router was able to automatically connect to the Internet. Most likely your provider uses the connection type “Dynamic IP” (DHCP) without MAC-address binding. Next you will need to configure only Wi-Fi network. Since the Internet through the router is already working.
We need to connect to TP-Link TL-WR820N from some device in order to configure it through the browser. It is best to use a computer or a laptop and connect via cable.
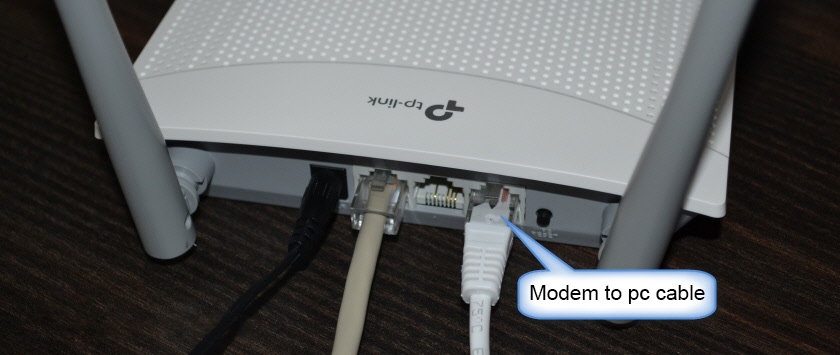
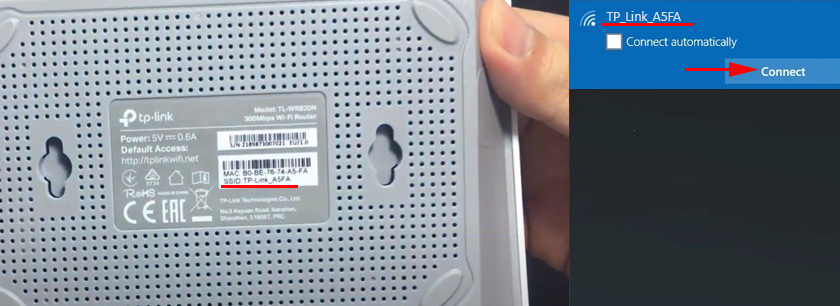
Let me remind you that after connecting to the computer there may be a status “No Internet access” (limited). If you can’t connect via cable(for example, you have a laptop without a LAN port, it doesn’t work, or you will be configuring from your phone/tablet), you can set up a wireless connection. Simply connect to the router’s Wi-Fi network. The factory network name (SSID) can be viewed from the bottom of the router. By default , the network is open (connection without password).
Perhaps you or someone else has already configured the router and there is a password to wi-fi, to the page with settings, or set some other unnecessary parameters that may interfere with the process of configuration. In this case you need to do a factory reset.
To restore factory settings on TL-WR820N (reset), you should turn on the router and press the WPS/Reset button for 8-10 seconds.
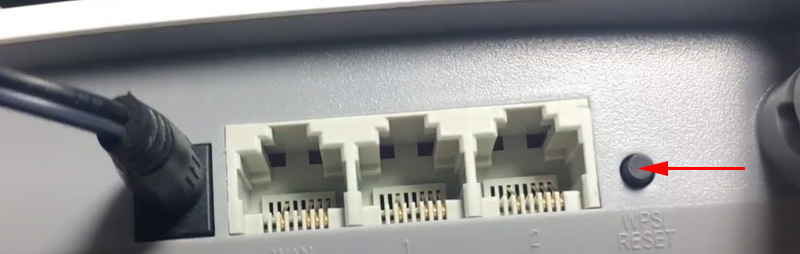
All three indicators should light up and go out. Release the button and wait for the router to boot up.
Let’s proceed directly to the configuration.
Quick setup of TP-Link TL-WR820N
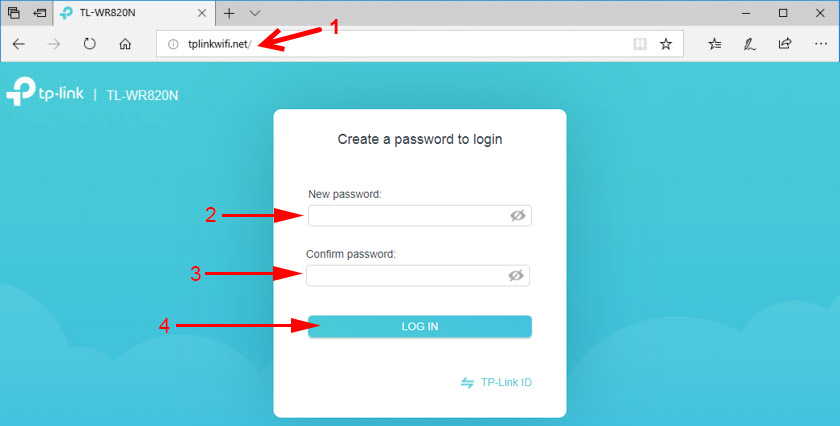
You can enter the router settings through the Internet browser. Launch any browser (preferably a standard one), type http://tplinkwi-fi.net in the address bar and go there. If you don’t succeed, look at the following articles: how to enter tplinkwi-fi.net or how to open TP-Link router settings. You can also use the standard IP-address 192.168.0.1 to enter TL-WR820N settings.
The router will immediately offer us to set a password to enter (to protect the settings). You need to think up a password and specify it 2 times in the corresponding fields. Write down the password. If you forget it, you will have to do Reset to get into the web-interface.
The Quick Setup wizard will start at once. It will help us quickly set the necessary parameters. Of course, it can be closed (by clicking on the “Close” button), but I don’t advise you to do it. You can also change the language of the control panel in the upper right corner.
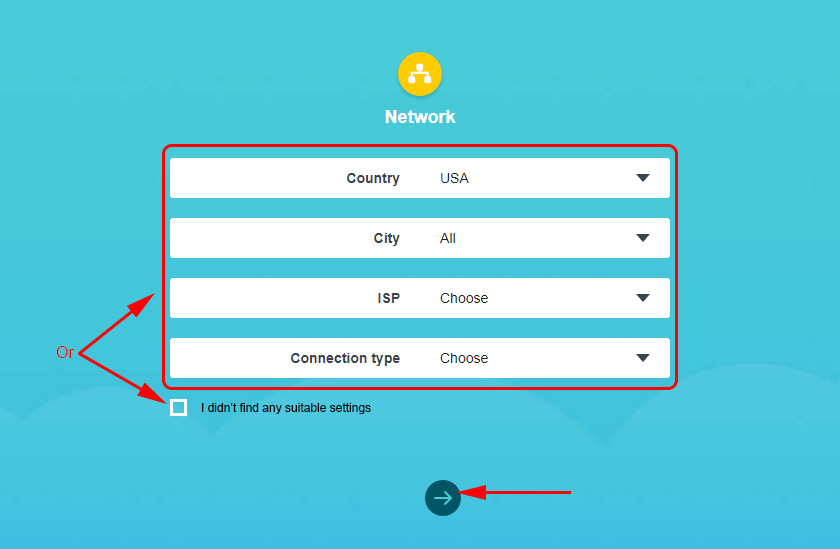
At the first stage you can try to select your country, city, Internet provider and connection type. If you don’t find the settings you need, check the box next to “I haven’t found the right settings”.
Choose the type of Internet connection. It all depends on your Internet service provider. If you don’t know which one to choose, check with your ISP support.
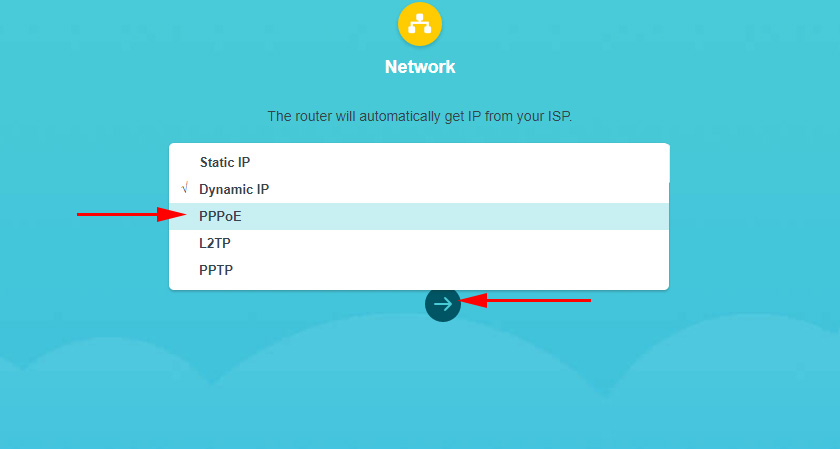
If you have a connection via PPPoE, PPTP, or L2TP, then on the next page you will need to specify the user name and password. As well as the server address (for PPTP and L2TP). All these data for connection are provided by your Internet provider.

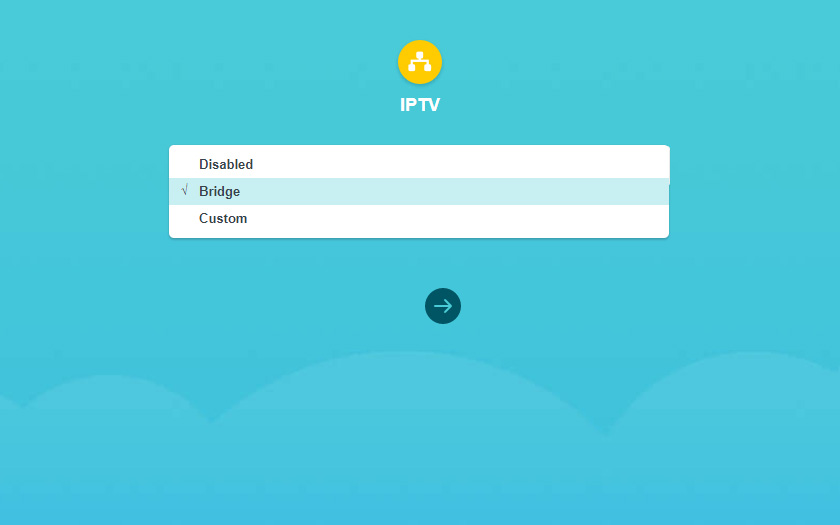
If it is “Dynamic IP-address”, you don’t need to enter anything. The router will offer to configure IPTV. If your ISP provides digital TV service, you can set the necessary parameters. You can select a country for automatic configuration, set up a bridge (specify LAN port (1 or both) where the IPTV set-top box will be connected), or specify all the settings manually (VLAN ID). To learn more about configuring IPTV on TP-Link TL-WR820N, please read the article IPTV setup on TP-Link routers.
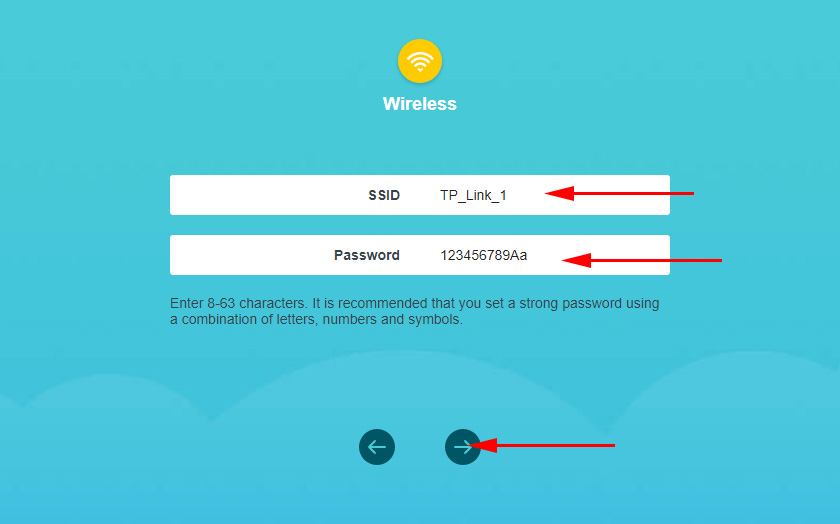
The next step is to configure the wireless network. Here you only need to change the factory name of the Wi-Fi network (SSID) and make up a wi-fi password. It is also recommended to write down the password.
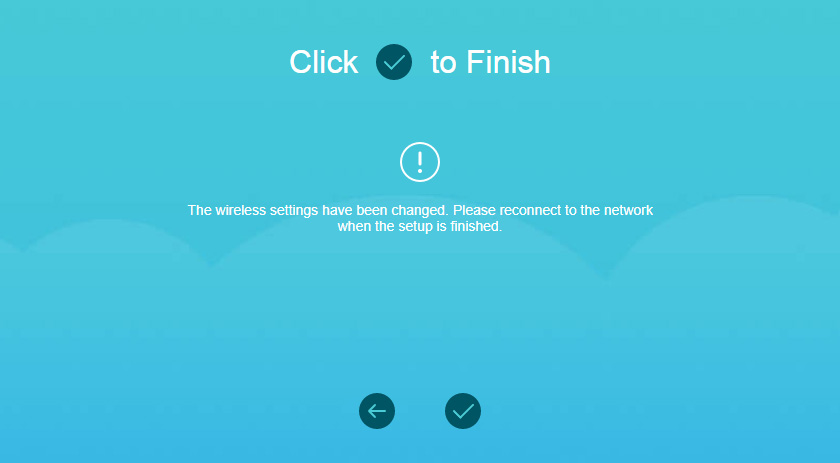
Click on the check mark to finish the configuration and reconnect to the Wi-Fi network (with a new name and password). If you initially connected via Wi-Fi and not via cable.
The control panel should open automatically (in the window where we configured it). If it doesn’t open, just go to the tplinkwi-fi.net page (you may be prompted for the password we set in the beginning) again. Make sure you are connected to the router.
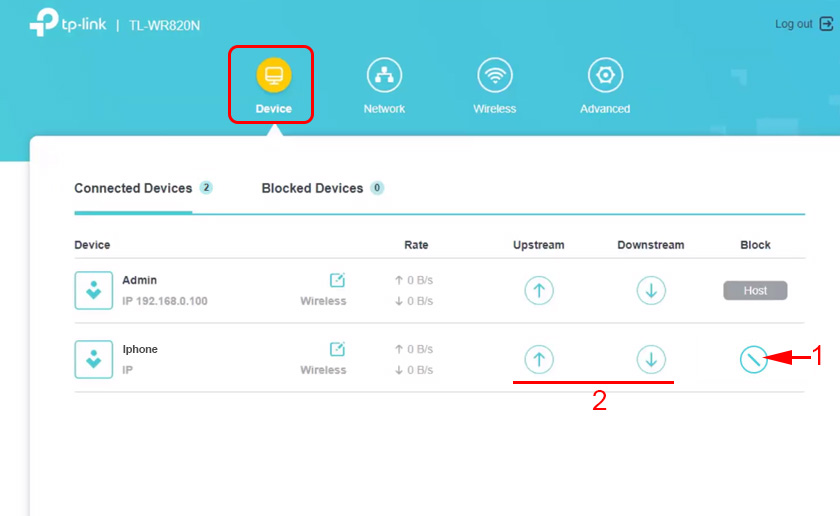
The Device tab will display a list of devices connected to the TL-WR820N.
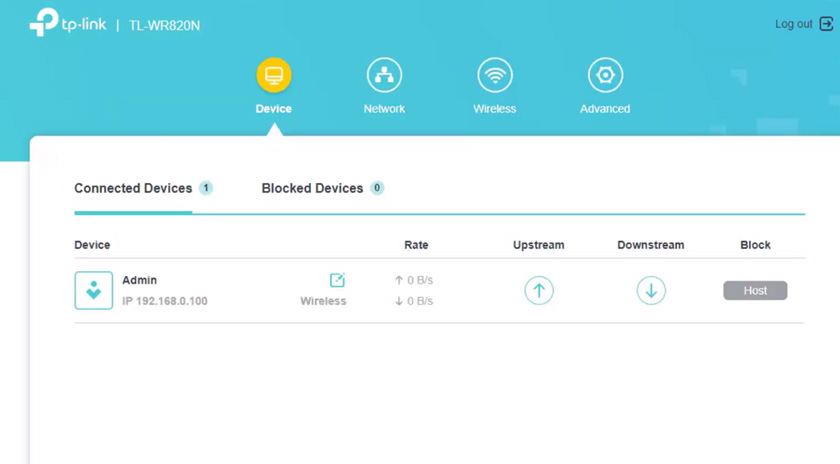
If necessary, you can:
- Lock the device (after which it will be displayed on the “Locked Devices” tab, where you can unlock it).
- Limit the outgoing and incoming speed for a specific device.
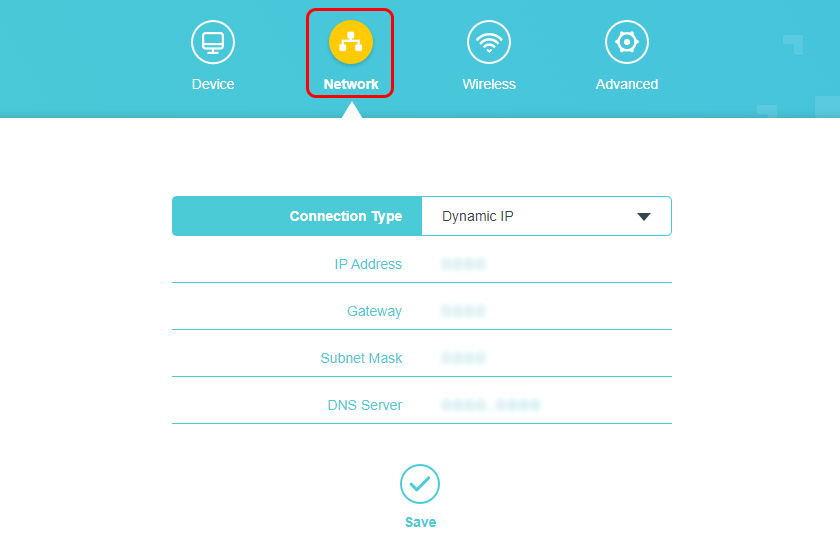
On the “Network” tab, you can change the basic Internet connection settings.
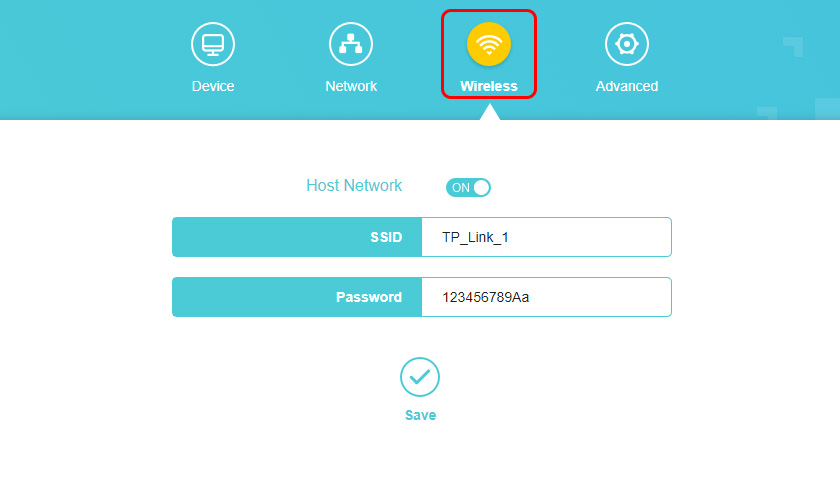
Or change the basic Wi-Fi settings in the “Wireless Mode” section.
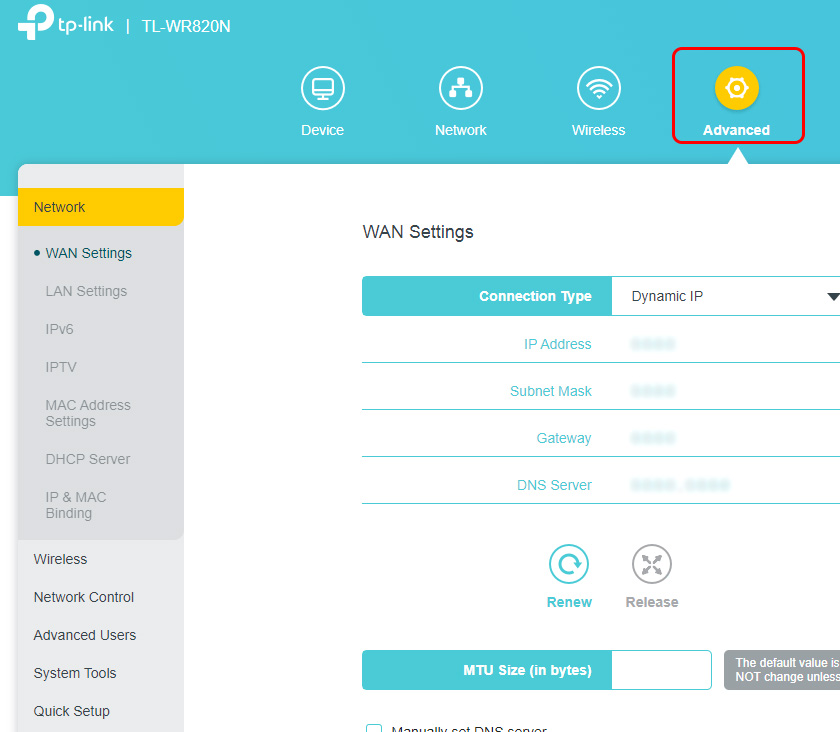
Well, and the “Advanced Settings” section with a lot of additional settings. For example, you can find there advanced WAN settings.
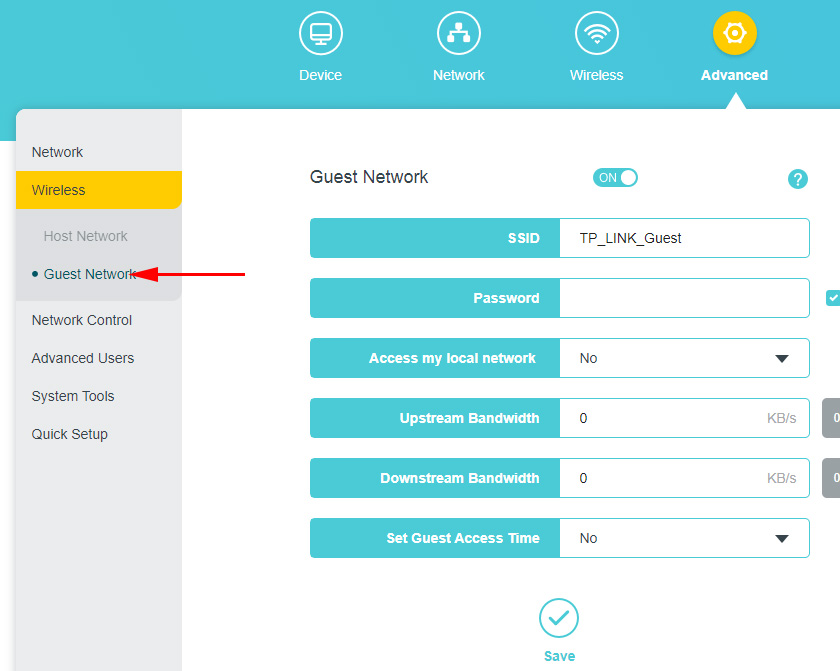
You can configure a guest Wi-Fi network. There you can also configure the speed limit for the guest network. And even create a schedule for guest Wi-Fi network on TL-WR820N.
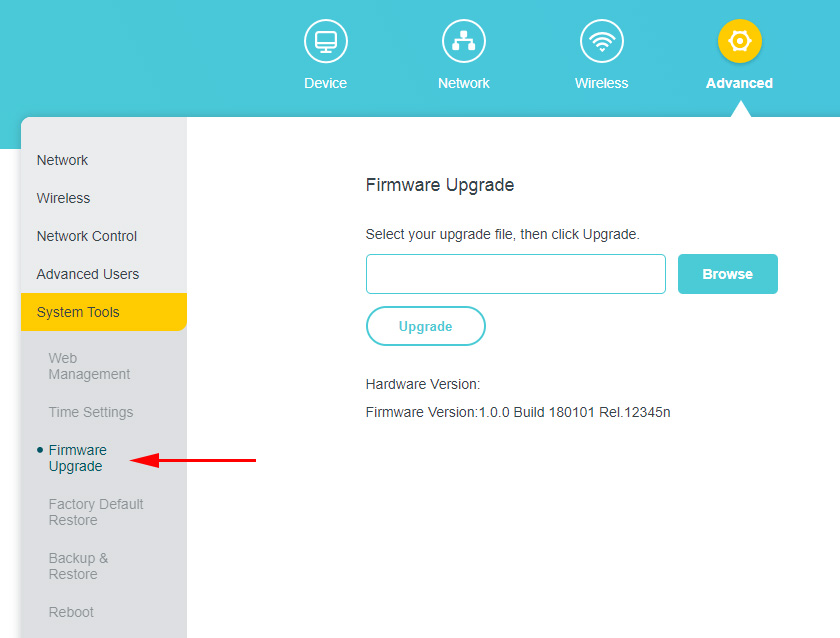
In the System Tools section, for example, you can update TP-Link TL-WR820N firmware. To do this, download a new firmware version strictly for this model and hardware version (which is indicated on the sticker at the bottom of the router) from TP-Link website and update it on the “Firmware Update” tab.
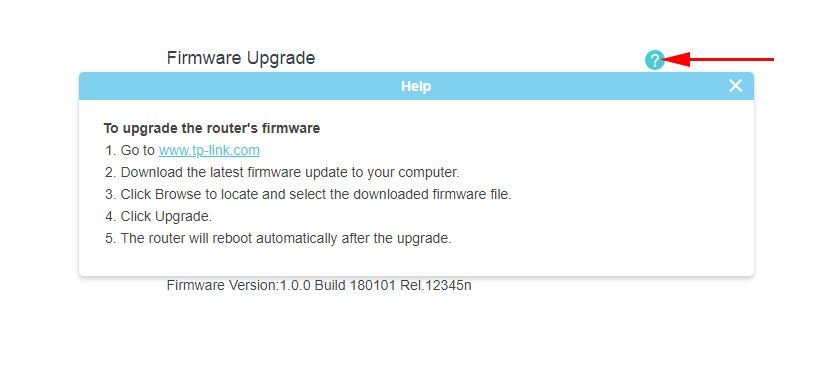
I think there is no need to look at every page of the web-interface. It’s very easy to figure out the settings. On each page there is a button (?), if you press on it, a window with the description of settings will appear (the help will open).
If you don’t manage to configure some function or have any other questions related to this router, you can always ask me a question in the comments. All the best!
 Review of the Router TP-Link Archer C5 V4. Gigabit, PowerFul, Long -Range
  Review of the TP-Link Archer a7 Router
  Reviews ABOUT TP-LINK TL-WR845N. OverView of the Ideal Router for Home from TP-Link
  Router TP-Link Archer C2 and 3G/4G USB Modem